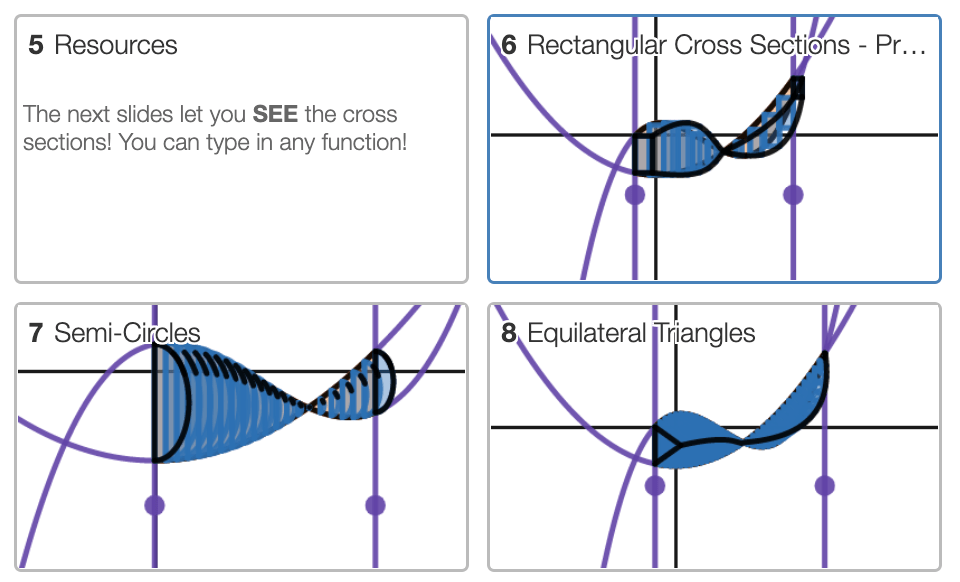
Delta Math has incredible sets for seeing volume of cross-sections and solids of revolutions. If you instruct your students to click on “show solution“, they can pull a slider to see the region become a solid! For the cross-section set, it shows the shape (square, rectangle, or triangle) growing along the base. For the disks, it includes the radius with the 3D shape. The washer set shows the washer inside the 3D shape. There is also a matching set, where students can practice matching up the 2D region with a resulting 3D shape, and vice versa.
The five sets I use are in the image below. I have also included videos of the volumes being created when you drag the slider so you can see how cool it is! Delta Math is free for teachers!
Delta Math – Volumes of Known Cross-sections
Delta Math – Volume, Solids of Revolution, Disks
Delta Math – Volume, Solids of Revolution, Washers
My AP Calculus students had a tough time with volume last year. So this year I wanted an activity where they could actually see the cross sections. I have seen many awesome activities where students actually measure the base between curves, and then create cross sections using paper, like the ones from Bowman and Rebacka. Iwould love to do these with my students, but unfortunately we are very short on time this year because of our school schedule.
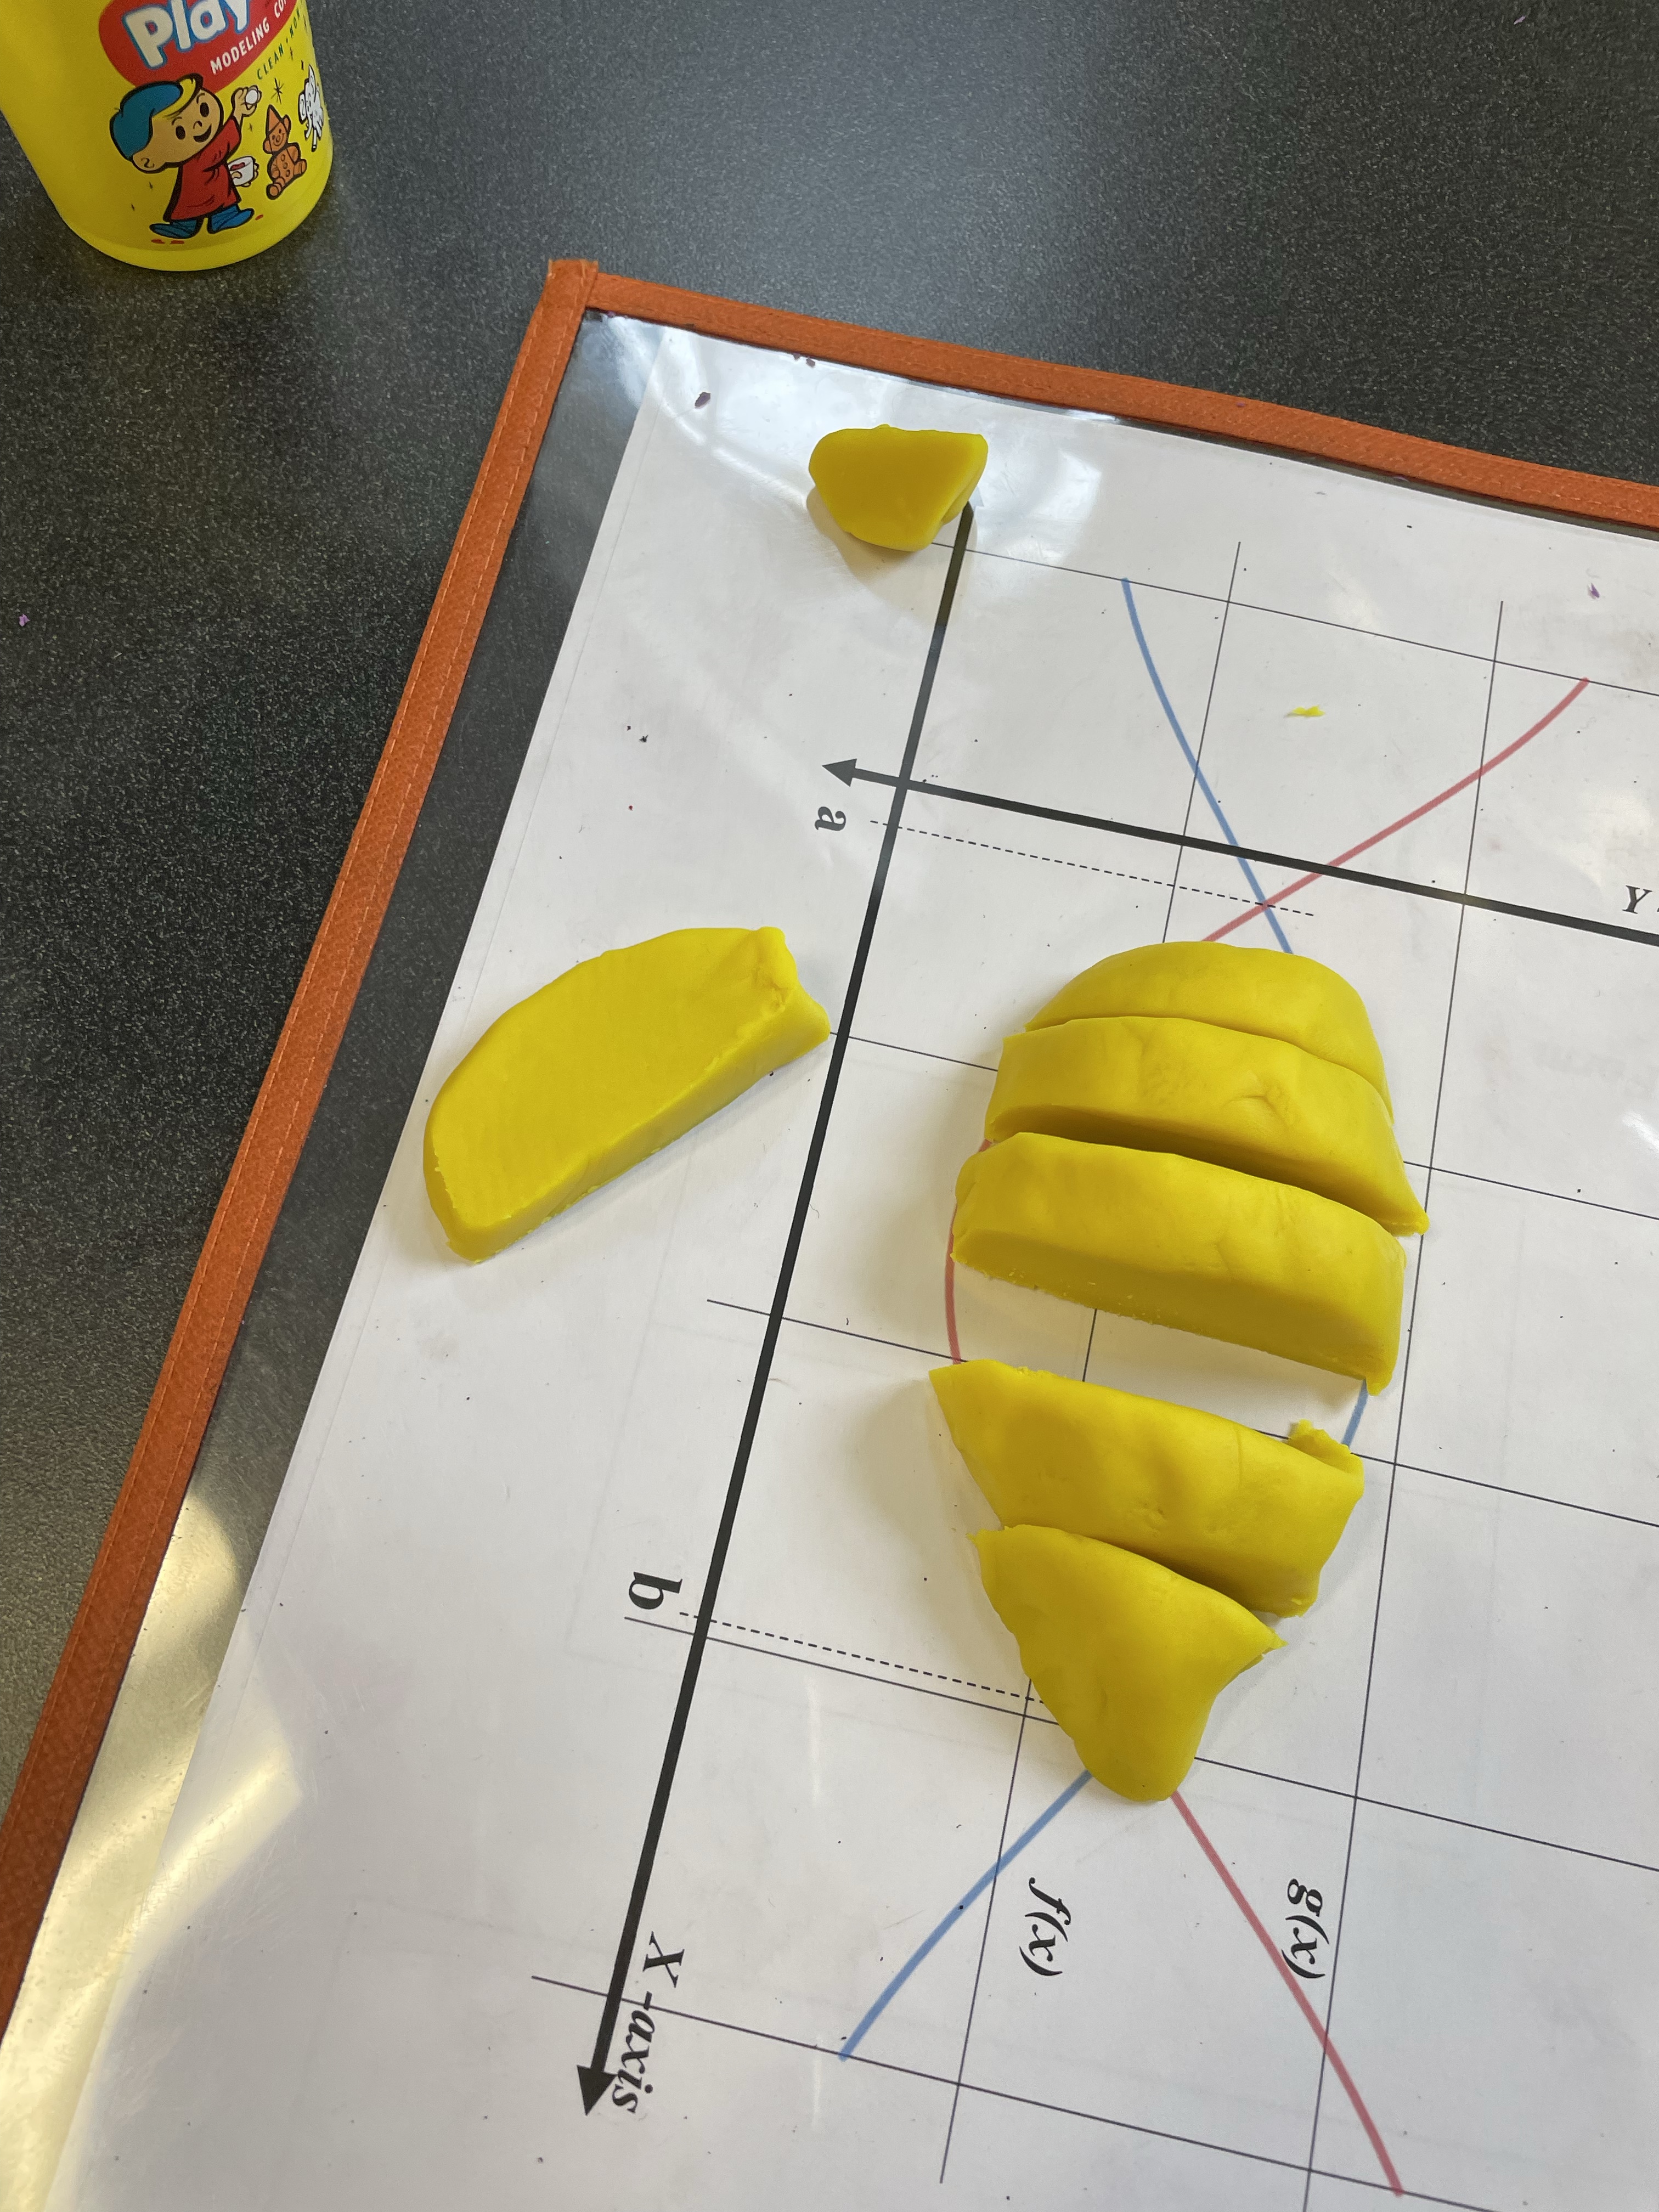
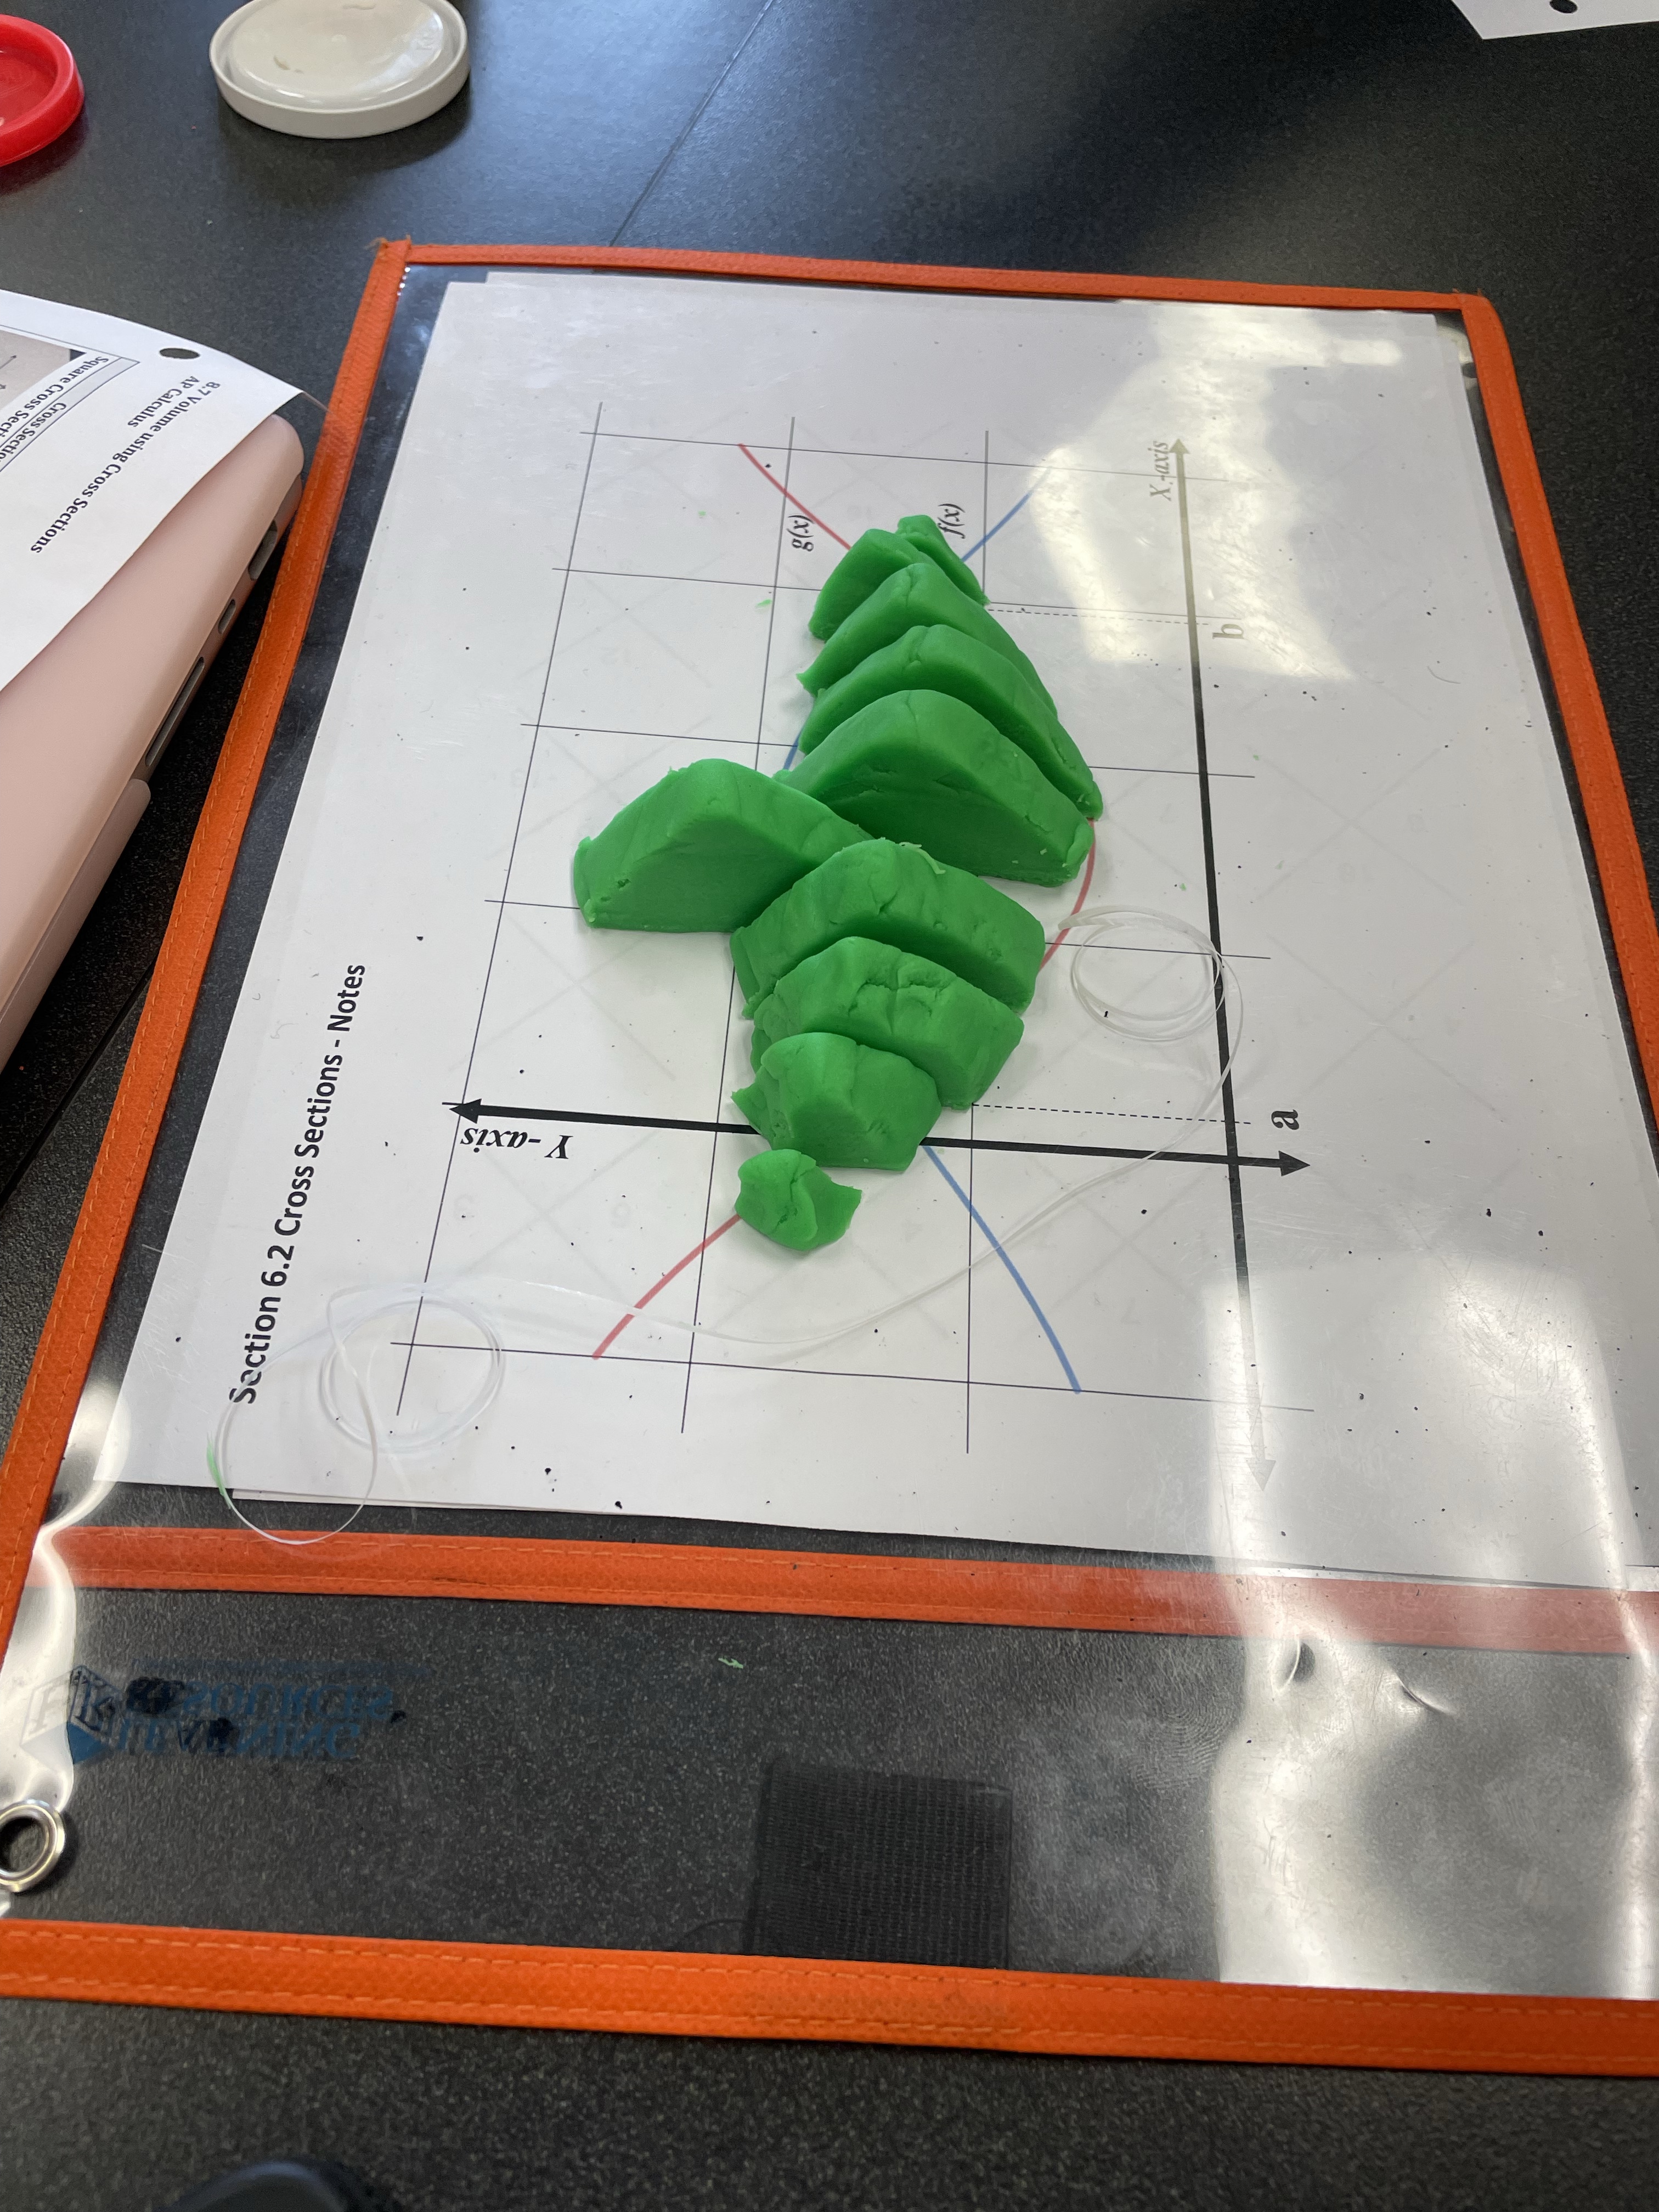
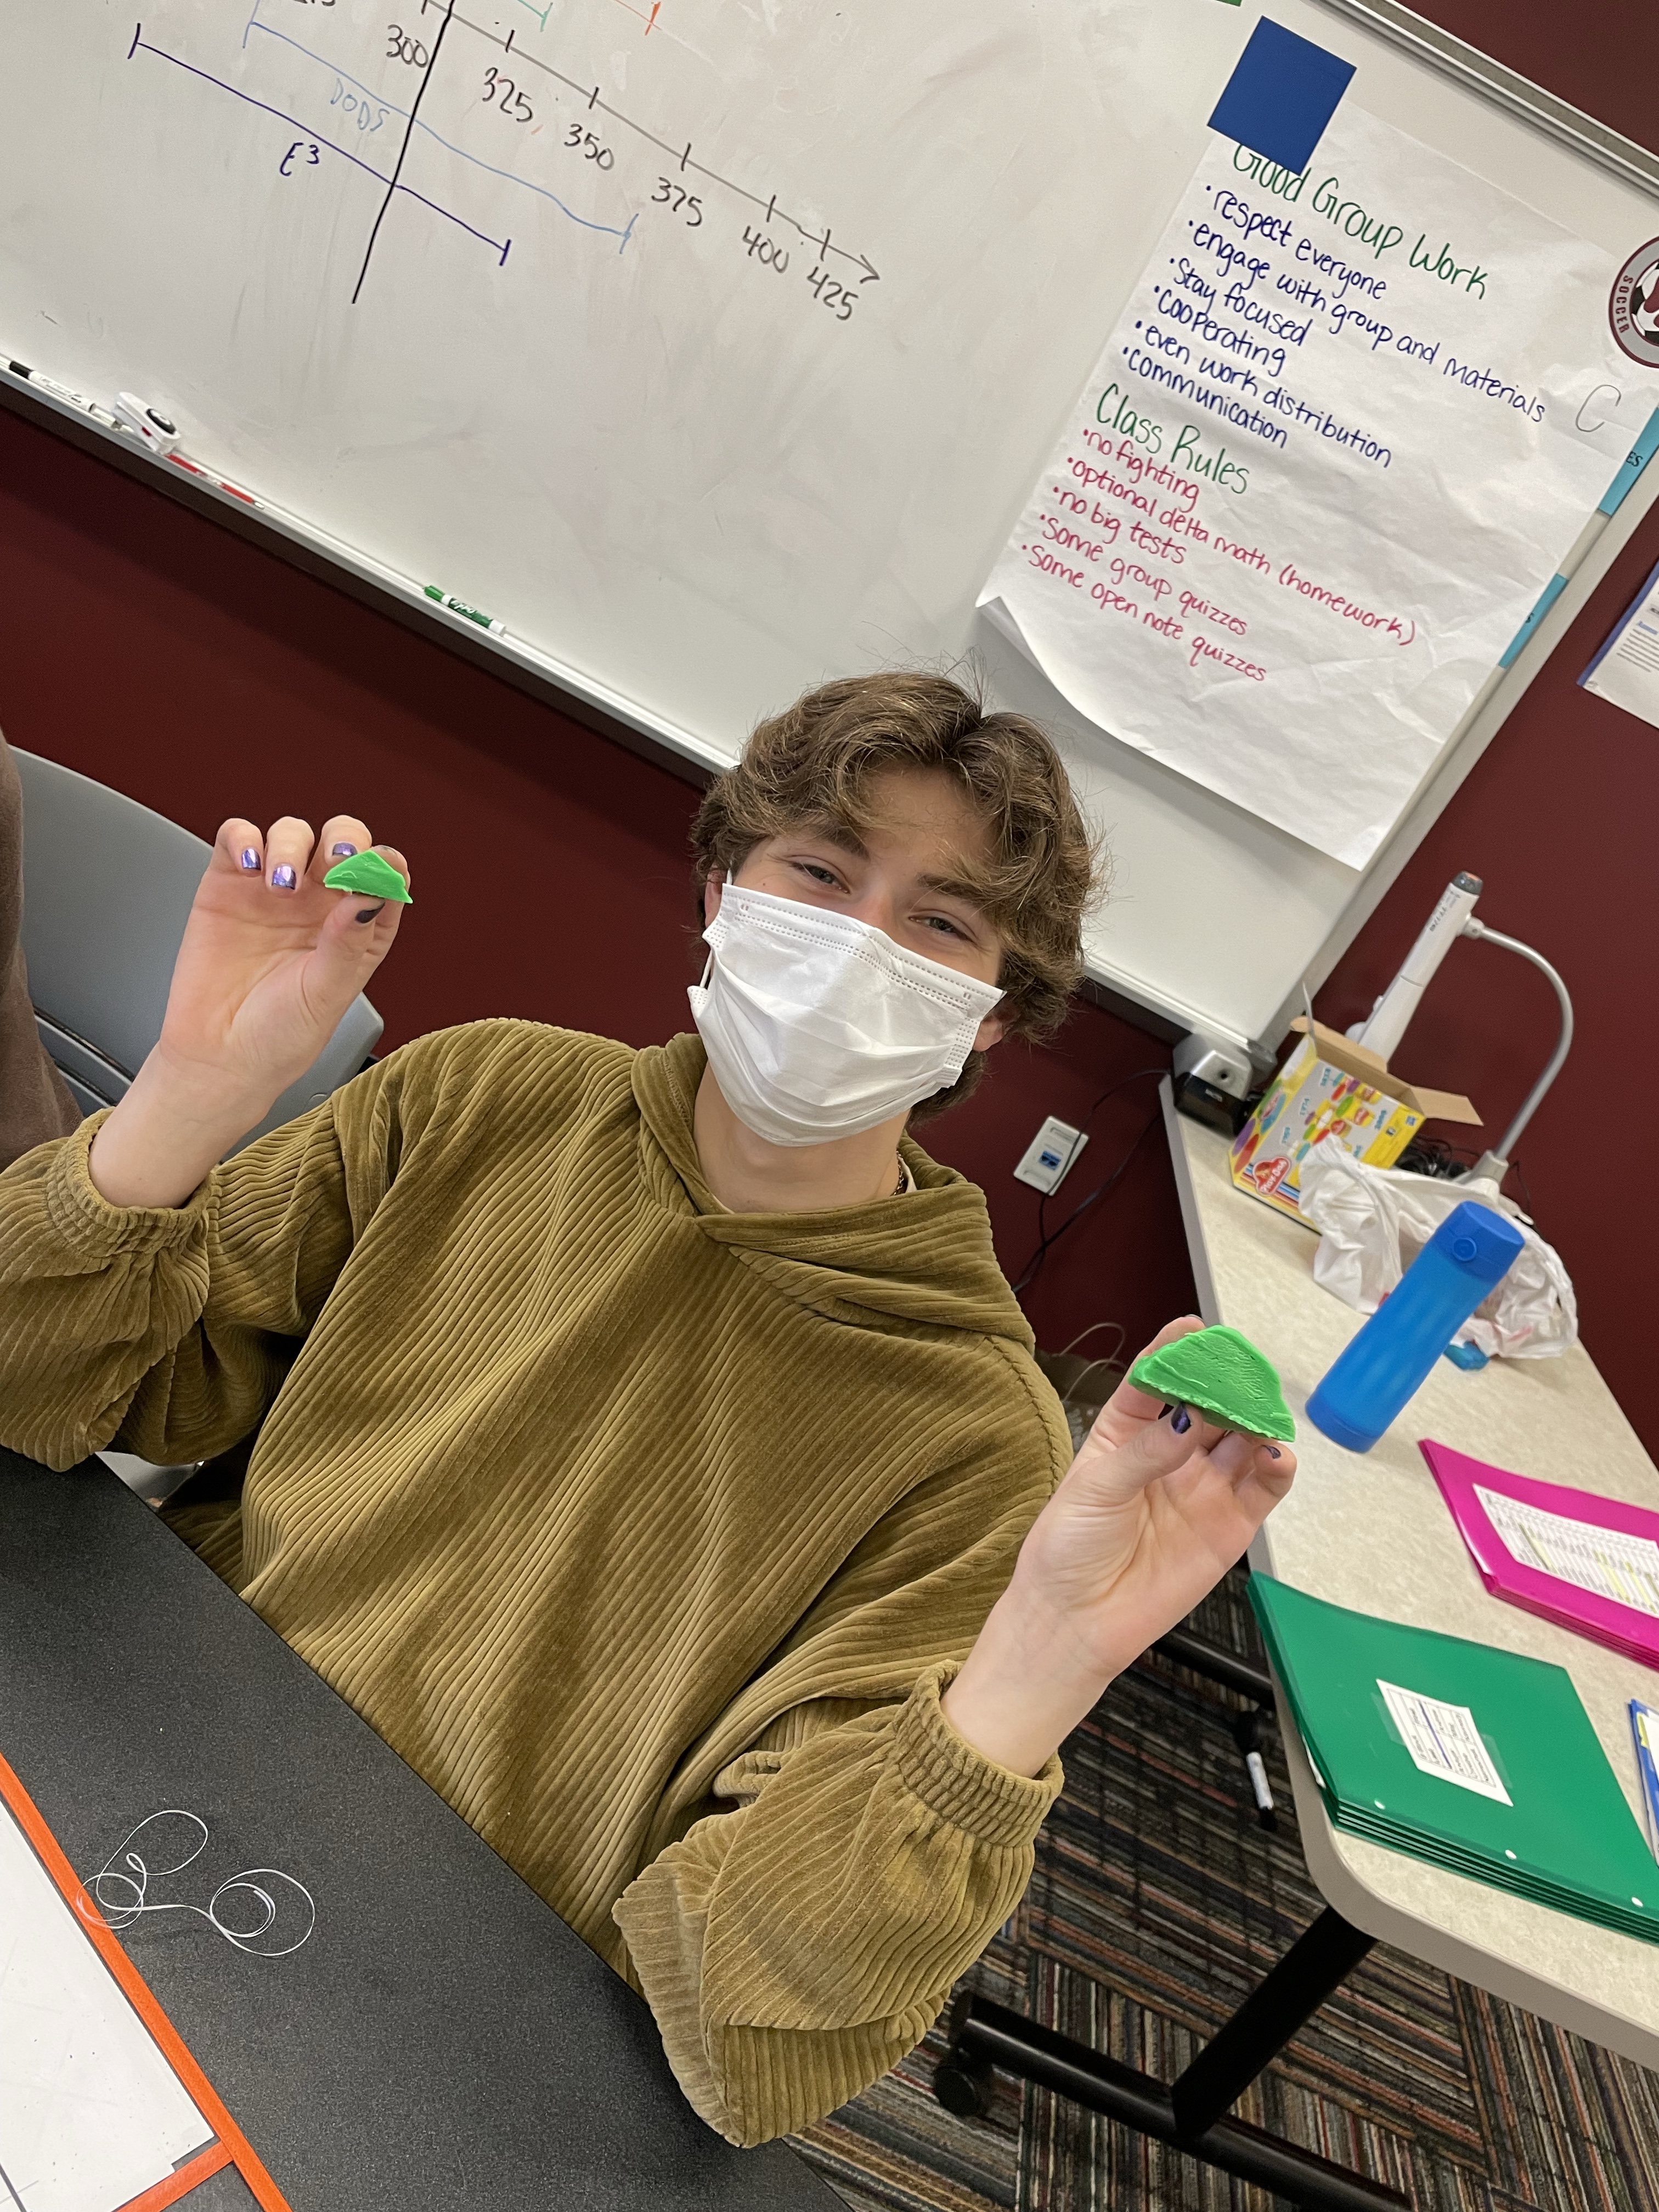
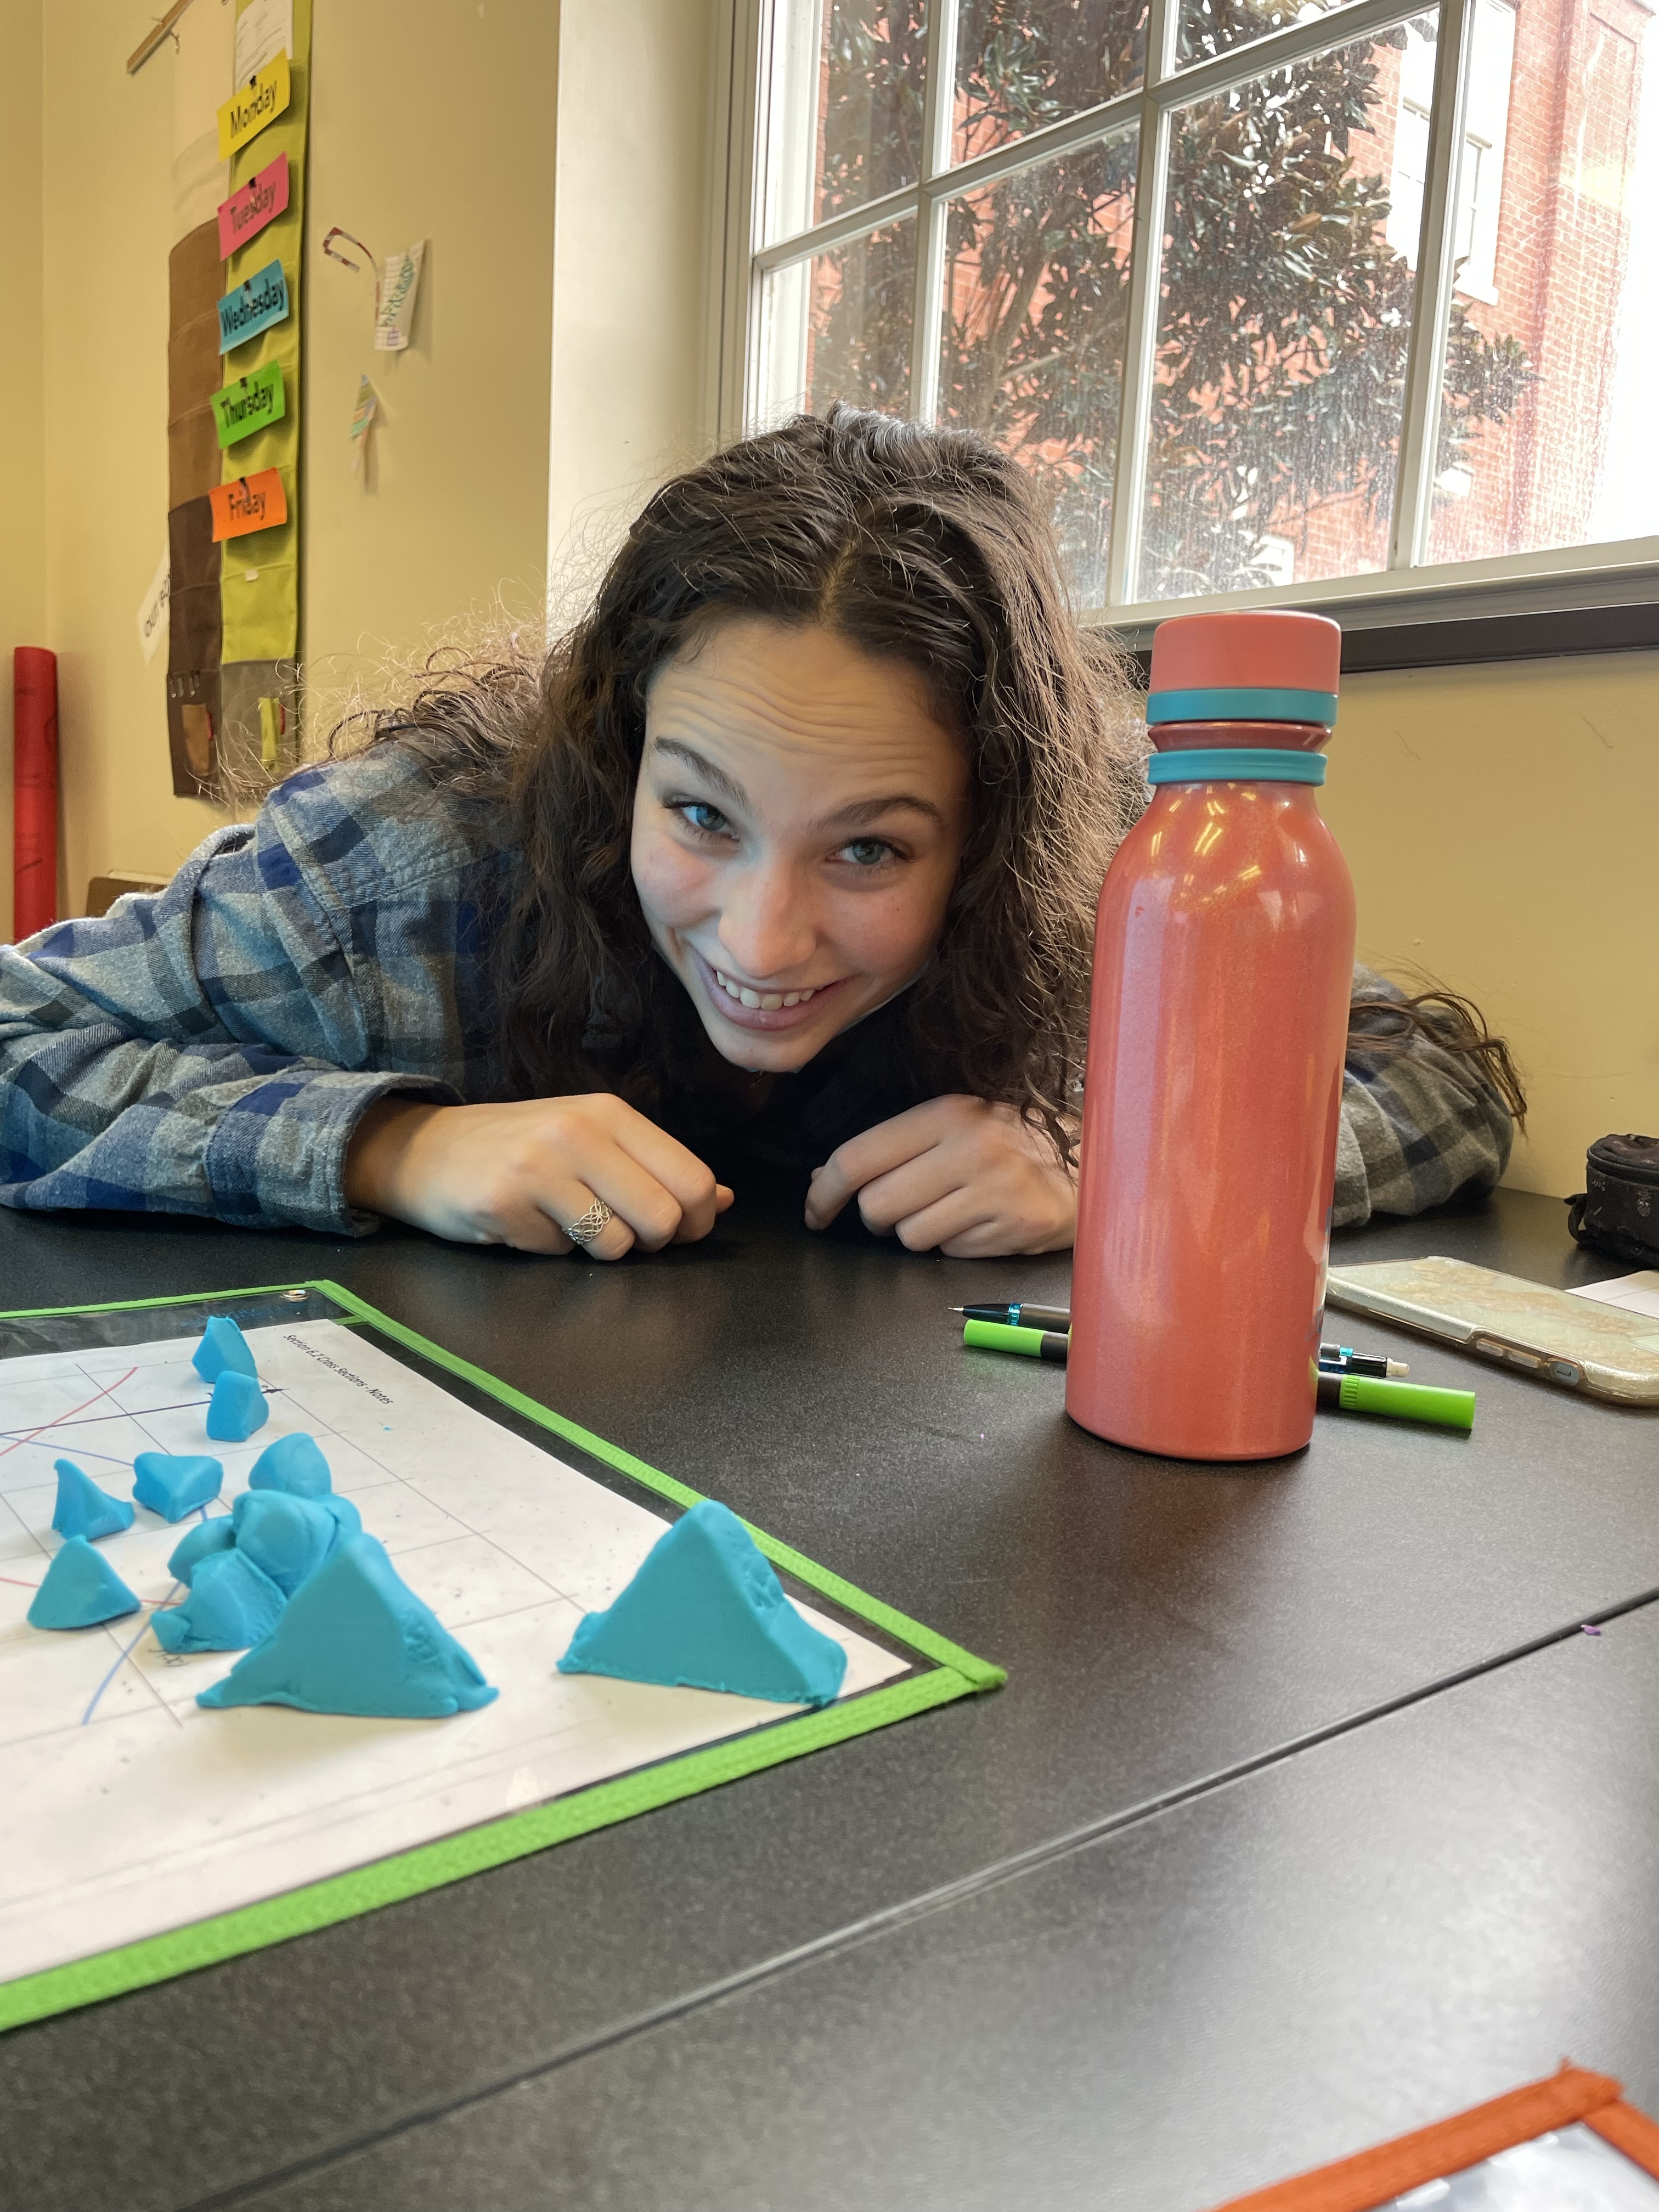
So, I decided to try it out using Play-Doh. I had students mold each type of cross section, and then let them slice it with either dental floss or a plastic knife. Once they cut their solid, I had them pull out cross sections so that we could develop the area and then volume formulas together.
First of all, kids loved playing with Play-Doh! It worked beautifully, and only took about 40 minutes to do the entire activity. Most of my students didn’t need to do all of the cross sections after the doing the first one. Doing the first one really helped them see and understand what was going on. So, if you are short on time, you could just do one cross section. However, my students really enjoyed trying to make the shapes for all four cross sections, and cutting them into the sections. And, again, they really enjoyed playing with the Play-Doh! They were so sad when I asked them to put away the Play-Doh for the quiz that I let them keep it out and play with it during the quiz. Sometimes I forget that high school students are still kids.
I pulled together a Desmos activity that I planned on using the same day. It is full of amazing graphs created by the amazing Suzanne von Oy. However we did not get to it as we ran out of time, and were just too excited about the Play-Doh! So I will share the Desmos with them when we do examples, and to remind them of what we did in class.
Procedure:
Class time: 45 minutes
Materials
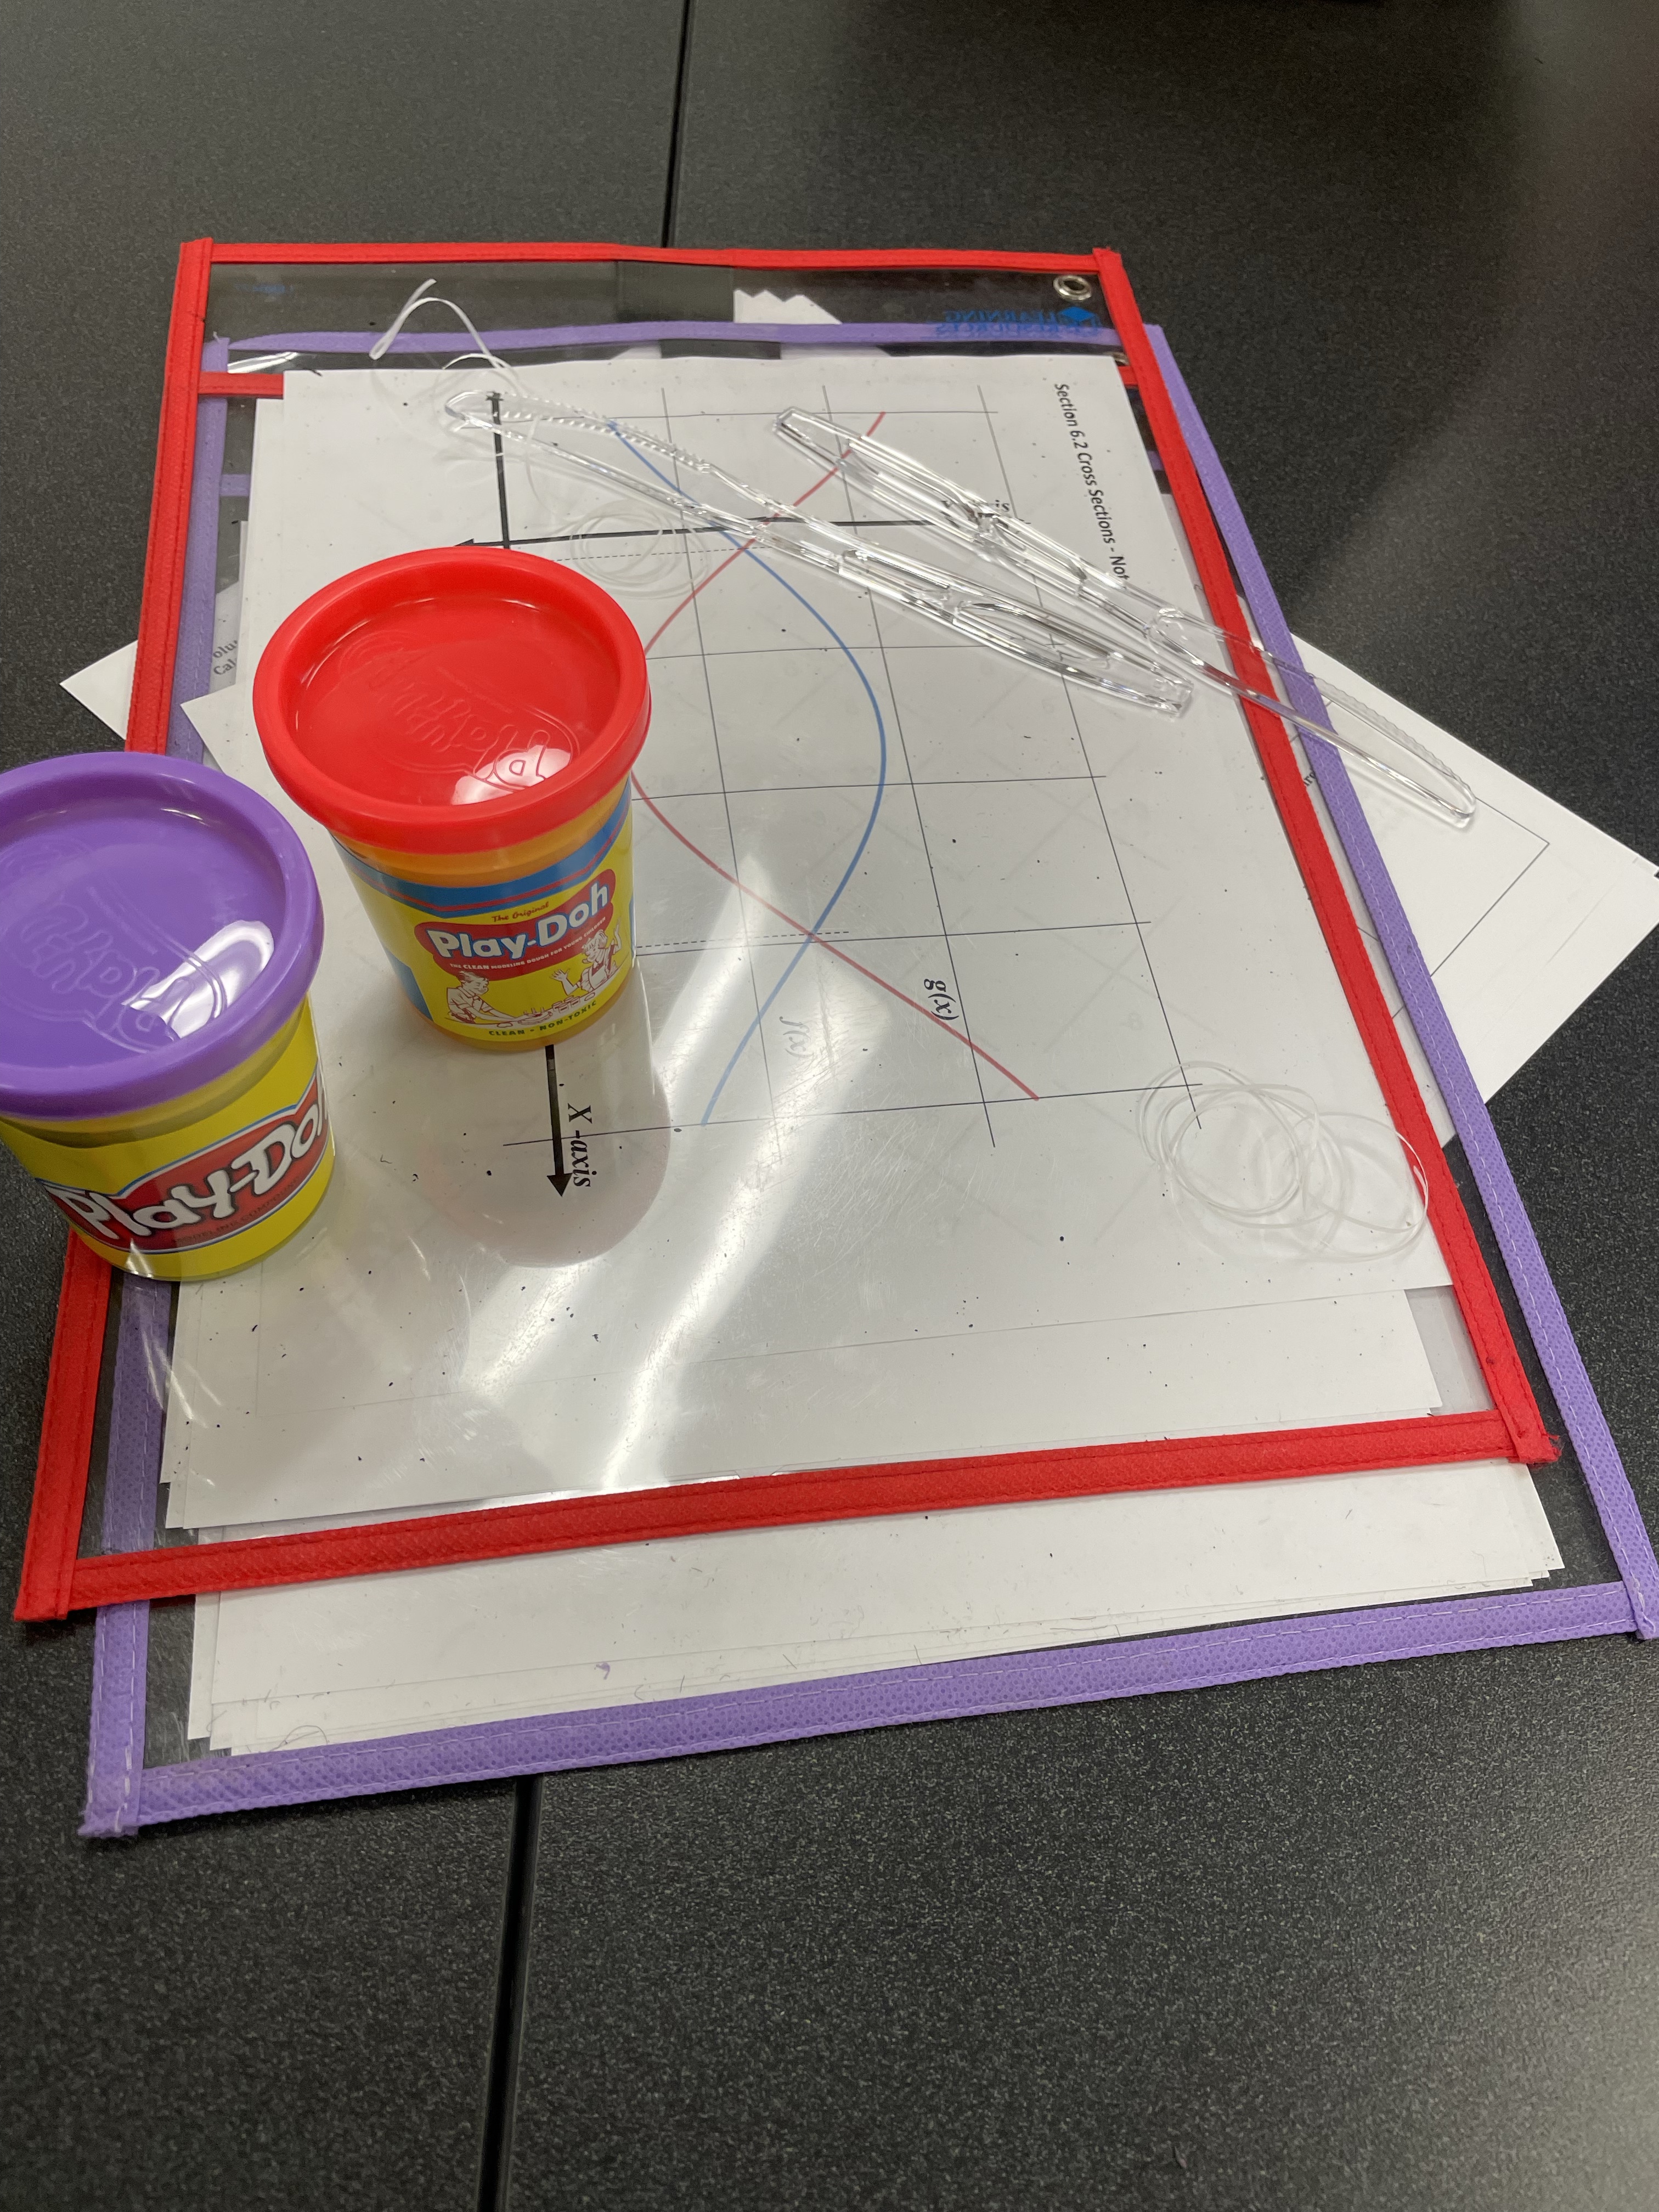
Graph sheet and worksheet – I put the graph sheet into slip in sleeves, so I could reuse them for my classes. You could also use plastic page protectors or laminate the graph sheet.
Play-Doh – I used one 4oz. can per every two students.
Dental Floss (or plastic knives, but dental floss works better as it doesn’t squish the top of the shape).
Rulers (they don’t need them for this activity, but it helps them see why they shouldn’t measure with a ruler).
I let the kids just play with the Play-Doh first. Don’t skip this important first step, or you will never get their attention. lol!
I had two students work together on one mat.
While they are playing we talked about volume formulas. I found asking them how do you get the volume of a cylinder was especially helpful as they all knew it was the area of a circle time the height. I pushed them on this, and then they told me that you have lots of circles to get the volume of a cylinder.
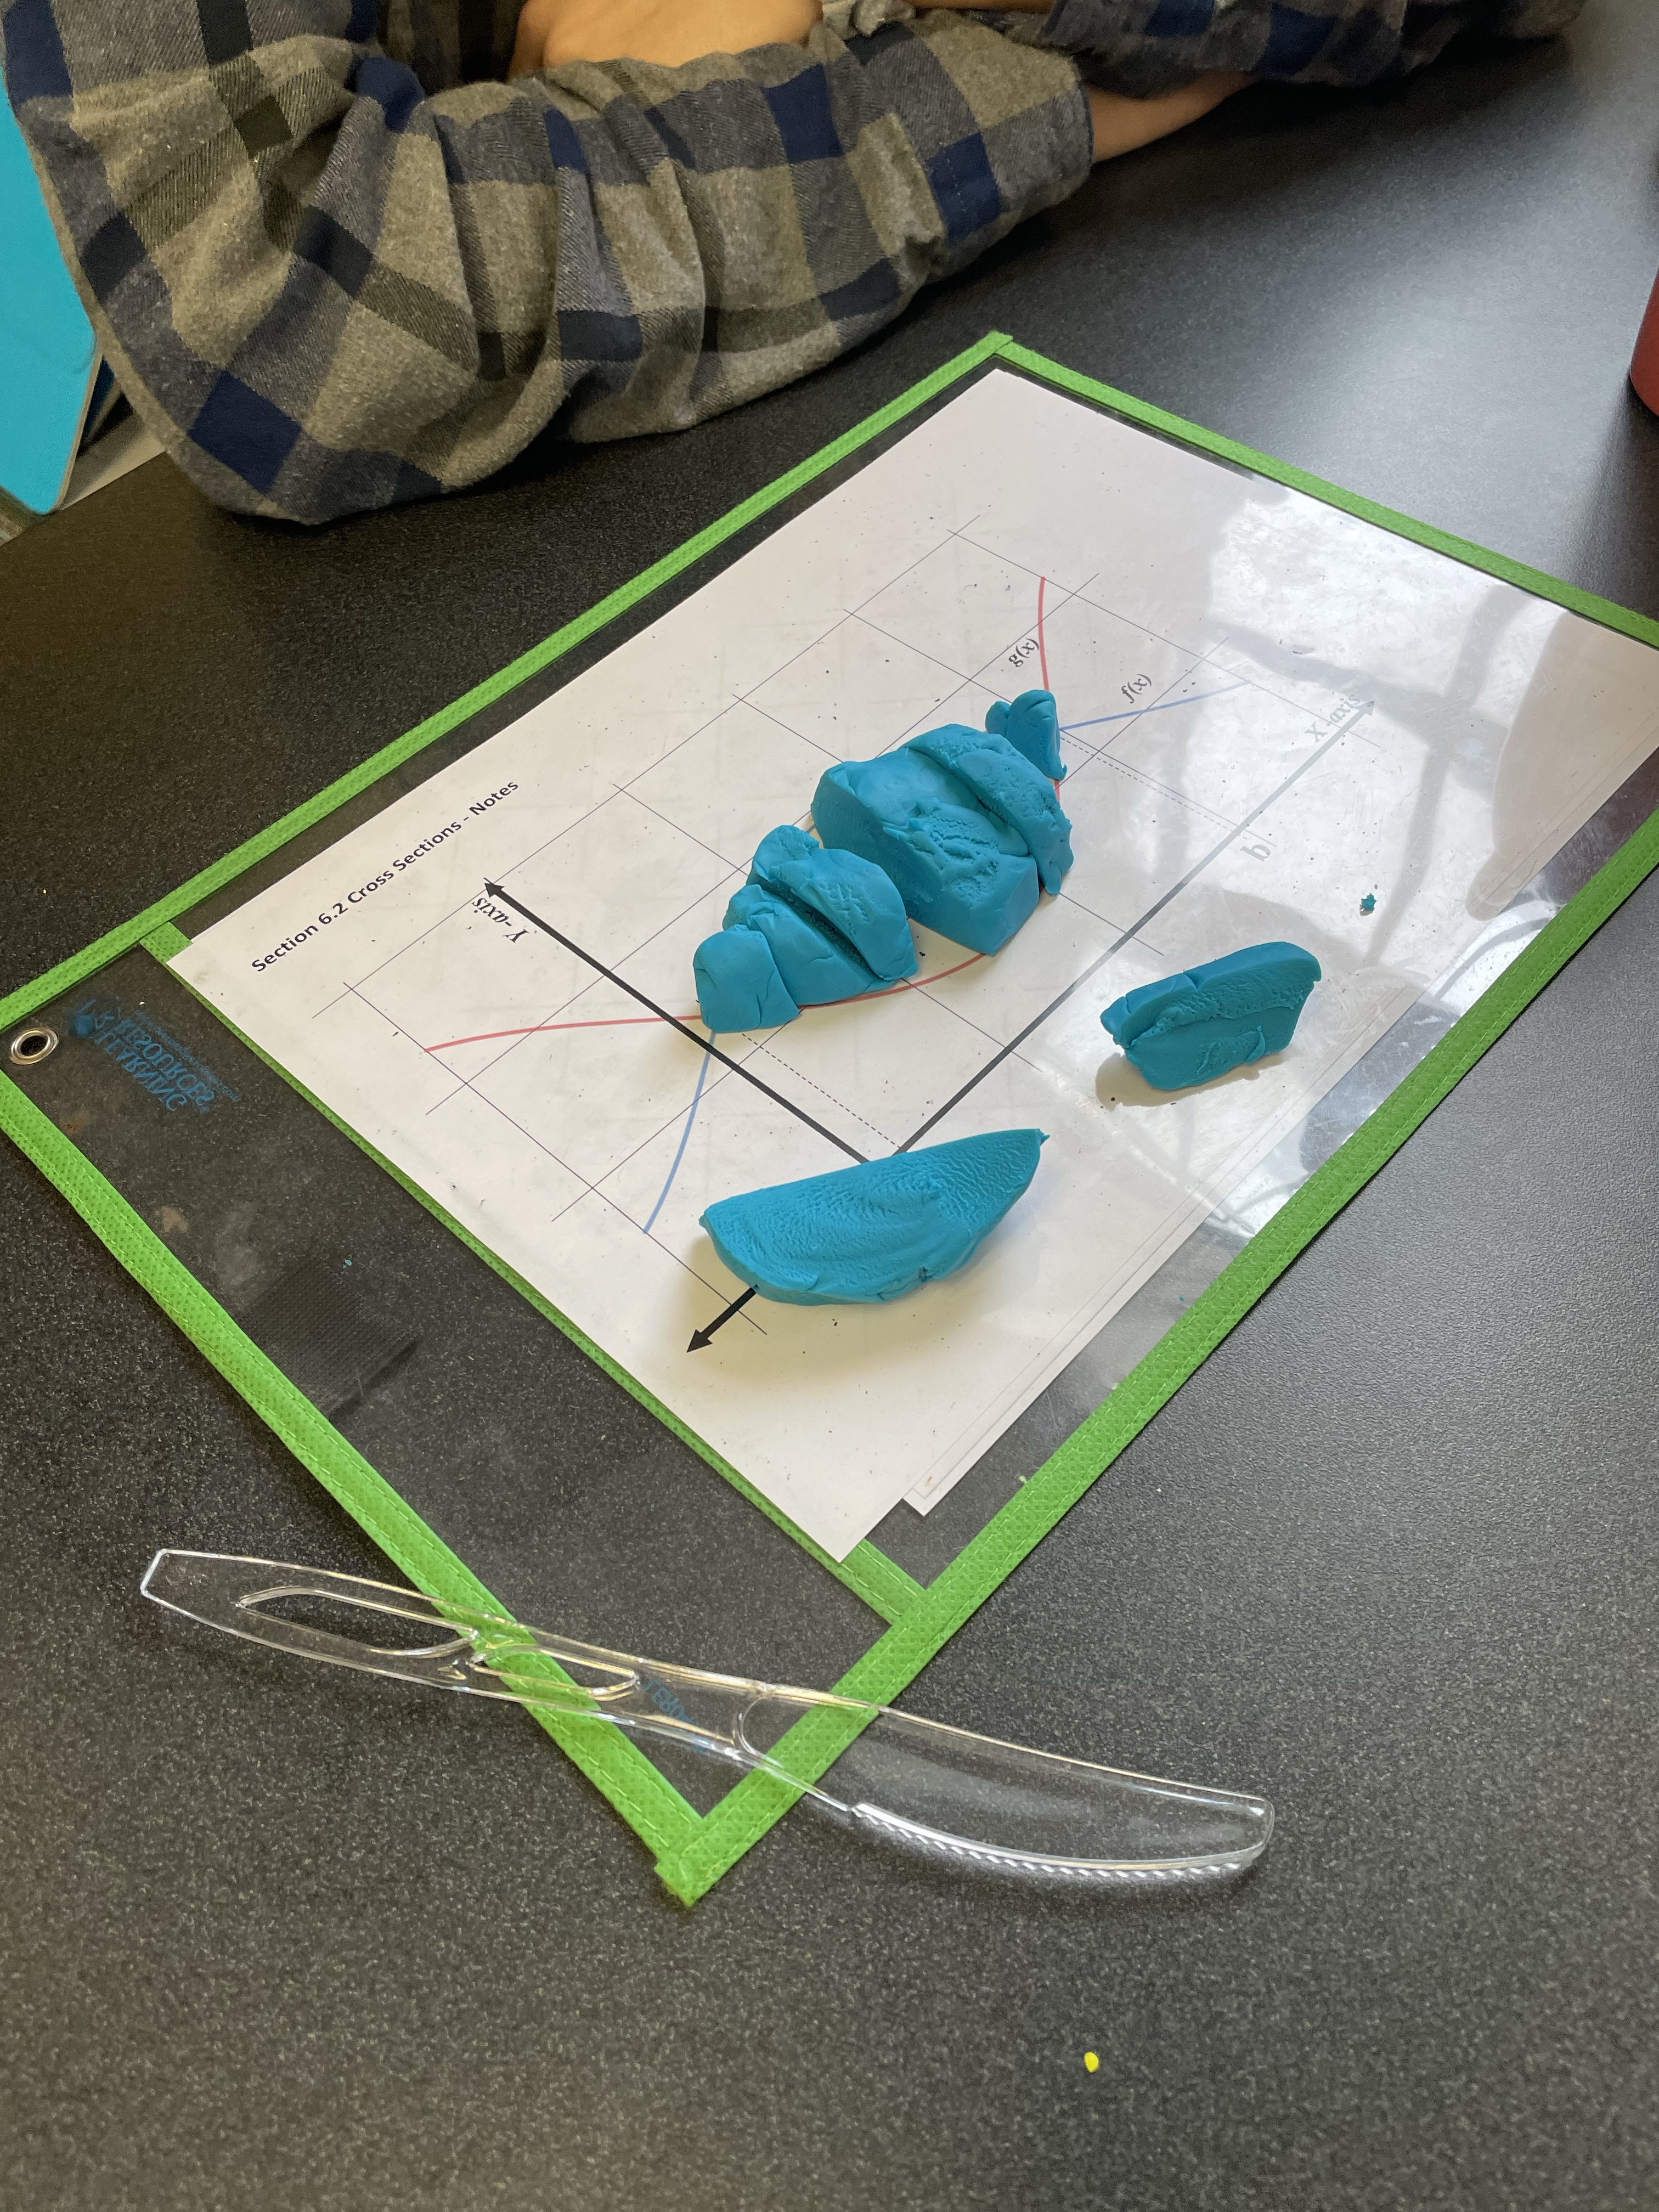
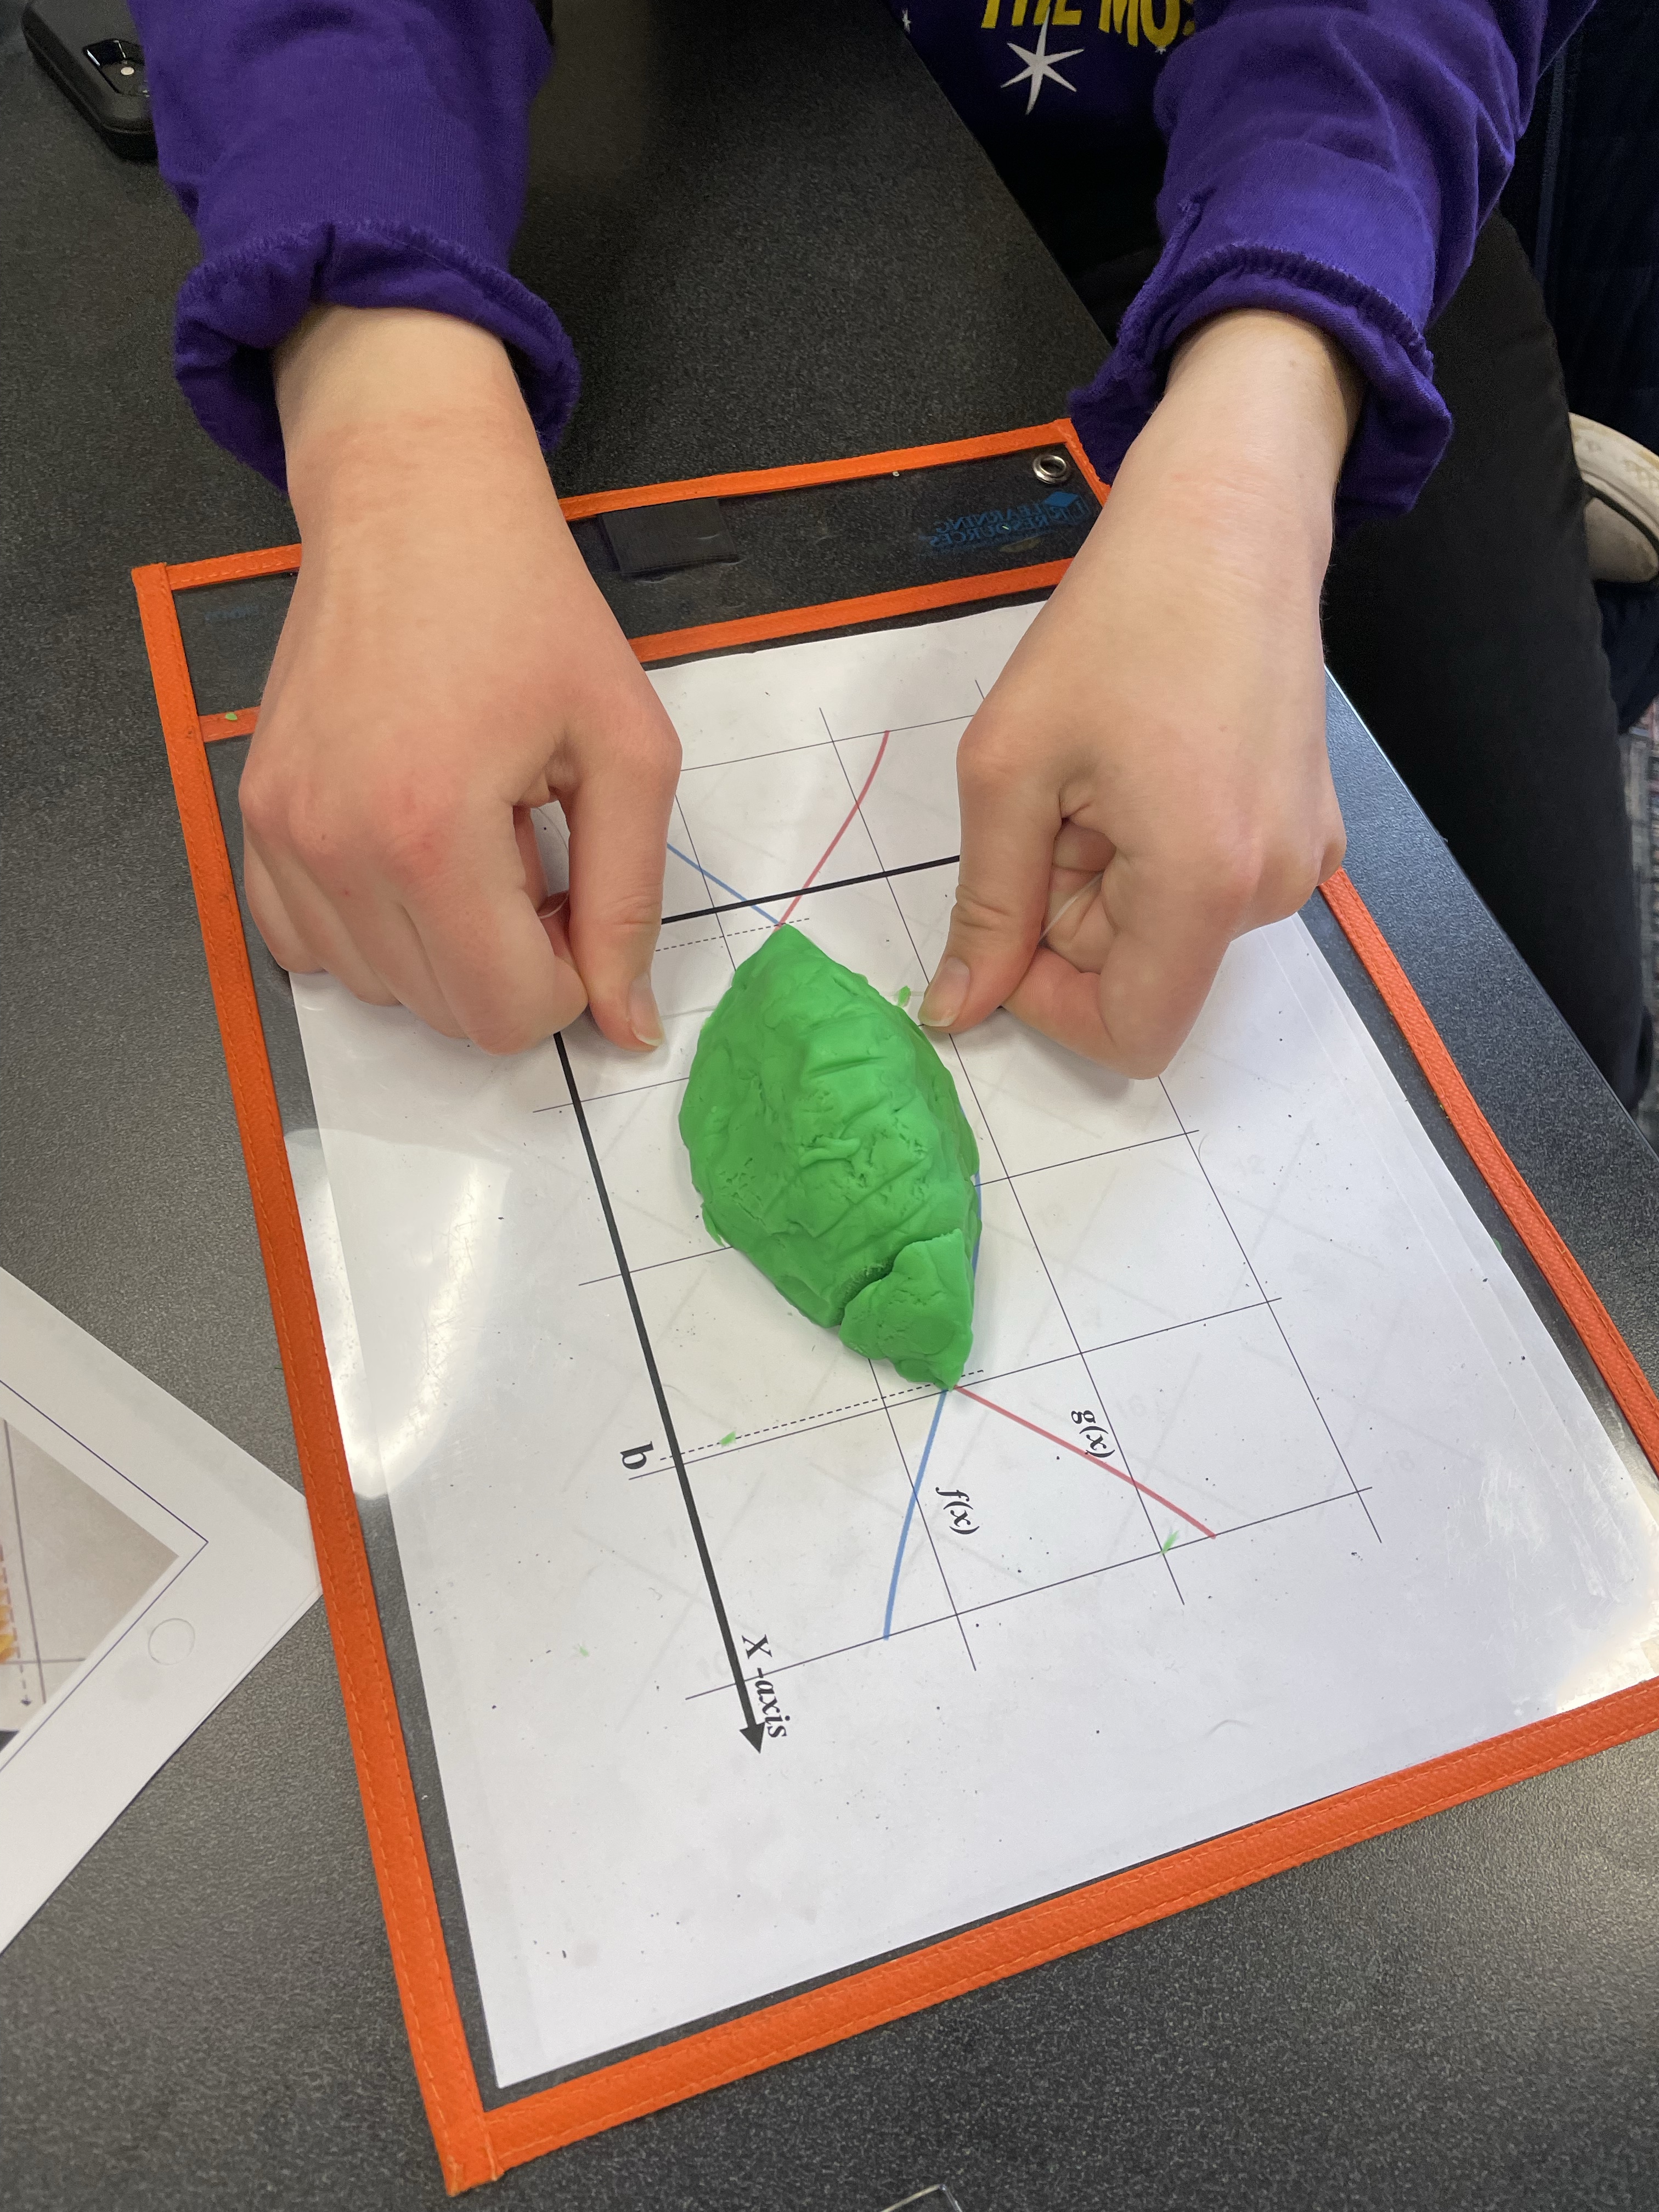
I told them to use all of their Play-Doh to make a solid out of the area between f(x) and g(x). Then, I had them mold their shape into the different cross sections.
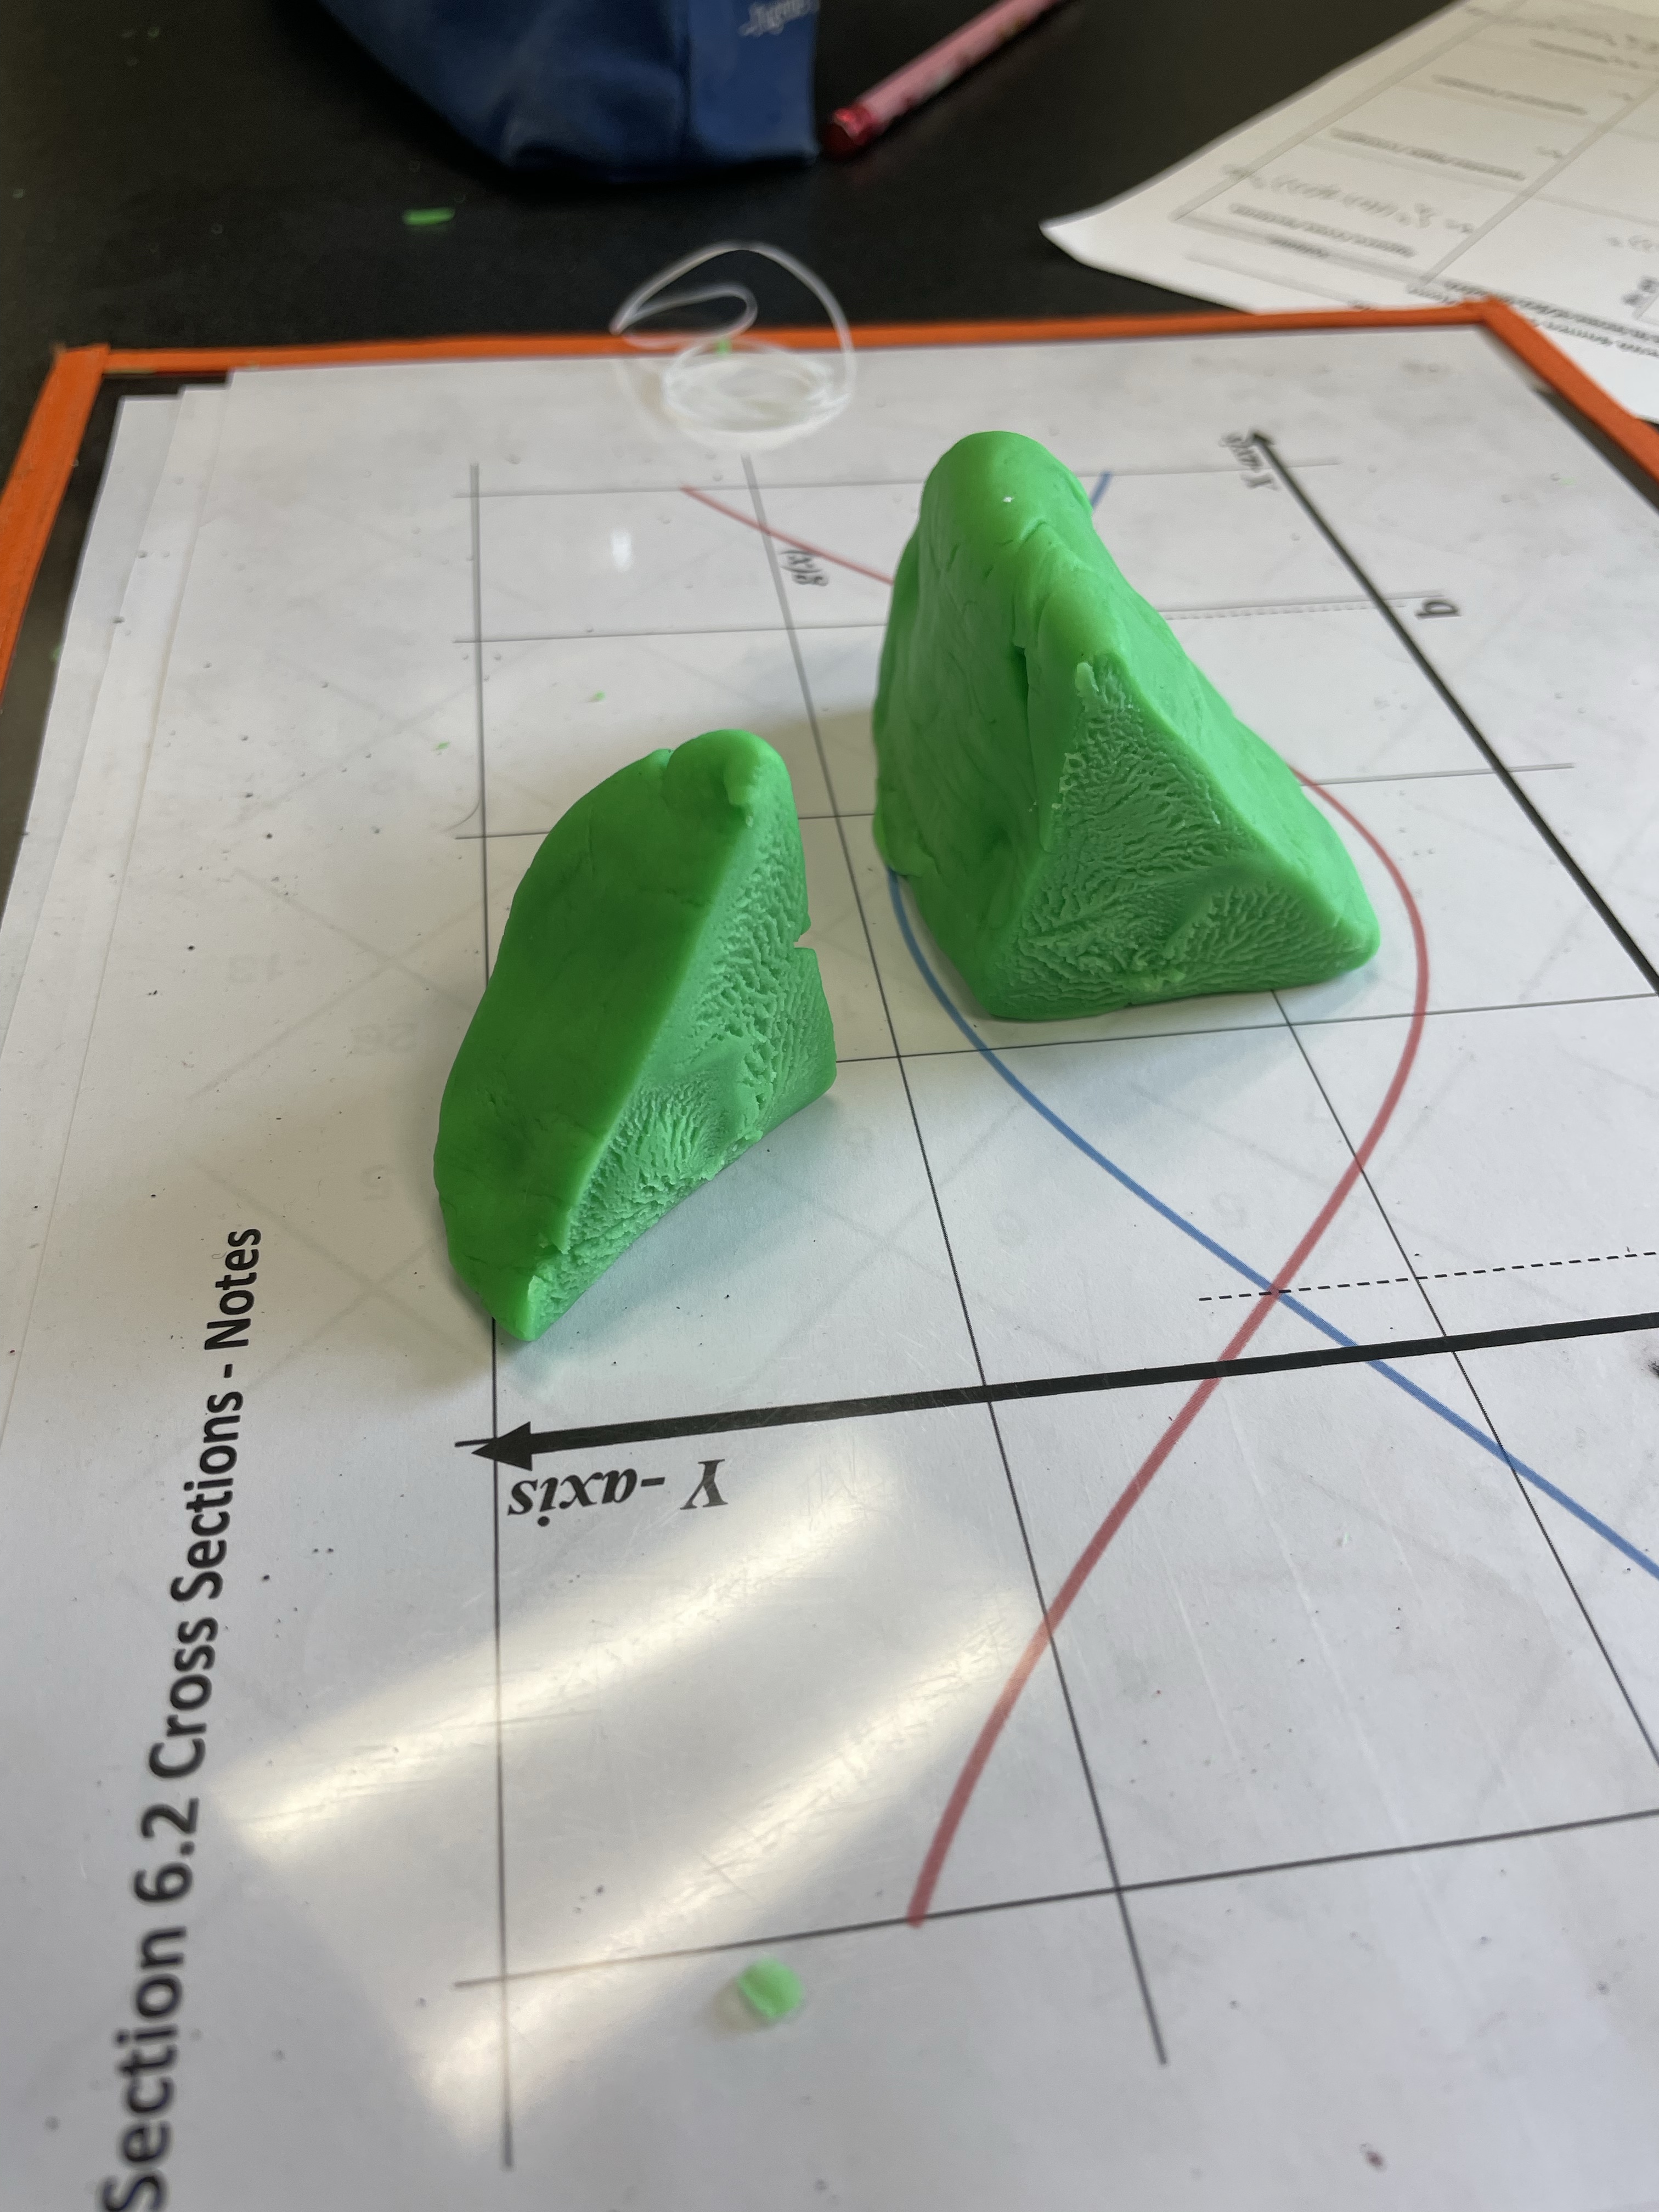
After molding, they sliced their solid, and took out two different sized cross sections, one from the middle and one towards the end. This was incredibly helpful as when I said, what is the base of the square? A couple of tables started measuring it with a ruler. (Rulers had been left on the table from the class before). This was accidental, but a great opportunity to talk about why measuring this is not the best method.
This led to a discussion about how to get the base measurement we needed. And moved to the worksheet to write down the area and the volume.
I did not give them the area of an equilateral triangle. We used our 30-60-90 knowledge to develop this.
Once we finished everything we compared the volume formulas on their worksheet. We talked about how they were different and how they were the same.
I planned on using the Desmos activity, but we ran out of time. So, I will use this the next day so they can see and manipulate the cross-sections of the examples we use in class.
I am one of those annoying people who sing everything. I can’t help it, and I can’t stop it. As such, I also love to play music in class. Kids really like it as well, and I love it when they are working hard and singing along. It also seems to help my more talkative classes focus. “Music soothes the savage beast.”
+C Playlist:
Some calculus concepts can be easy to forget, especially adding C. So, I created a +C Spotify playlist full of songs with anything that sounded like the letter C in them, see, sea, me,… As we first learn about why we need to add C, I play, and SING, these songs, loudly emphasizing the C. I also change lyrics when necessary, as in, “Don’t you, forget about C!” Because I am crazy.
U-Substitution Playlist:
I also have a U-substitution Spotify Playlist, that I save until we get to Integration. But, you could use this as early as Algebra 2 if you wanted to!
Here is the spreadsheet that I used to figure out and keep track of my pacing for AP Calculus throughout the year. The spreadsheet includes AB and BC. I follow the CED (page 27, Course at a Glance) so that I can use the AP Classroom Progress checks throughout the year. I really like using the Progress Checks throughout the year, instead of saving them for review time. It shows how my students are progressing and what they still need to work on. It gives them consistent practice with AP level timed multiplication problems. And, it shows students (and me) what they still need work on, and which students need the most help.
I picked the lower number of suggested days from the CED, because I never have enough class time! The spreadsheet is for AB and BC. We have about 80 class periods before AP Exam week begins. I need to review more this year, so I blocked off 12 days of review, leaving 68 days for content.
** Please note that the CED recommends 22-23 days for Unit 1, Limits. However, our CPM Precalculus book does a fantastic job with limits, so I cut that in half for my schedule.
Example AB Schedule
The Can I? section is how many days I plan on using for each unit. However, things always change, which is what the Used section is for.
Used is the days I actually used, so I can adjust as I go along. Last year I stole from review days, I am hoping to do that less this year!
I try to stick to this schedule, even if it feels like we are going way too fast. I tell my students that we have to, in order to get it all finished. I have math help almost everyday for students who need more time or help.