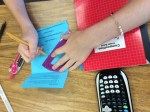
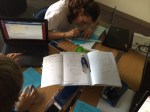
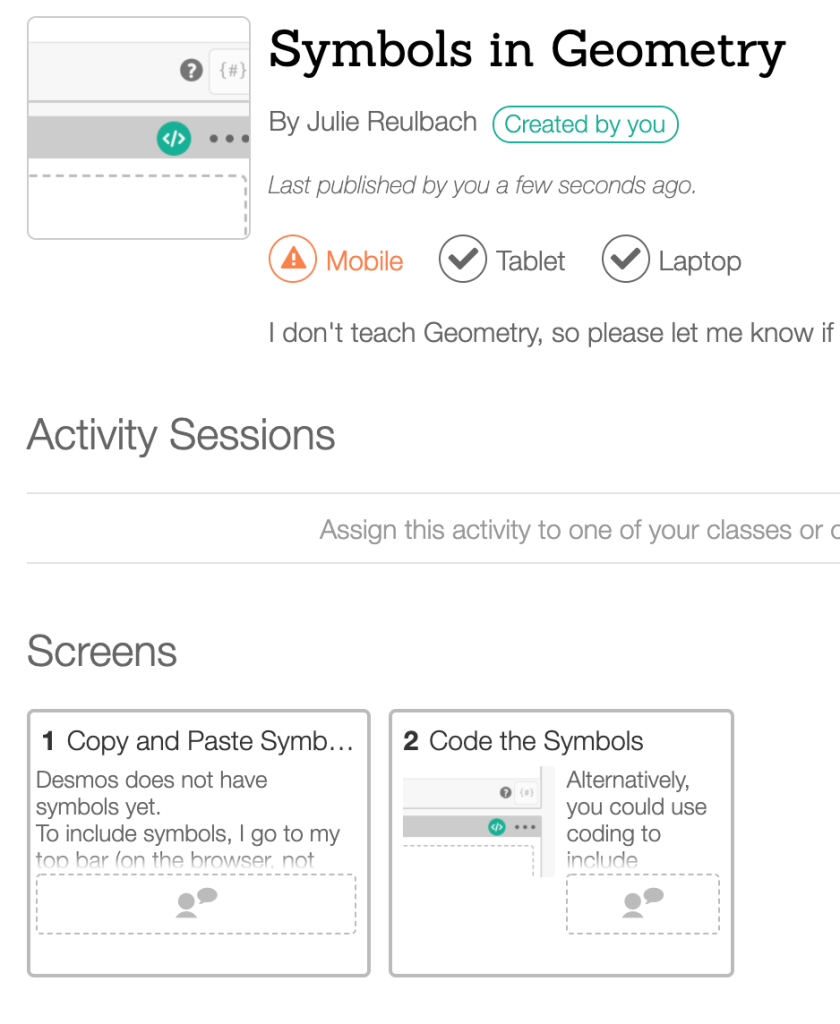
I often get asked how students can easily type symbols into Desmos. I don’t teach Geometry, so I have not worked to find the best way to do this. I am including what I currently do below, but would love to know if you have a better way. Please comment below if you have a great way that easily enables students to type Geometry symbols.
I use Emojis & Symbols to get things into Desmos that are not in their math keyboard (yet!). I use this often for the arrow key with limits statements.
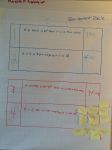
To include symbols, I go to my top bar (on the browser, not Desmos) and select, Edit, Emoji & Symbols, and then I can input them there. You can copy and paste with Desmos. So to make it easier for the students, you could put the symbols into the text box question, and the students can copy the symbols from your question and paste them into their answer box. Alternatively, you could also code the text input box so students could have the symbols they need already in the box. I created a Desmos to illustrate what I am talking about. It still isn’t great, as you can’t put the symbols over the numbers.
Symbols in Geometry Desmos
If you have a great way you have students type symbols, please comment below! Thank you!!
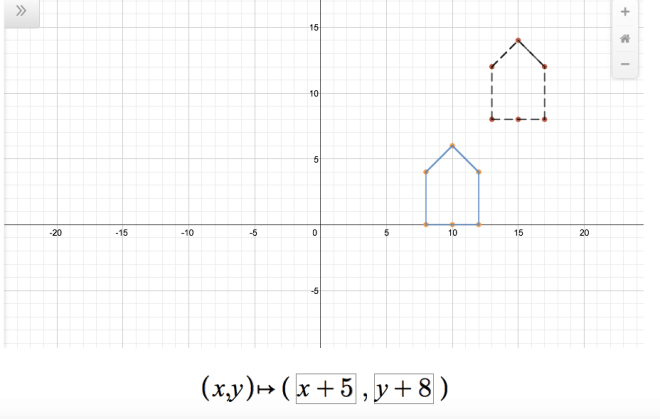
I only had about a week to cover transformations so I focused on translations and reflections, and then briefly covered dilations. I used coordinate changes, where (x,y) transformed to (x +2, y-1) or (-x,y) as I feel that will benefit them in later Algebra classes as well. Michael Pershan’s created an excellent Tool for Exploring Transformation Rules using Desmos that I love. I gave my students the link and let them play with it.
Then I had them take out the +5, and +8 so they only had (x,y).
I challenged them to make the house FATTER. It took them a while to figure out they had to multiply a number instead of add. After they were all able to make very fat houses asked them to make it skinner, taller, and shorter. After that, I asked if they thought they could turn it upside down. The students enjoyed making the house different sizes and moving it around. But the best benefit came days later when I only had to mention the house to remind them how to differentiate between the translations and dilations in future work.
I’m totally reducing the amount of time I spend on this next year. But I’m blogging out what I did just in case you teach it as well.
Things I liked (in order that I taught it):
Inductive and Deductive reasoning sort – I made a card sort with inductive and deductive reasoning examples. I had the kids sort the cards with zero information, then tell me what they felt was different about the two sets of cards. They did a great job! I’m not including my cards because I need to change them next year. I will only do words on both types of cards, and no patterns or numbers. A few students took inductive to mean “numbers” or patterns only, and deductive to mean “words”.
I need to spend more time turning statements into conditional statements.
It takes a few days but it is worth it! All students were very engaged the entire time.
DON’T LET THE STUDENTS WRITE THEIR OWN STATEMENTS. Use the ones Sam etc. wrote. You will thank me later.
It is “paper intensive” so make group packets before they come in to preserve your sanity.
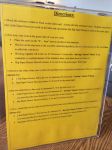
I put the directions in a picture frame so students could see it more easily as it is a “directions intensive” activity. They did well and I love when they practice following directions.
After the posters were all finished, I had students do a “gallery walk” with post-its so they could make comments on other posters in case a student got the truth value incorrect. This was great!
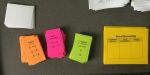
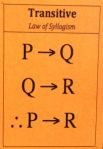
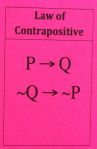
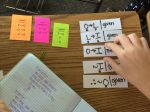
Symbolic Logic Proofs – I made cards for them to refer to. They used them often. We made “index card pockets” in their graph books to hold them. I loved these things!
Proof strips – I laminated card stock and we wrote on these to re-arrange the statements.
Post-it flags – I also let them use post-it flags to write the givens on so they could be easily rearranged.
I also combined this with Speed Dating for the win. I don’t think I can ever thank Kate enough for Speed Dating.
I did another sorting activity thanks to Pam Wilson’s intro to logic post. This went well! I let them sort on the floor if they wanted and then check their answers with another group.
I am really starting to like, even love, teaching Geometry. There, I said it. Hopefully I won’t lose my math card.
I am finding that Geometry problems are just one big puzzle. And I love puzzles! I am also inspired to see some students who were maybe not great Algebra students have success with Geometry. I have identified those students, and I plan to work with them one on one this year to strengthen their Algebra skills so they can keep their newfound engagement with mathematics going strong! It is so exciting to see these student’s perception of their own mathematics ability improving, and their attitudes about math changing!
I assigned two students per giant whiteboard with two different colored markers and one eraser. The two different colored markers were a fabulous idea. The students can color code things (so helpful in Geometry), and I could make sure both partners were equally participating. I’m not sure who gave this tip at Global Math but THANK YOU. As a bonus, the colored markers I found in my cabinet were scented. I didn’t realize how much this would thrill high school students. Some things that I think they will love they could care less about, but break out scented Expo markers and WATCH OUT because you will have some really happy teenagers. Who knew??
Back to parallel line proofs. I gave them the proof, but told them not to prove it yet. I told them to just draw the picture and label the GIVENS only. Then, I had them discuss with their partner how they knew the “prove” was true. For example, given that m<1 is 100 degrees, how did they know that m<8 was 80 degrees? Once they talked about it, I had them write down their thinking (steps) on their whiteboard. Then, they shared their giant whiteboards with their steps with the rest of the class.
They discovered:
There are many ways to do a single proof
Some ways can take many more steps
Some ways are equally as efficient as others, there is not one most efficient way
How to carefully explain their steps to the class so everyone would understand what they were doing to “prove” they knew it.
They do not like it when other people talk while they are presenting. This is great training for when I am talking! lol
After they shared, I modeled how to write down the proof steps, explaining that they have to SHOW why m<2 = 80 degrees, if m<1 is 100 degrees using substitution and angle subtraction.
After that, I gave them another proof, but let them do the steps and work on the proof before sharing with each other. The sharing is crucial, as it helped students see the difference ways each group solved the proof. My favorite part was how mad a student became when she realized she had taken TWO extra steps than another group to prove her statement. Now that is engagement! In fact, this activity produced some of the highest levels of engagement I have seen all year! Thanks again Bowman!!
The #MTBoS is a wonderful place. Sometimes the only problem is deciding which awesome activity I will do, since I don’t have time to do them all! Luckily, I had a block day, so I was able to use two great activities that I found, and even add one of my own.
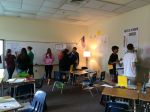
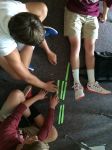
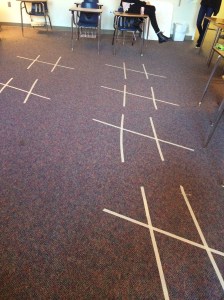
After reading Jessica’s post about “Dance, Dance, Transversal”, I knew I had to do it. As I desperately miss the high energy of middle schoolers, I am often trying to infuse some fun and spirit into my HS student’s day. I couldn’t wait to have them dance, but didn’t want to spend more than about 10 minutes dancing because we had a lot of work to do. However, since I was going to spend all of that time putting tape up the floor (and it turns out even more time taking it off – tip for you, use PAINTER’S TAPE, not regular masking tape), I wanted to see if I could use those lines for more than one activity. The result? A lighting round of Geometry Jeopardy!
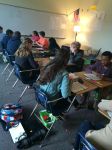
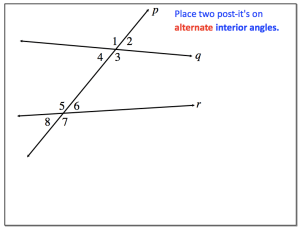
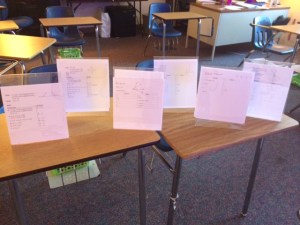
When the students came in, I instructed them to find a partner and have a seat on a set of lines on the floor. I gave each student the graphic organizer, and a post-it note. I then projected a similar set of lines on the board and asked them questions. They were to put their post-it note on the answer. Then we recorded the correct answer on the graphic organizer. For example,…
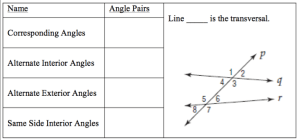
I loved this because students had to work together, each with one post-it, to decide not only what an “alternate interior angle” was, but which set to put their post-its on.
Angle pairs
Partner work
Kids loved sitting on the floor.
Photobomb
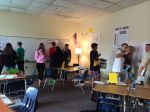
After this activity, we did a short round of “Dance, Dance Transversal”. After the partner post-it activity, the kids decided to dance with their partner first. So for alternate exterior angles, each student would stand on one angle. The game had been described as one person dancing while the other partner watched, but I think this worked out better because everyone was involved at the same time. Plus, it took more talking to decide where to step when each angle was “called”. Unfortunately, I was too involved in the action or I would have taken a video of this! It was great fun!
After learning the names of all of the angles made by a transversal, it was time to move on to parallel lines. I am trying to incorporate Geogebra, so I borrowed and adapted this lovely discovery activity from Tina Cardone. Of course I made it into a foldable! My instructions were adapted from the amazing Kate Nowak. I especially love her “teacher checkpoints”, where the students have to call me over to approve their work before moving on to the next step. This greatly helped to prevent students from going down the wrong path for too long, which sometimes happens with discovery lessons! For instance, many students didn’t “construct” parallel lines, they merely drew two lines that looked parallel. So, when students called me over I would move a line to ensure the other line moved parallel with it. Another checkpoint was measuring angles in Geogebra. This can be tricky, and pretty frustrating to the students. Seeing angles of 257 degrees are not going to help them understand which angles are congruent.
These activities seemed to work well, as two days later in class they all knew not only what the angle pairs were, but which ones and even when they were congruent. I did have to remind a few students that they are only congruent when the lines are parallel. Next year, I will be careful to make sure the tape lines on the floor do NOT look like parallel lines.
Here are my advisee’s making sure there was room to dance on the lines. They are so much fun.
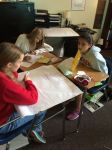
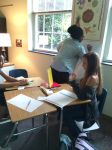
After a smashingly successful first day doing proofs in Geometry I was excited to prepare for day two! Our Geometry classes are not tracked (leveled). On day 1 I noticed that I had a wide range of proof writing ability.
I still wanted the students to have time to think and process the proofs as they did the day before, but I did not want to go too slowly for some students, or two quickly for others. I wanted everyone to be able to think and to learn at their own pace. Enter Stations.
I am a huge fan of stations for review, but I really haven’t done much at the beginning of a unit. This worked beautifully!
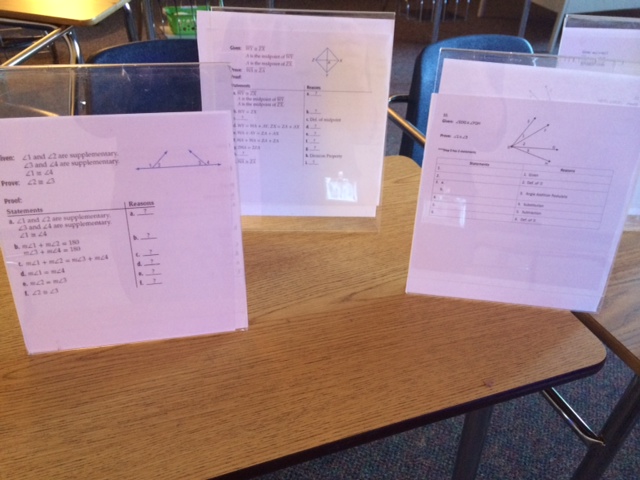
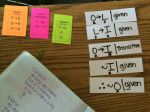
I gave my students six proofs in (of course) an INB foldable. All they had were the givens and the prove. I had them work on them silently for 10 minutes. After the 10 minutes, they were able to work with a friend, and move around to the stations.
At each station, I had a copy of the same proofs that were on their papers, with some “hints” added. The “hints” were the “fill in the blank” that can help students along if they get stuck. On the back of the picture frame I had the proof fully worked out.
I encouraged the students to try the proofs FIRST, then if they got stuck or needed a hint they could go to the station. Or, if they finished the proof they could check their answer with the proof answer on the back of the station frame. Many students did not WANT the hints. I agree with them, I really hate reading how someone else has solved a proof before I have time to think about it and try it on my own. But, I did want students to check to make sure their proofs were similar to mine. Since they are just beginning proofs, they often leave steps out.
This activity worked so well! Students had time to think and try to work out the proofs on their own. They were able to move around at their own pace. They could get a hint if needed, and check their answers. Another great thing came out of this as there are usually a few ways to solve each proof. I loved it when a student proved something in a different way and came to ask me about it.
We still have a long way to go, but I feel this gave them a great foundation!
** I did not provide the proofs I used here as I “borrowed” them from many sources and am not sure where they all even came from. 🙂
After a couple weeks of p, q logic proofs, we started proofs “for reals” in Geometry this week. First, we did algebraic proofs. The kids were not happy that they had to show all of their steps. “But I can do this in my head!” Yeah, right. At least it was a pretty easy introduction to proofs. Anywho…
After learning all about segment and angle addition postulates, we started beginning baby proofs. The first day went really well. I took a page from the amazing Fawn’s book and modeled my first proof lesson after her problem solving lessons. After all, proofs are just giant problems you have to figure out. I gave them a proof. We wrote down our “given” and marked up our diagram. Then, I had them “think” silently for a few minutes. I encouraged them to write what they were thinking or to take notes, but they didn’t have to do any “work”. I just wanted them to think about what they knew.
After those few minutes, I gave them a few minutes to talk to their group about their observations and what they were thinking. I walked around and heard amazing things. “Could we just add these up?”, “Aren’t these equal?” and “I think we could use the segment addition postulate here.” Then, we pulled it all together. I let the students tell me (and each other) what I should do next. The students explained their thinking to their peers and I also jumped in occasionally when needed.
Learning how to “do” proofs (how to prove something) is problem solving. This takes time and effort. This takes a person looking at something on their own and really trying to figure it out. You can give a student strategies, but I don’t think you can “teach” someone how to do a proof. They need time to figure it out on their own. The time spent in class “thinking” and “talking” to each other before actually doing this together as a class was well worth the time. First of all, I have freshmen, so a few of them are not doing their homework as consistently as I would like. This means that the in-class time is the only dedicated time they will get. Also, many of my students get frustrated on homework at home and will just quit. I wanted them to have support when they were starting out.
The best part was when we worked as a class. Since I gave them time to think silenty and work together, some of my students “figured” out the approach they would take. They were excited to explain it to their peers. Their peers are much tougher on them than I am! Students often had to explain their reasoning in a couple of different ways. The listeners wanted to know how and WHY their classmates are doing a certain step. And voila, there are the proof “reasons”.
I was worried about teaching proofs, but it has been amazing so far!
Join us tonight at 9 PM EST on Twitter to talk about proofs in geometry. Geometry chats are now the first Thursday of the month.
To follow and participate in the chat, use the hashtag, #geomchat.
Michael Pershan suggested a reading assignment and found a great short article about proof by Michael Serra. If you can’t read it before tonight, please come anyway! We would love all advice, opinions, and links about proofs in Geometry.
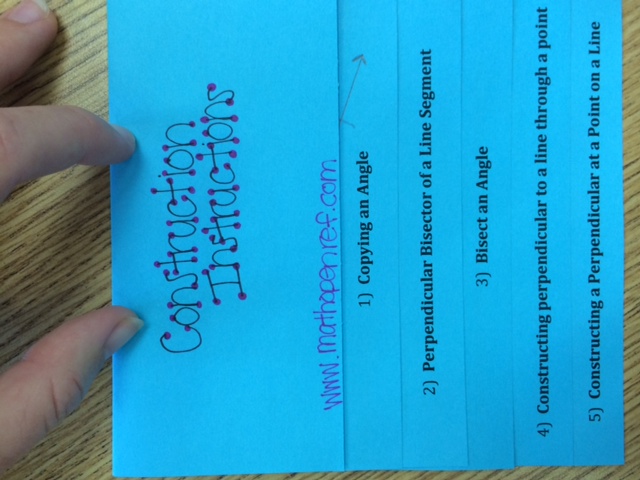
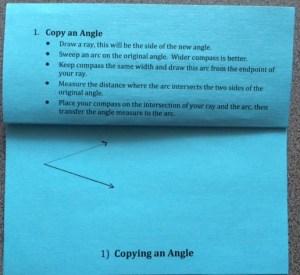
Yikes! Constructions! There are many steps to follow. My students are working really hard but I felt that they (and I) could use a little reminder / reference guide for the most basic constructions. I made a layered booklet foldable. Each each page contained instructions for one construction with an example for them to construct.
I love the layered book because of the way the information can be organized. I made it half sized so it would fit in their composition booklets. I made a ppt to show the students with folding instructions so I wouldn’t have to fold all of them myself. Cutting and sorting them was enough work!
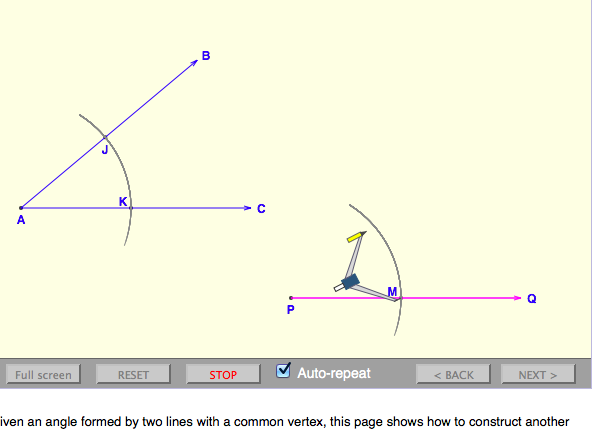
I copied the instructions from the Math Open Ref site as it is what I have shown my students as we have done each construction. My students and I have really enjoyed the videos on the Math Open Ref site. The most ingenious part is the fact that you can select “auto repeat” so that the video plays over and over again. I loop this video while I walk around helping students. It’s a game changer.
After the students used their notes (and the Math Open Ref site or me if needed) to finish all of the examples in the foldable, I glued or stapled it in the center, then they glued them into their INB’s.


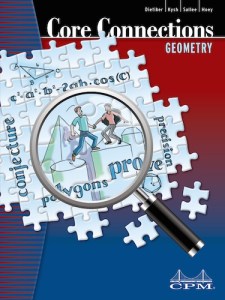 Laila will give an overview of what the CPM curriculum entails and discuss some of her students’ favorite lessons thus far.
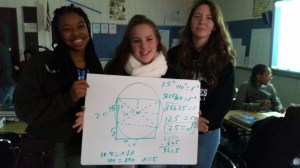


 After reading


 I gave my students six proofs in (of course) an INB foldable. All they had were the givens and the prove. I had them work on them silently for 10 minutes. After the 10 minutes, they were able to work with a friend, and move around to the stations.