Discovering Volumes of Known Cross Sections Using Play-Doh

My AP Calculus students had a tough time with volume last year. So this year I wanted an activity where they could actually see the cross sections. I have seen many awesome activities where students actually measure the base between curves, and then create cross sections using paper, like the ones from Bowman and Rebacka. I would love to do these with my students, but unfortunately we are very short on time this year because of our school schedule.

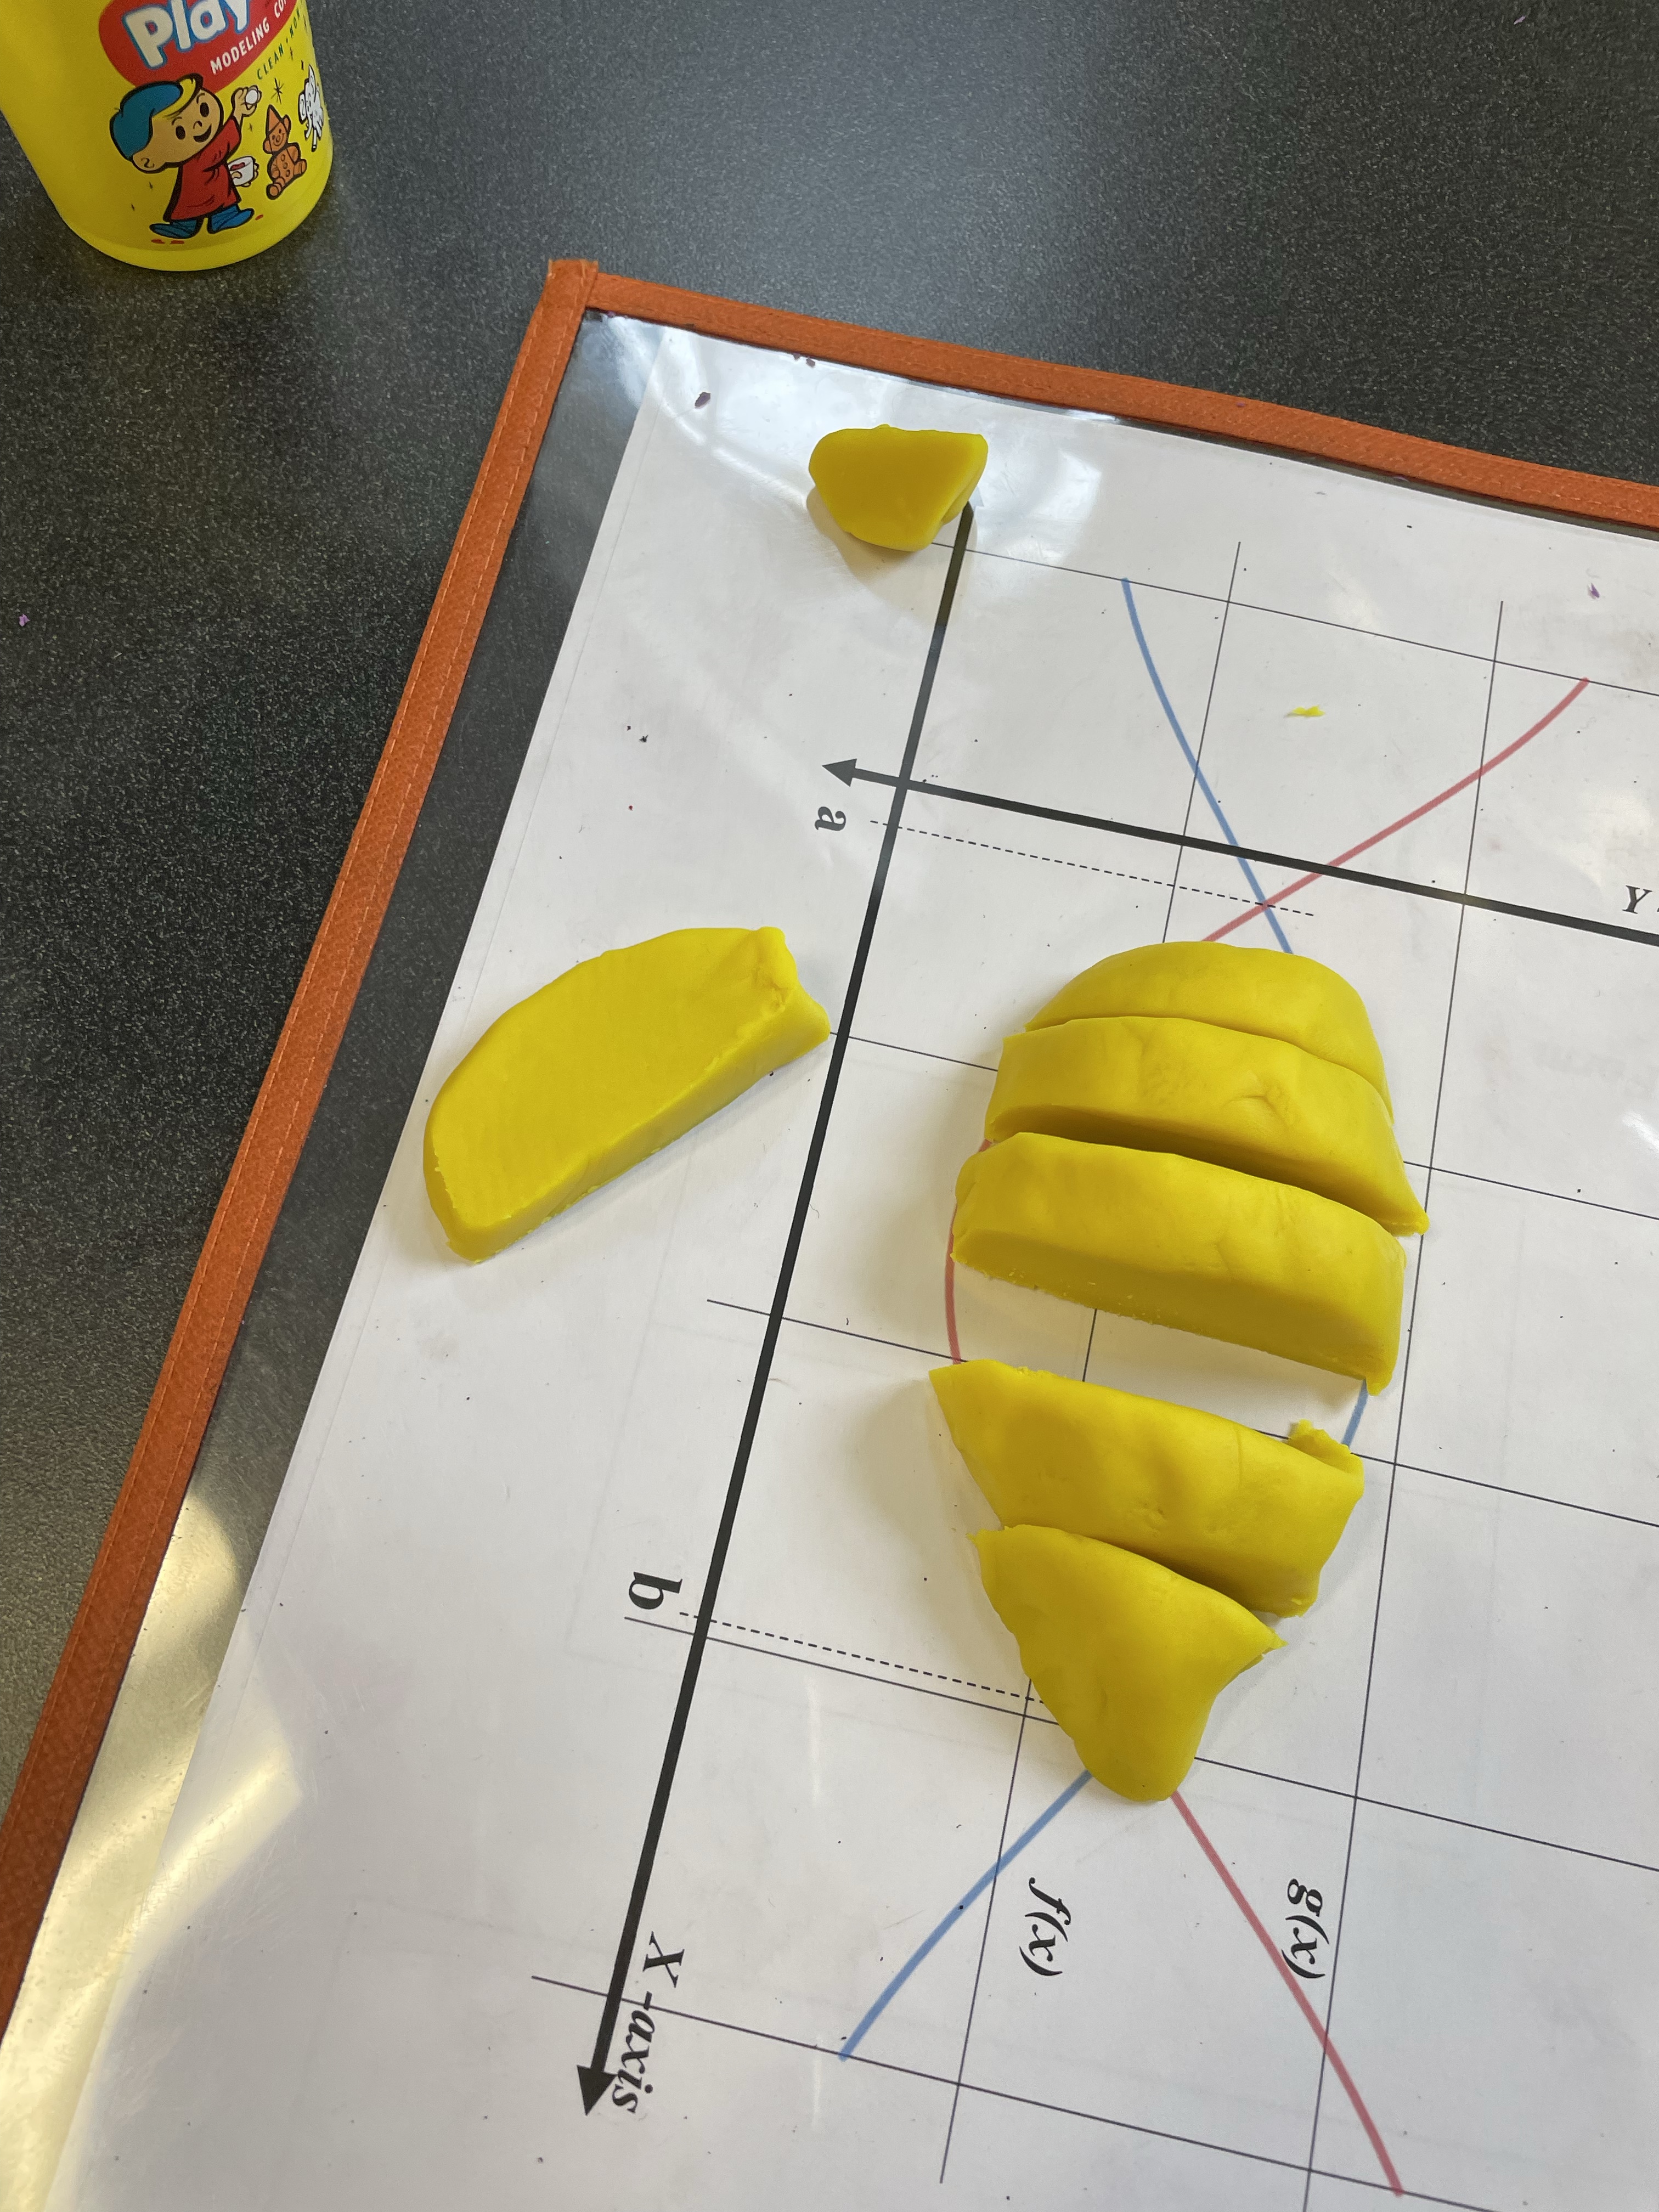
So, I decided to try it out using Play-Doh. I had students mold each type of cross section, and then let them slice it with either dental floss or a plastic knife. Once they cut their solid, I had them pull out cross sections so that we could develop the area and then volume formulas together.

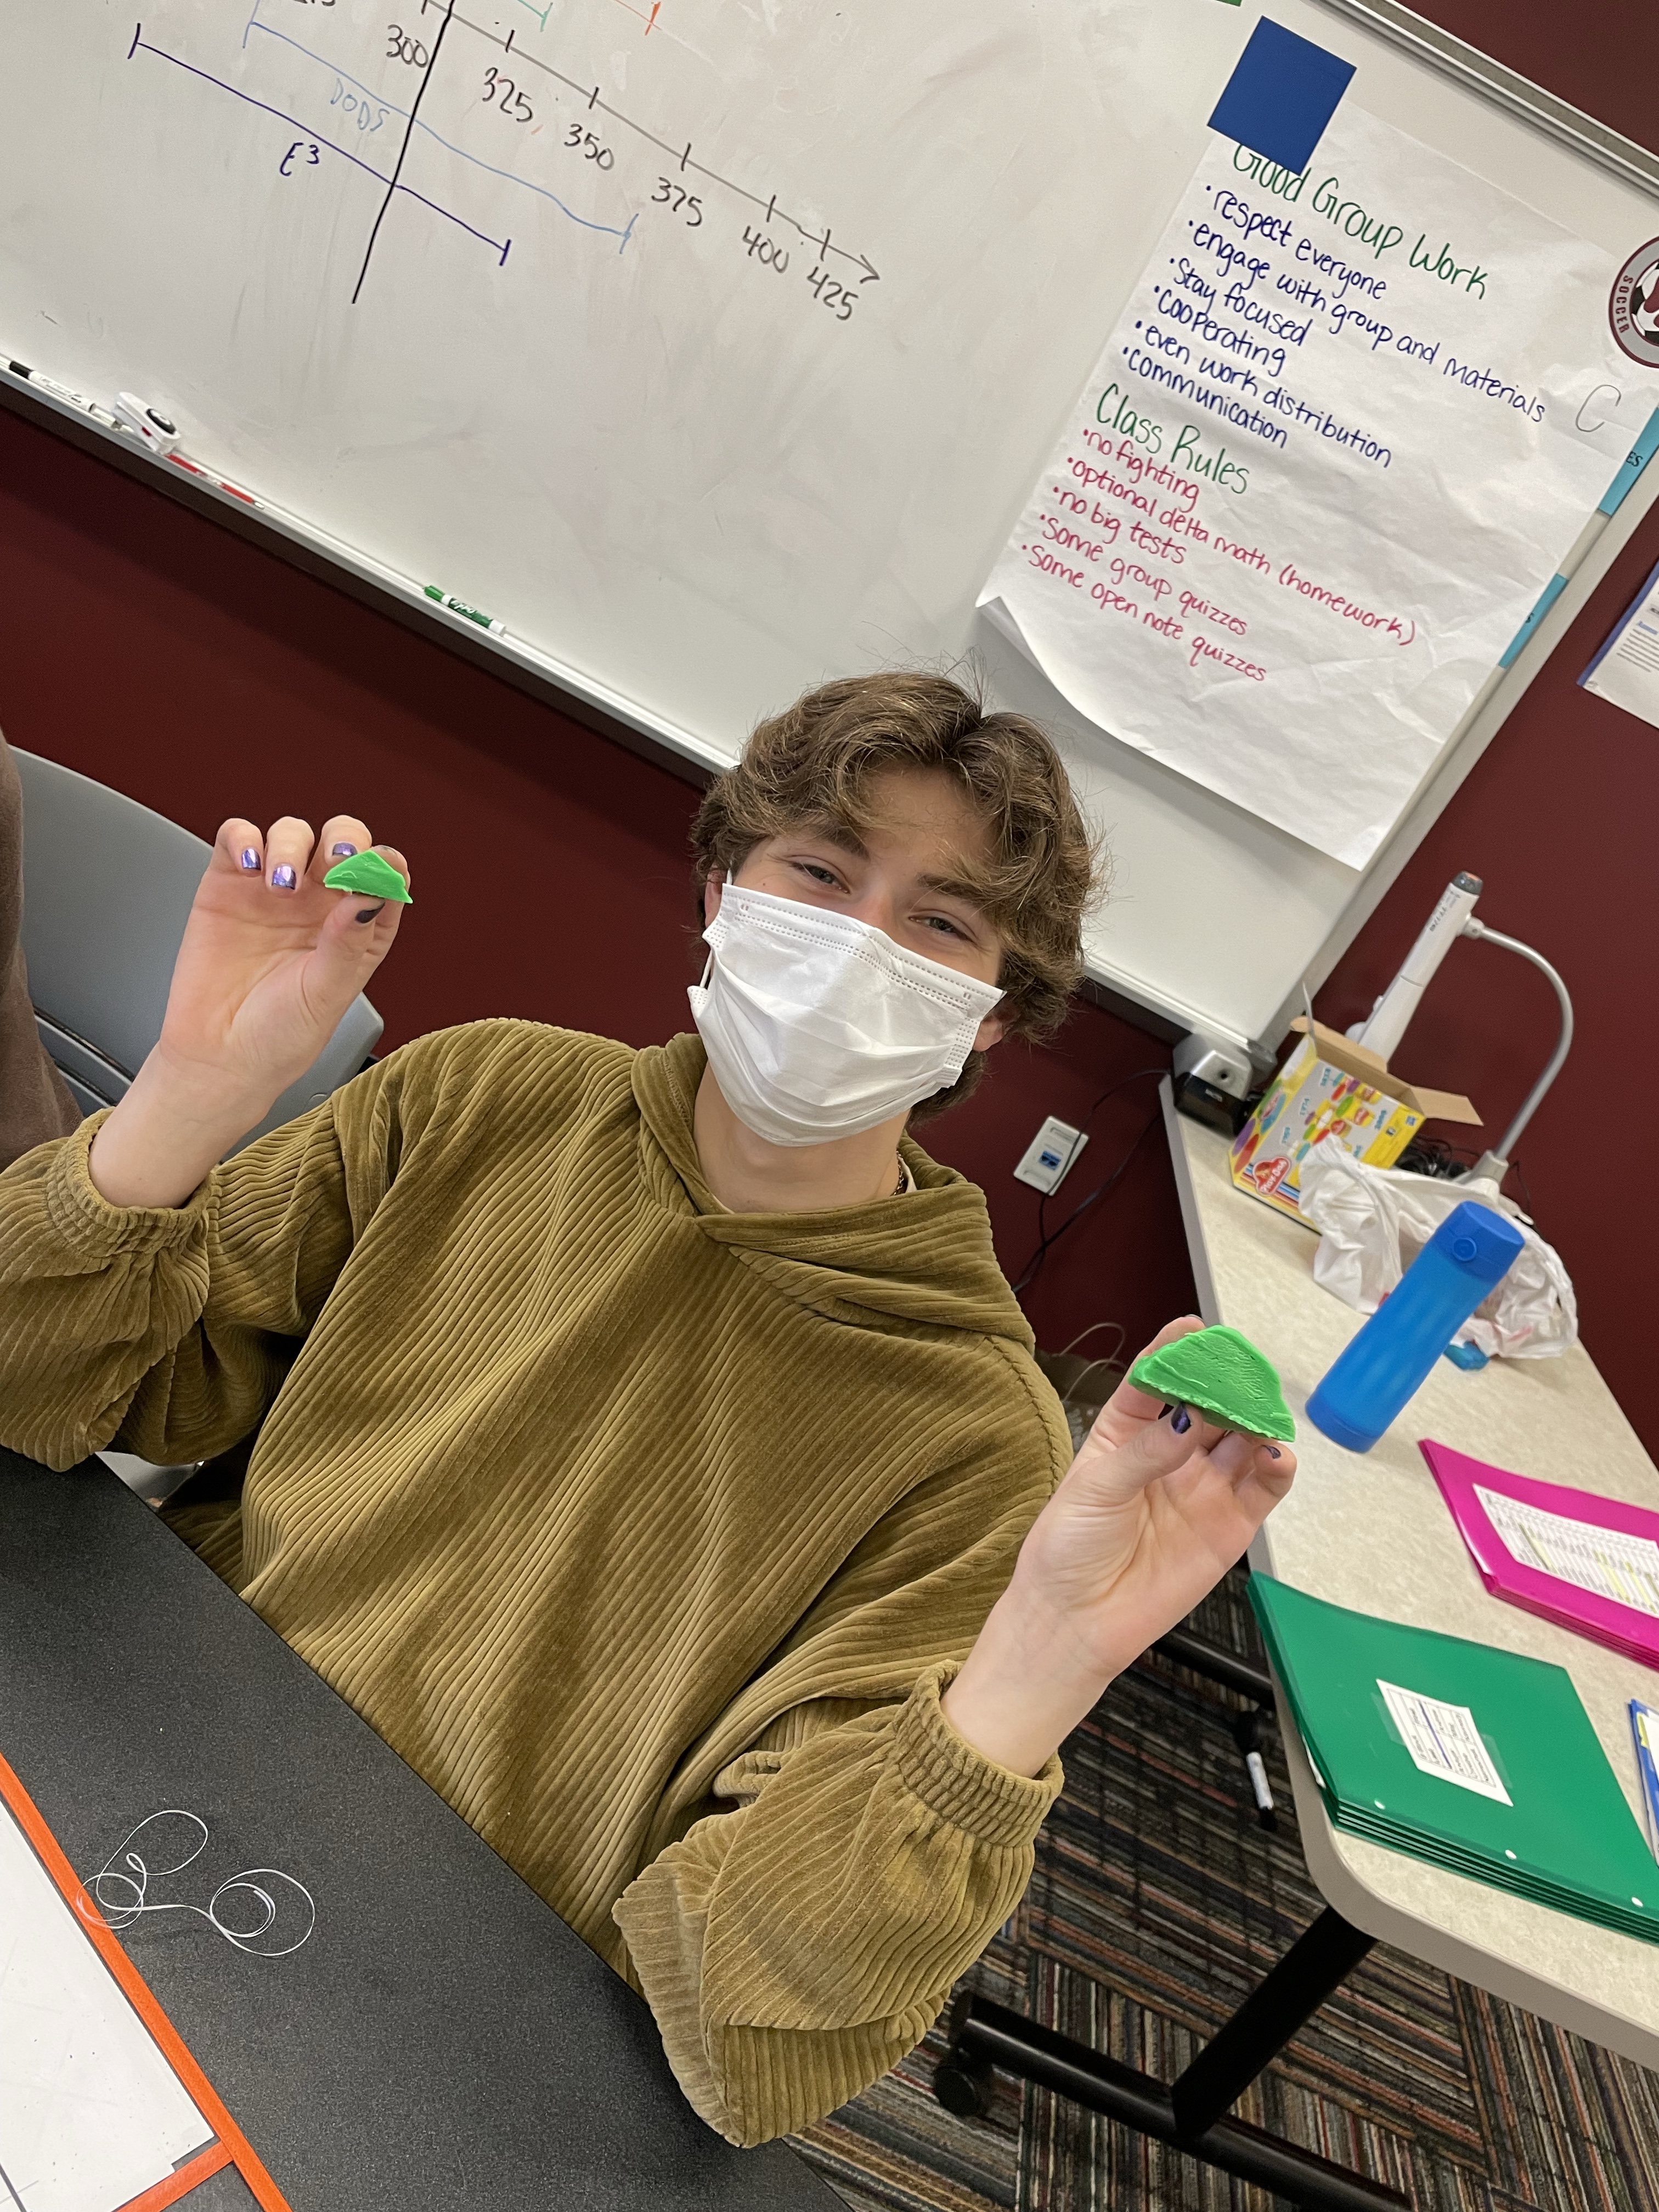
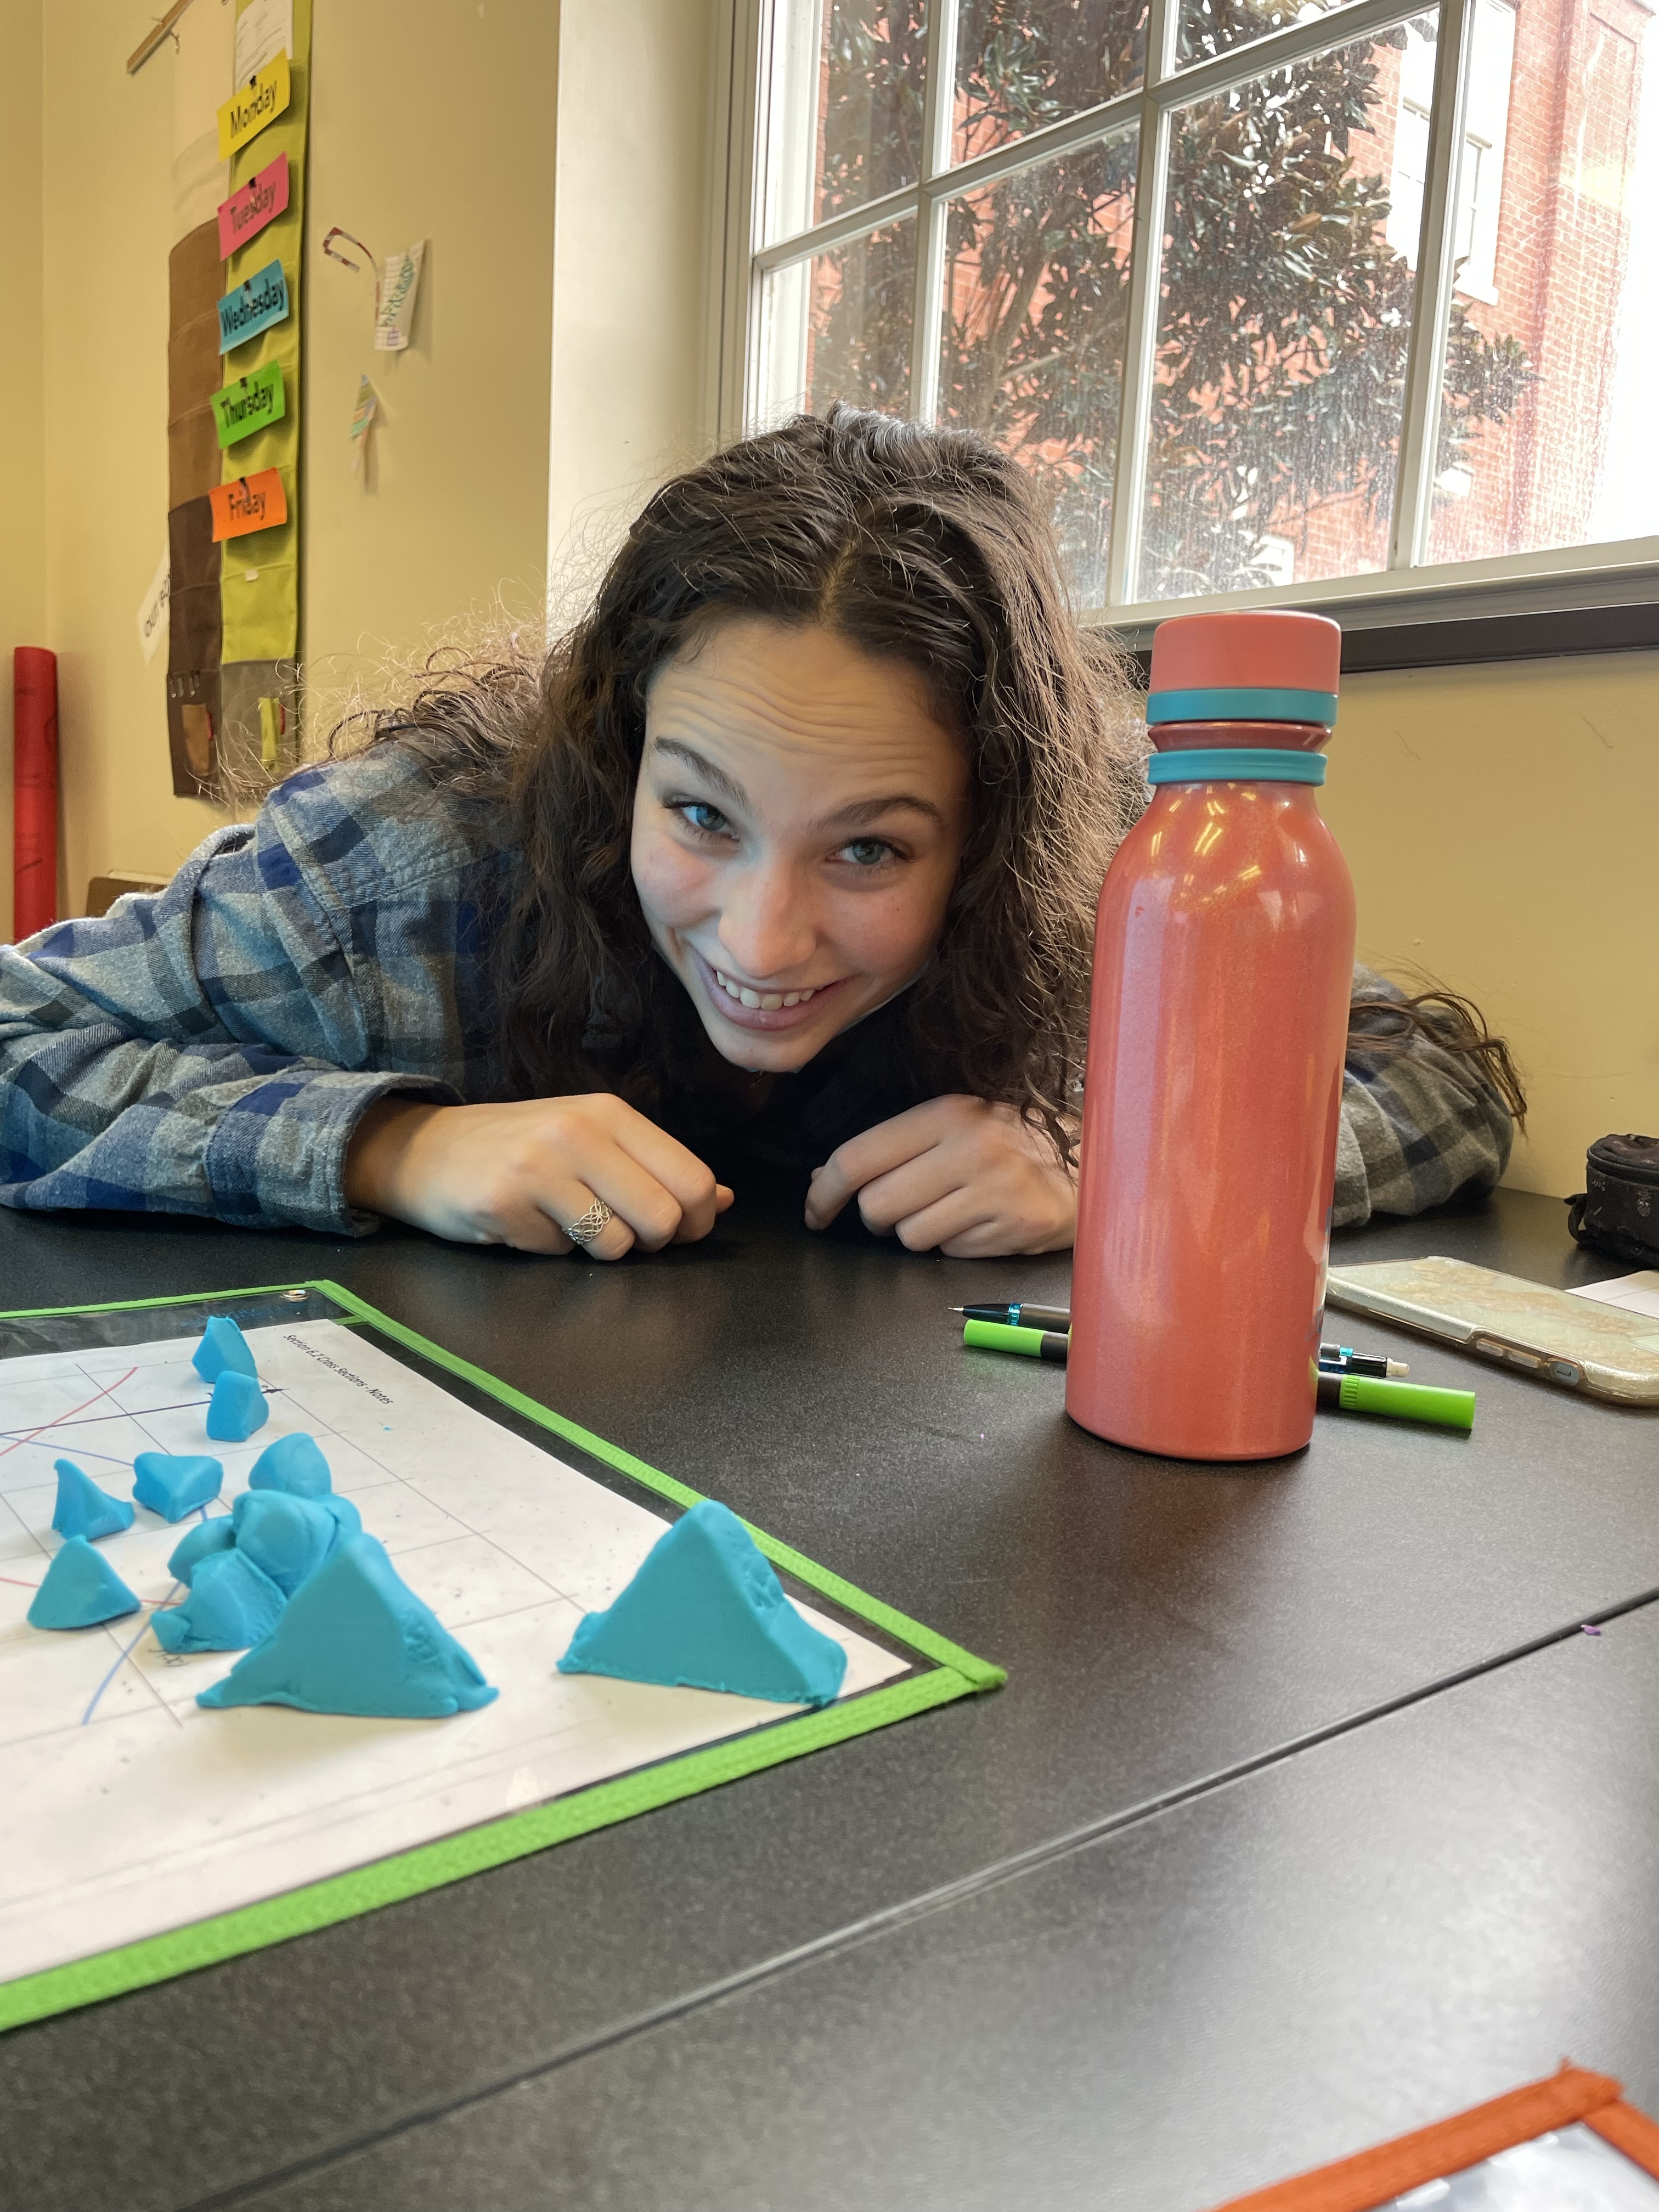
First of all, kids loved playing with Play-Doh! It worked beautifully, and only took about 40 minutes to do the entire activity. Most of my students didn’t need to do all of the cross sections after the doing the first one. Doing the first one really helped them see and understand what was going on. So, if you are short on time, you could just do one cross section. However, my students really enjoyed trying to make the shapes for all four cross sections, and cutting them into the sections. And, again, they really enjoyed playing with the Play-Doh! They were so sad when I asked them to put away the Play-Doh for the quiz that I let them keep it out and play with it during the quiz. Sometimes I forget that high school students are still kids.

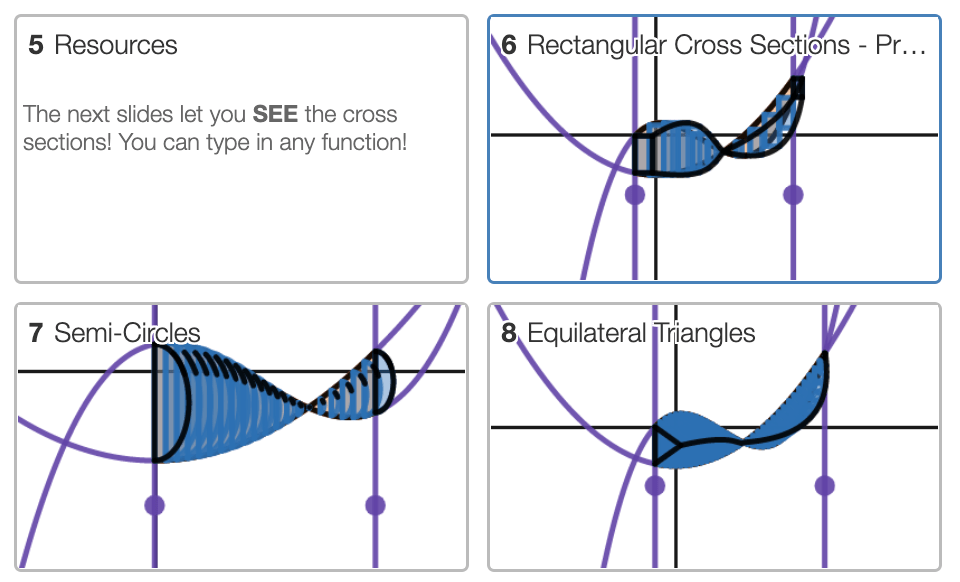
I pulled together a Desmos activity that I planned on using the same day. It is full of amazing graphs created by the amazing Suzanne von Oy. However we did not get to it as we ran out of time, and were just too excited about the Play-Doh! So I will share the Desmos with them when we do examples, and to remind them of what we did in class.

Procedure:

  • Class time: 45 minutes
  • Materials
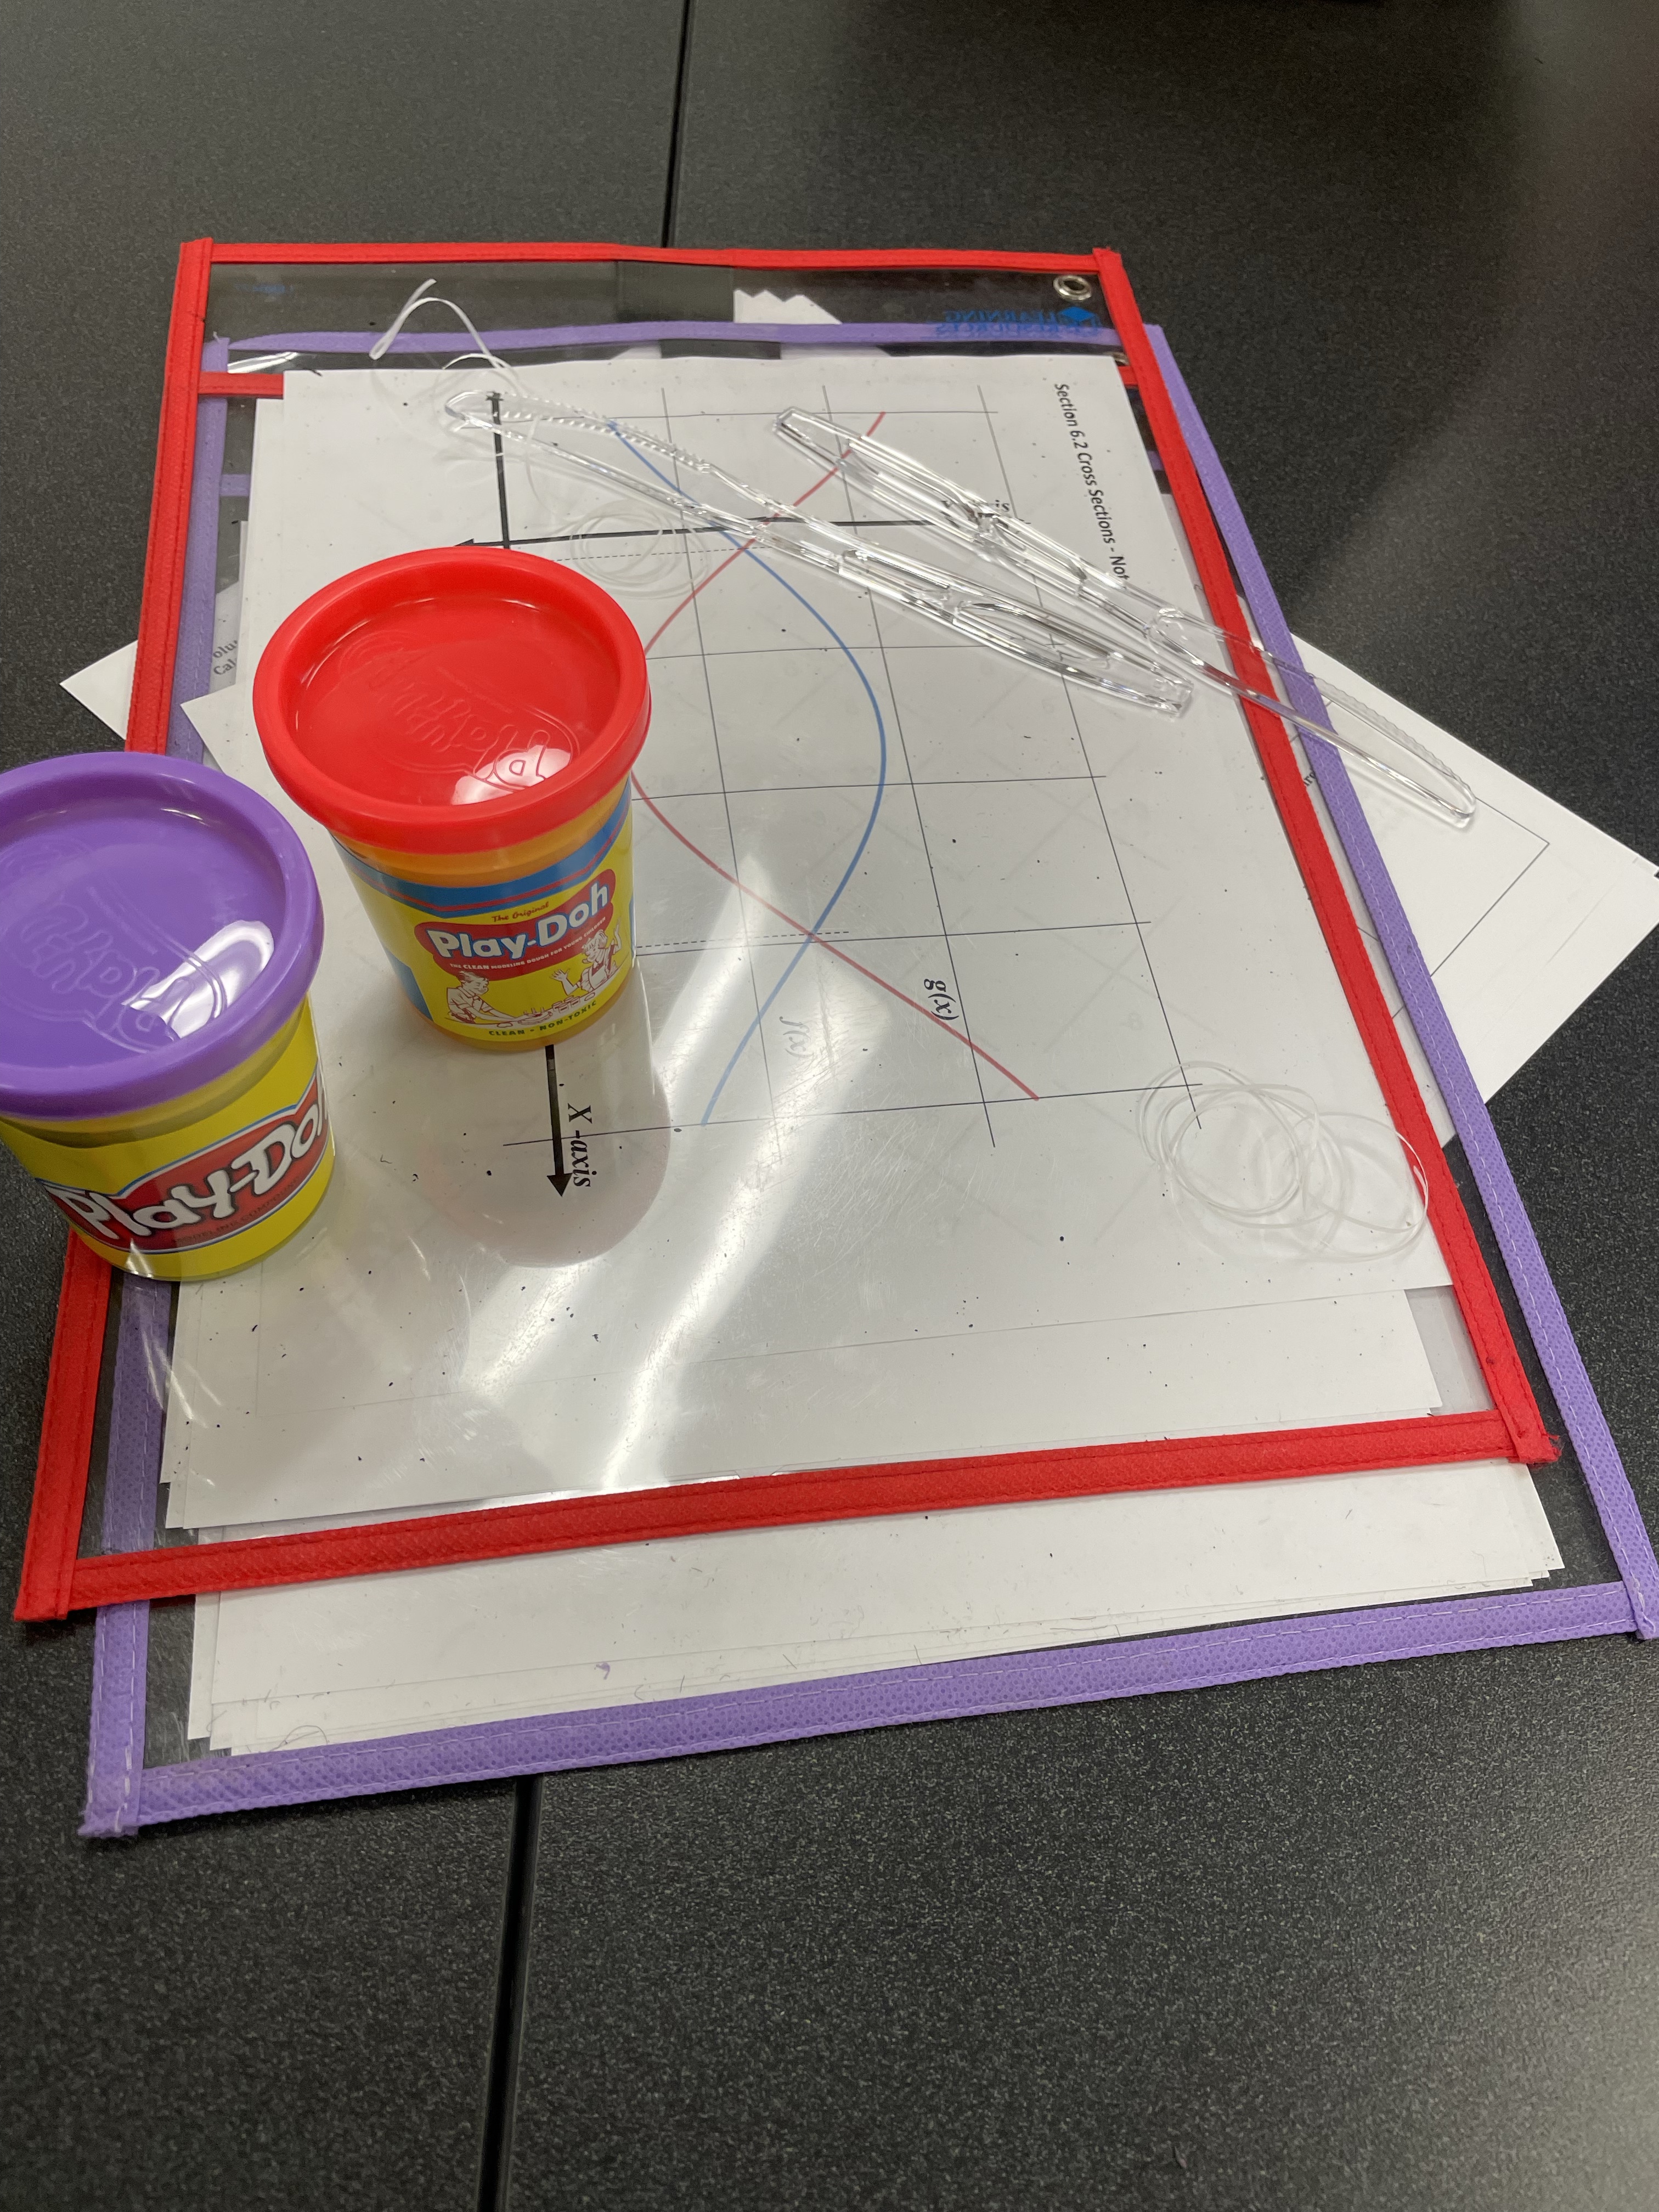
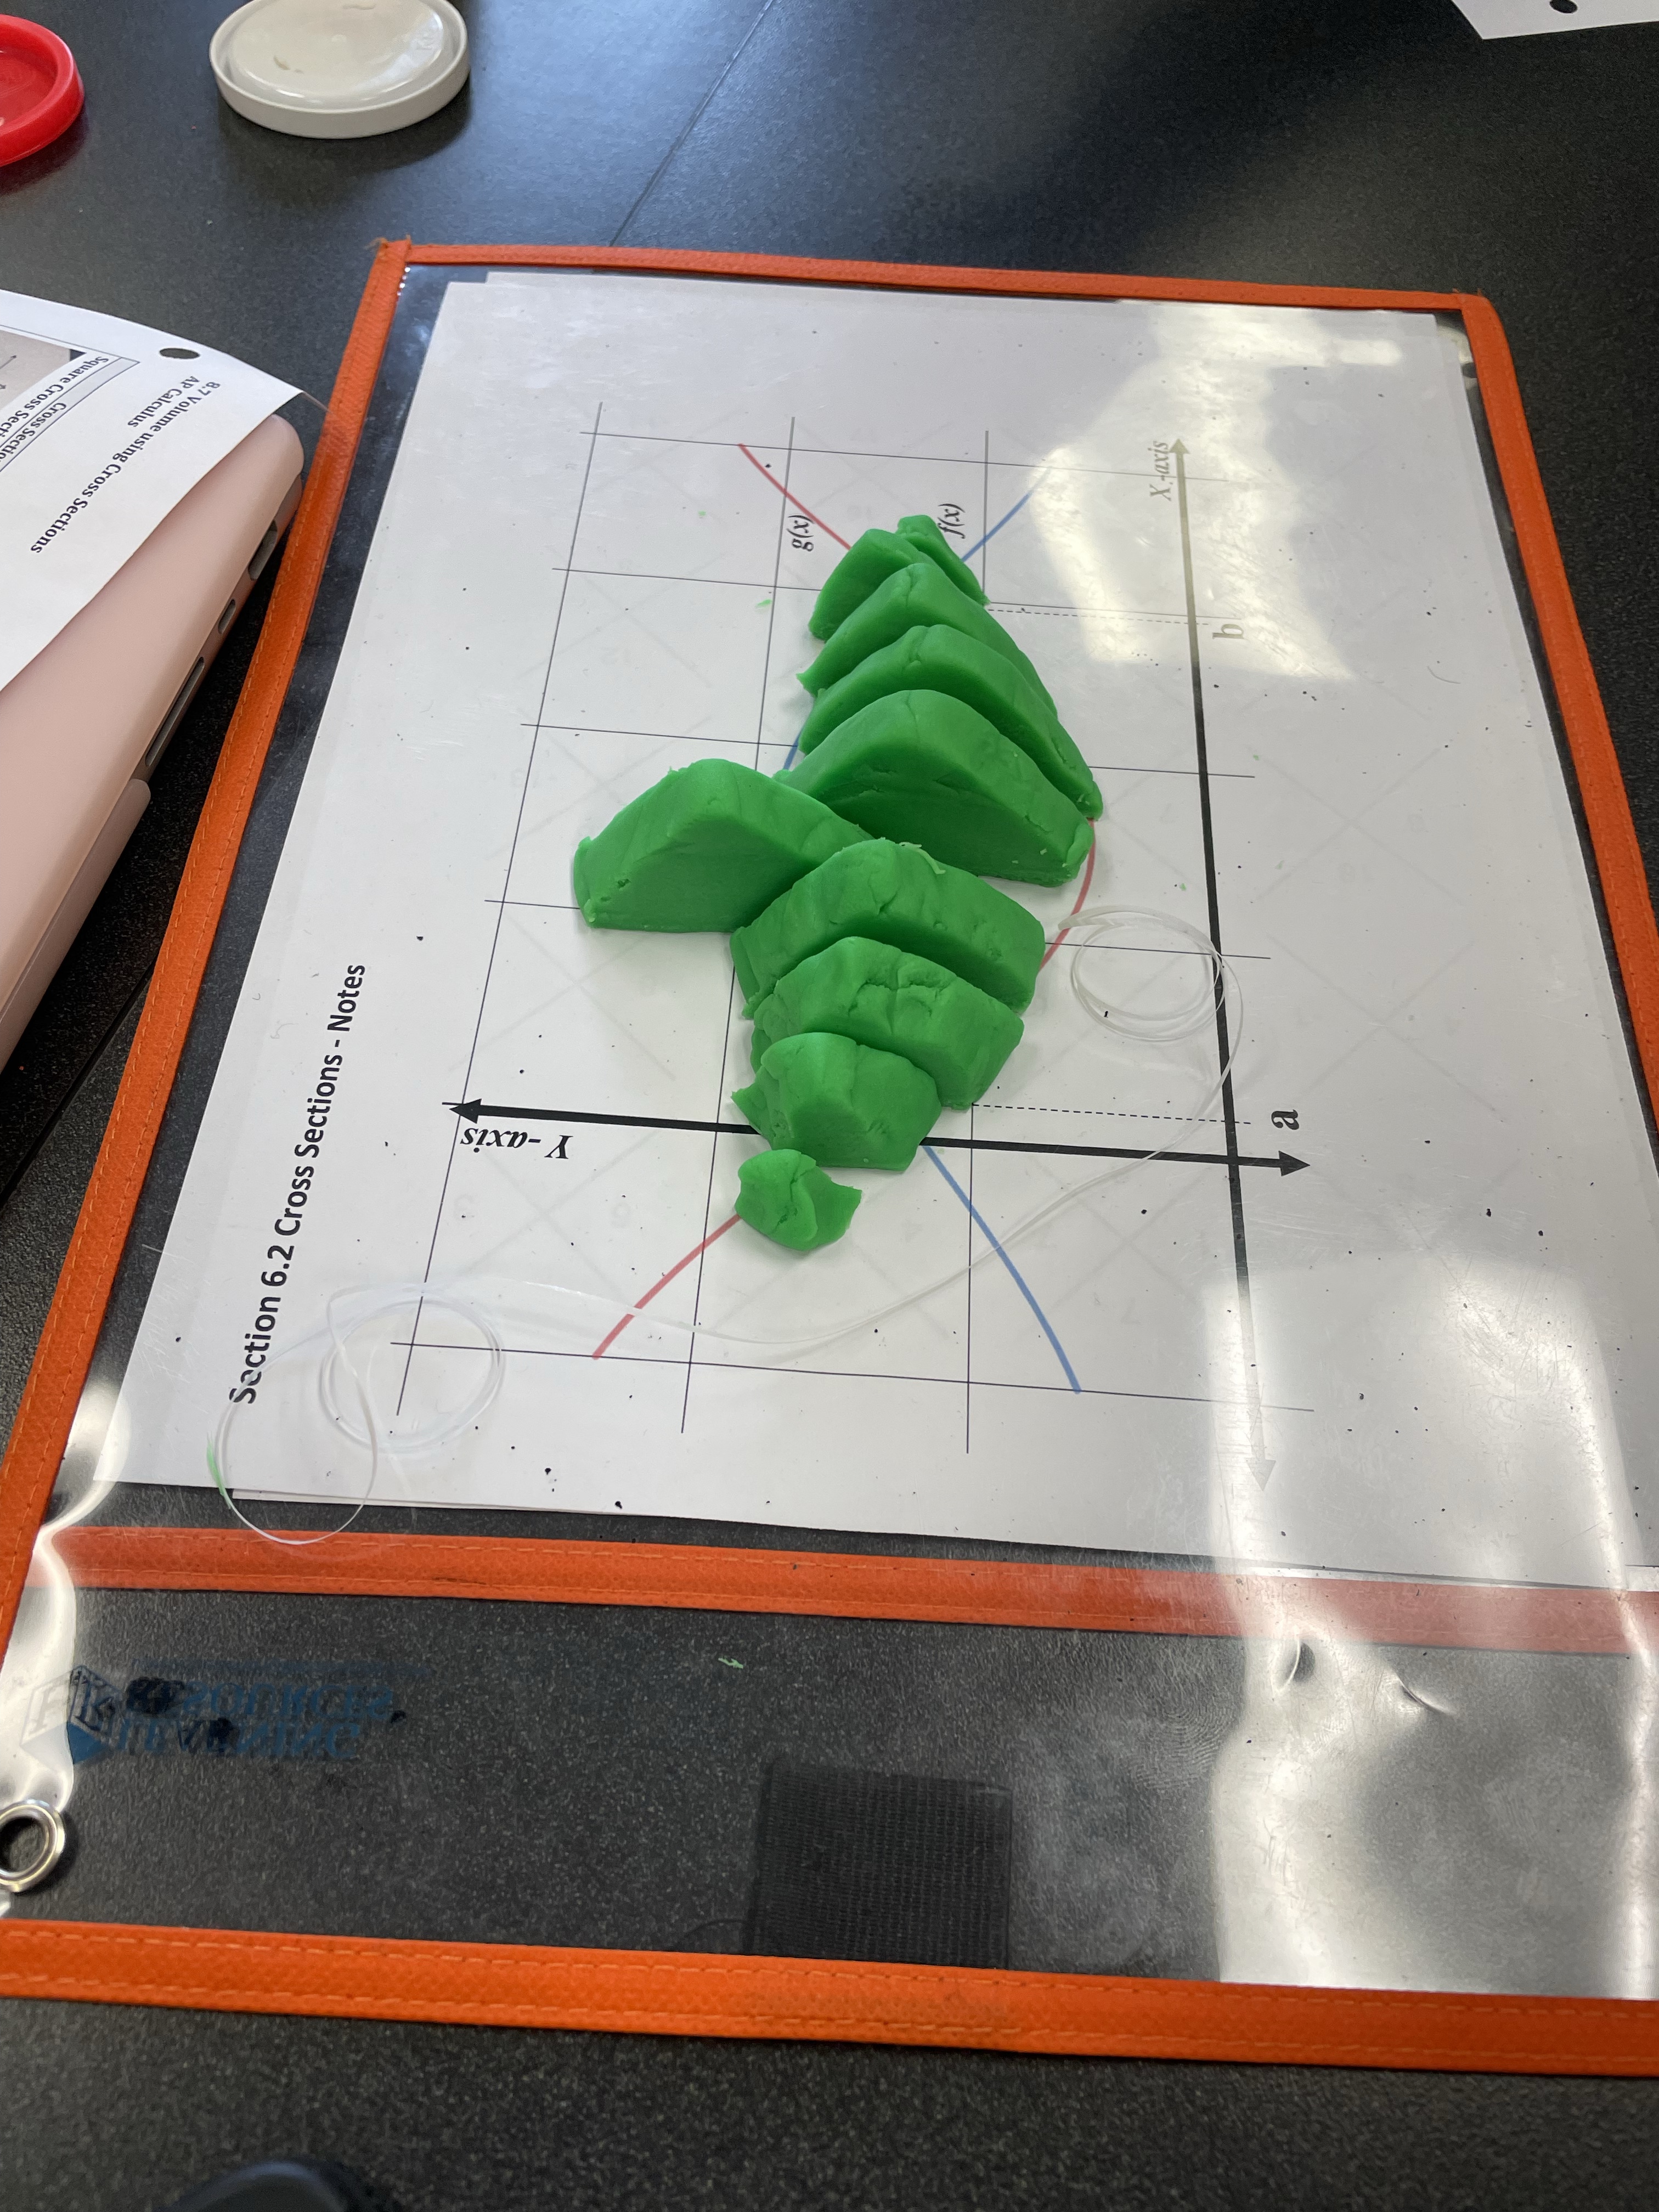
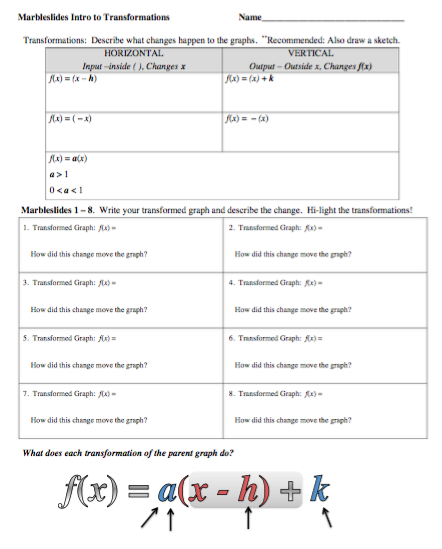
    • Graph sheet and worksheet – I put the graph sheet into slip in sleeves, so I could reuse them for my classes. You could also use plastic page protectors or laminate the graph sheet.
    • Play-Doh – I used one 4oz. can per every two students.
    • Dental Floss (or plastic knives, but dental floss works better as it doesn’t squish the top of the shape).
    • Rulers (they don’t need them for this activity, but it helps them see why they shouldn’t measure with a ruler).
    • Desmos activity
  • Directions:
    • I let the kids just play with the Play-Doh first. Don’t skip this important first step, or you will never get their attention. lol!
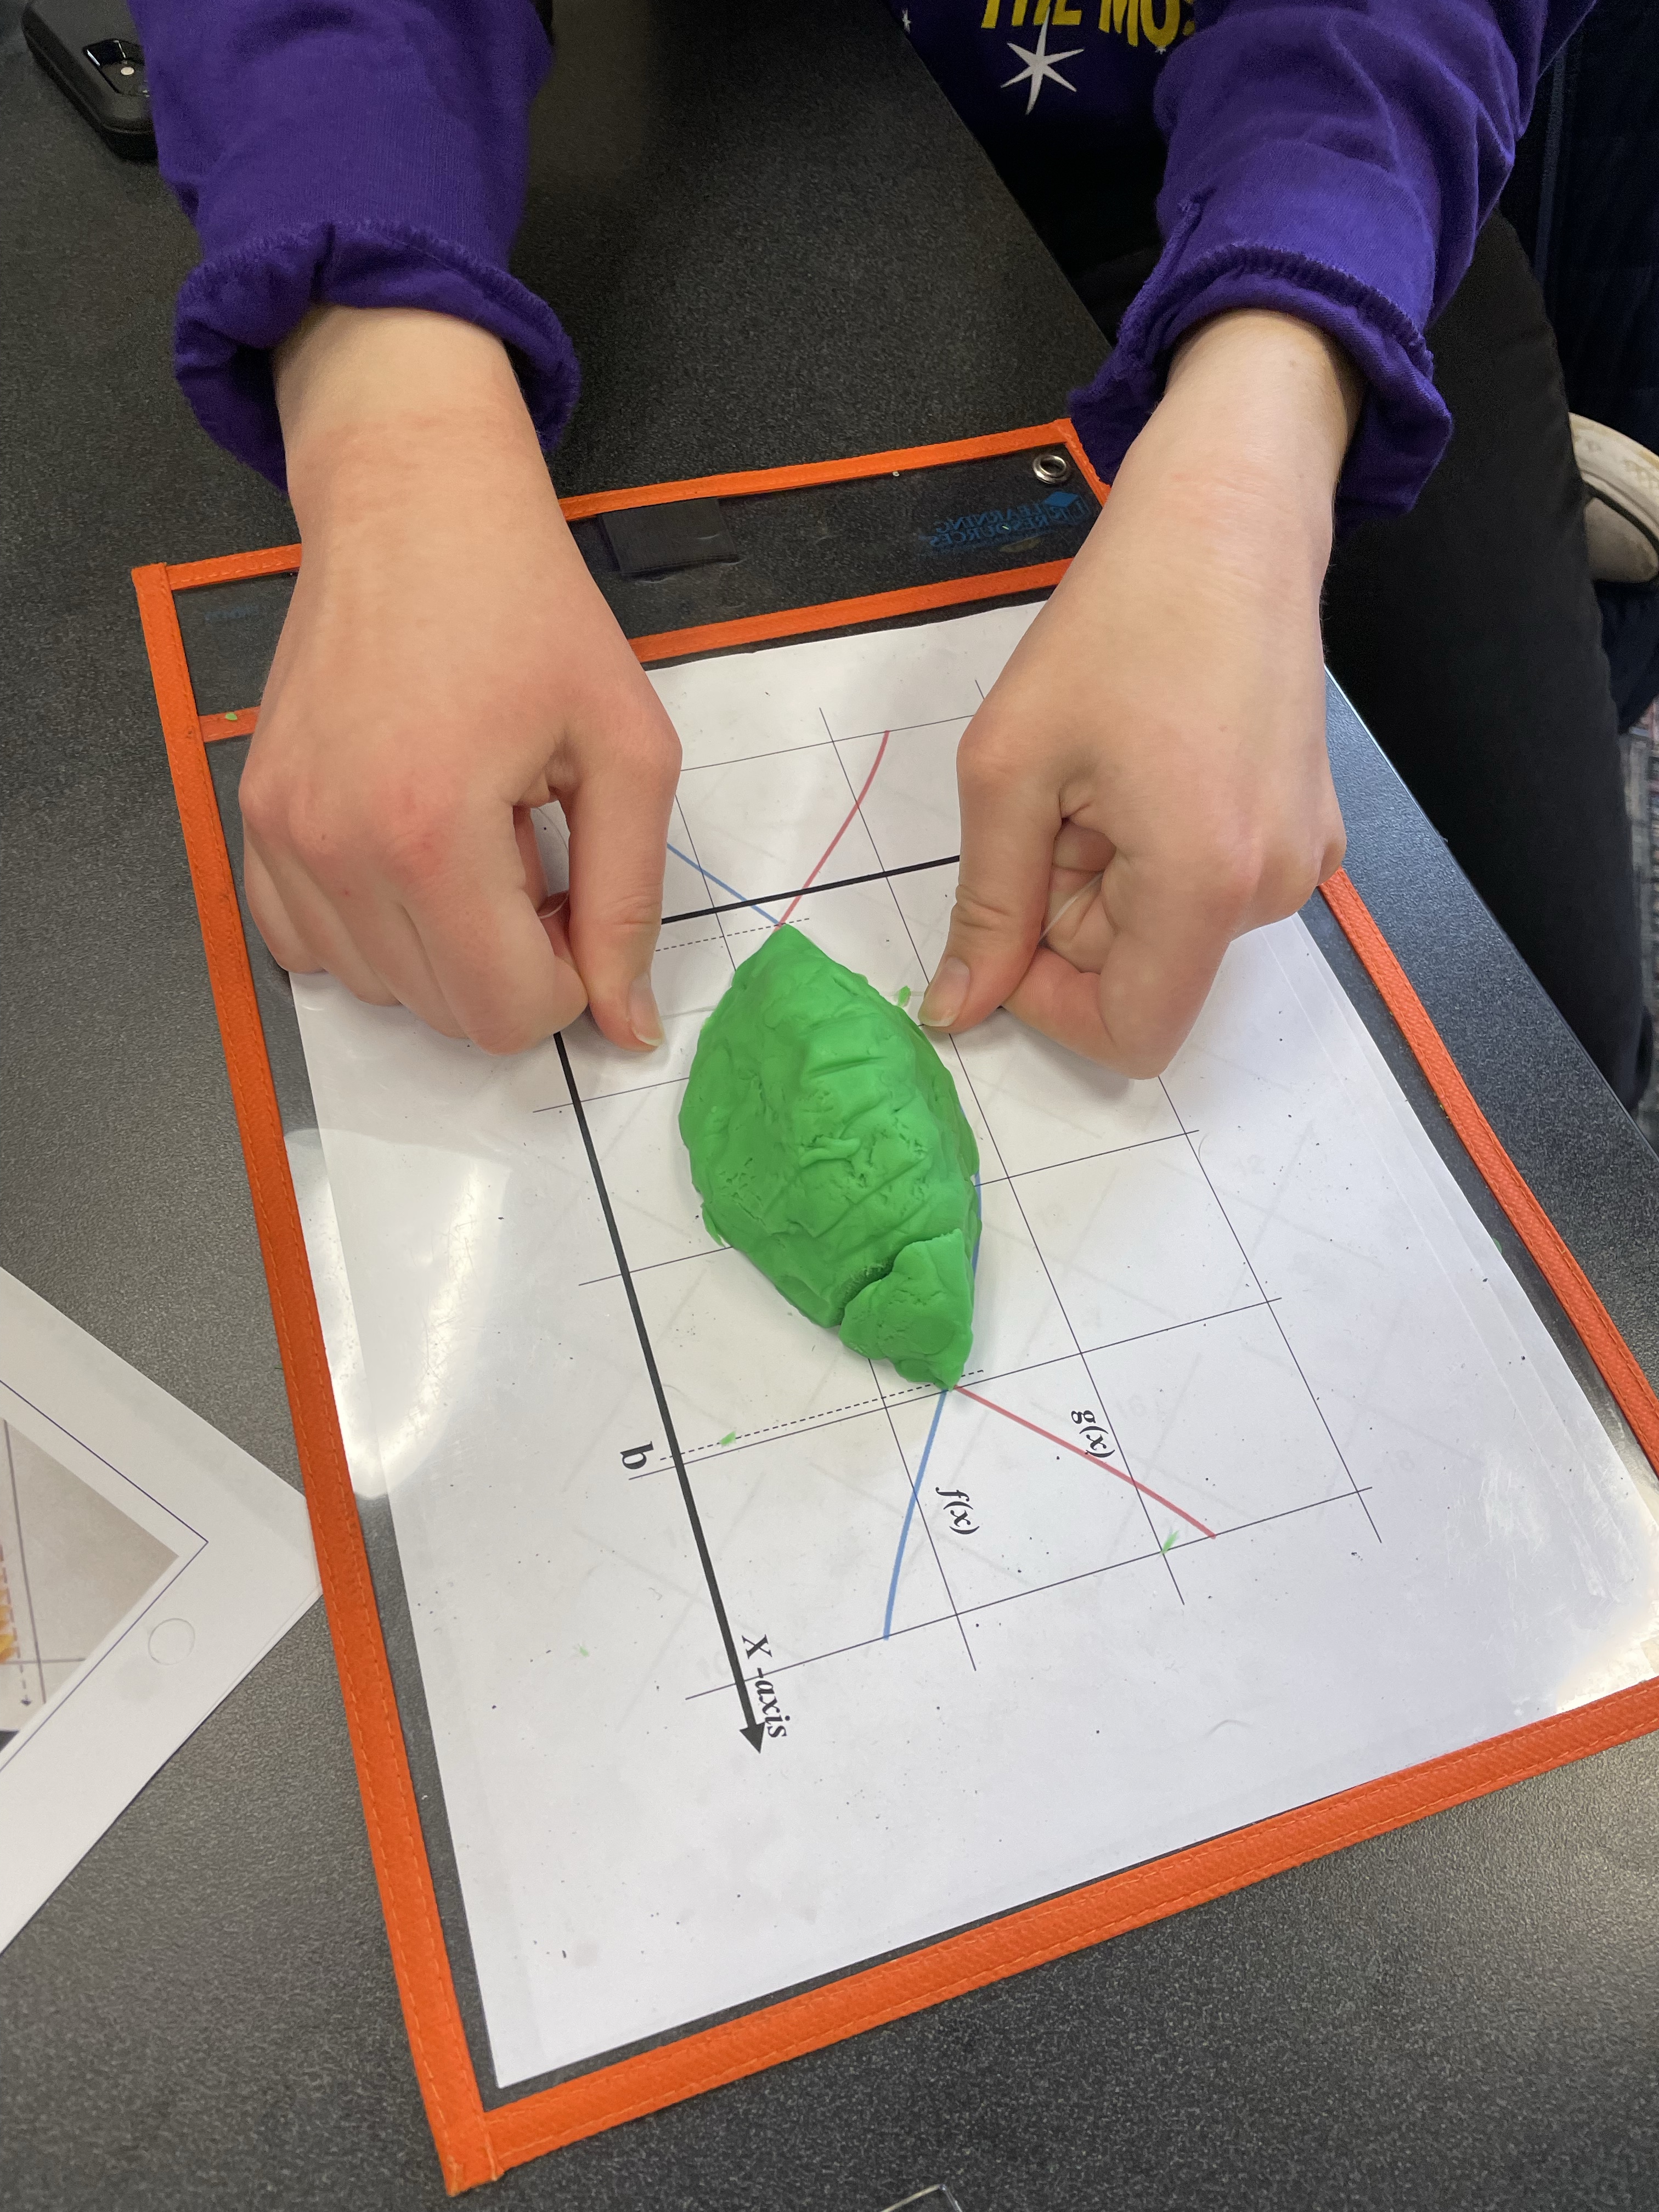
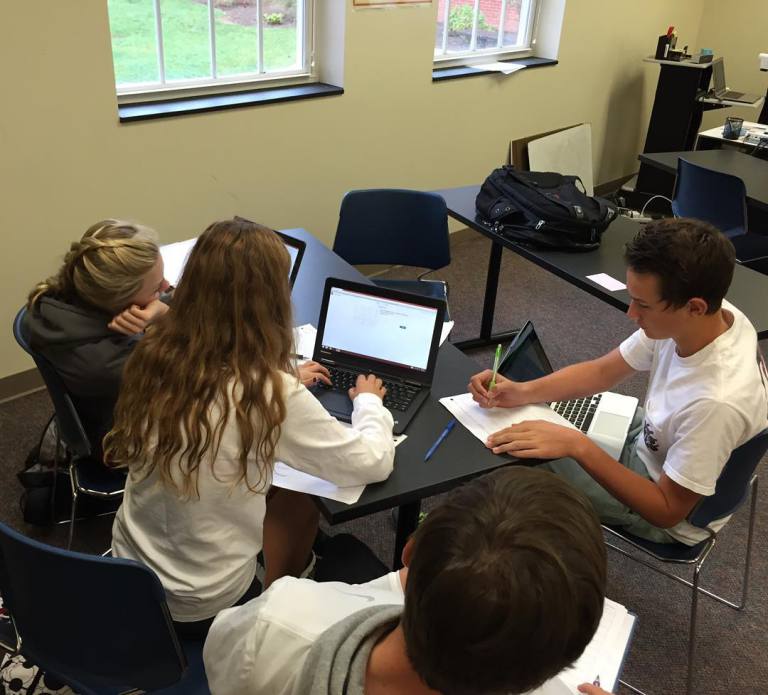
    • I had two students work together on one mat.
    • While they are playing we talked about volume formulas. I found asking them how do you get the volume of a cylinder was especially helpful as they all knew it was the area of a circle time the height. I pushed them on this, and then they told me that you have lots of circles to get the volume of a cylinder.
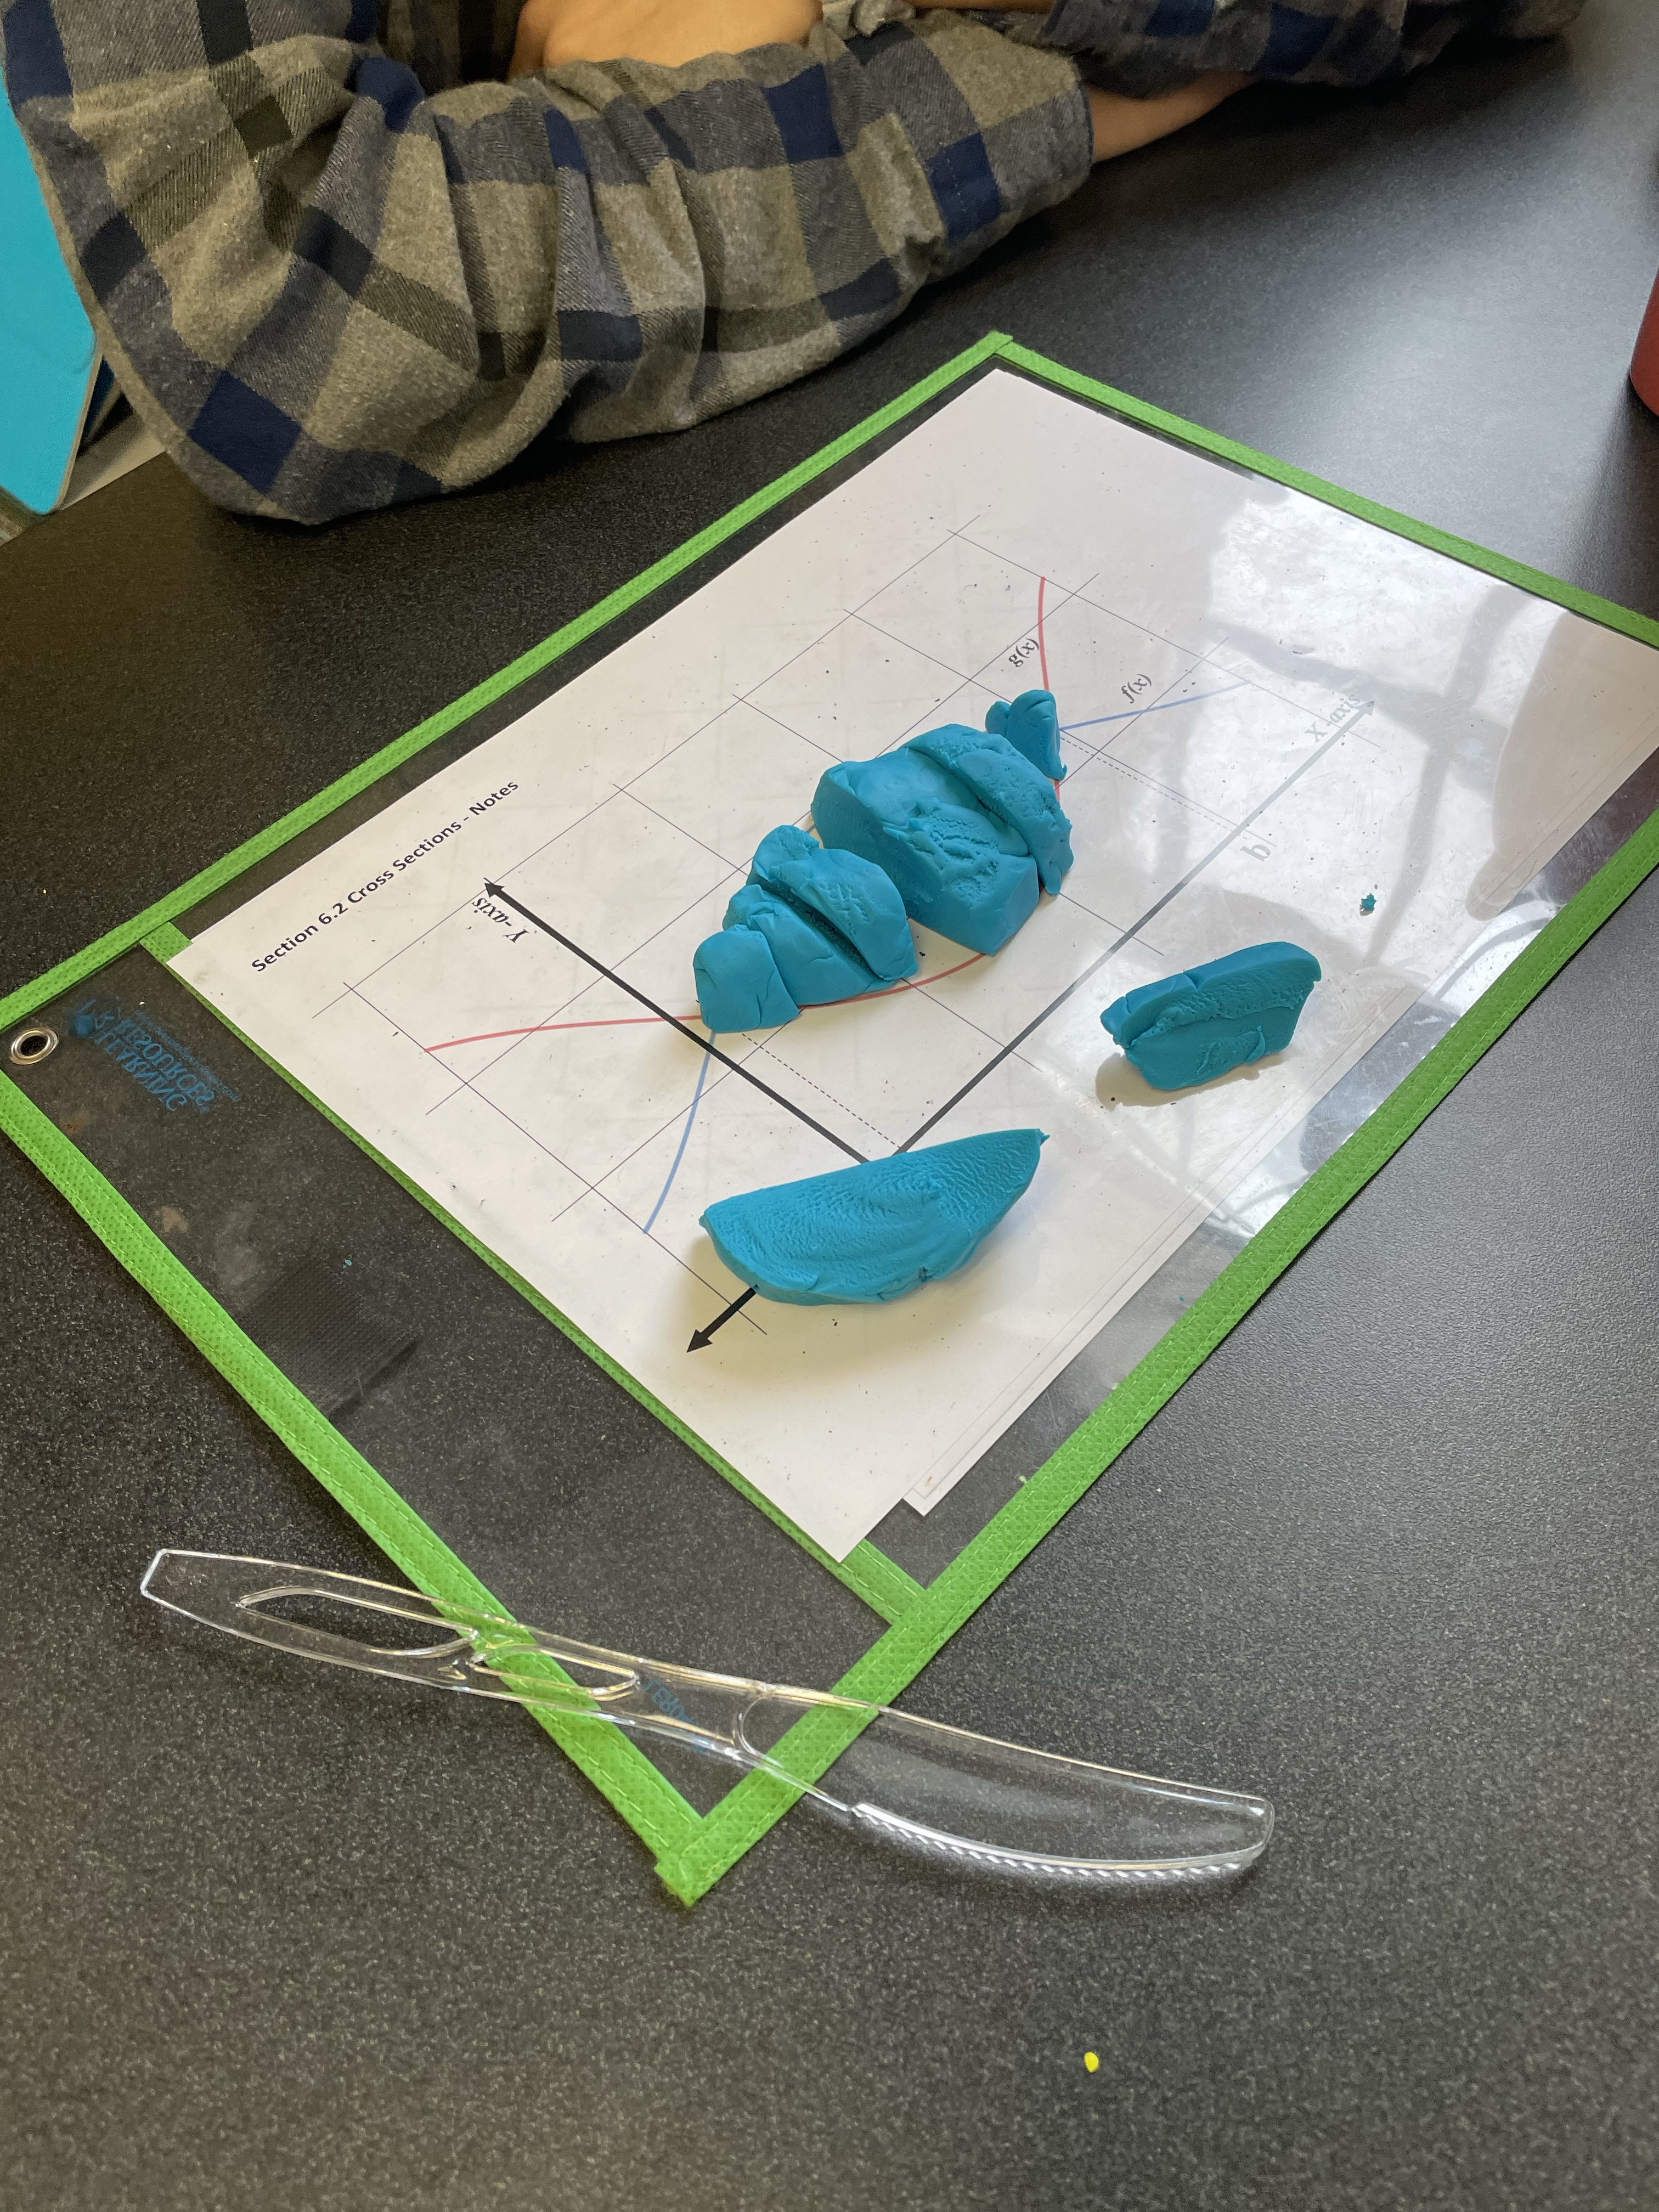
    • I told them to use all of their Play-Doh to make a solid out of the area between f(x) and g(x). Then, I had them mold their shape into the different cross sections.
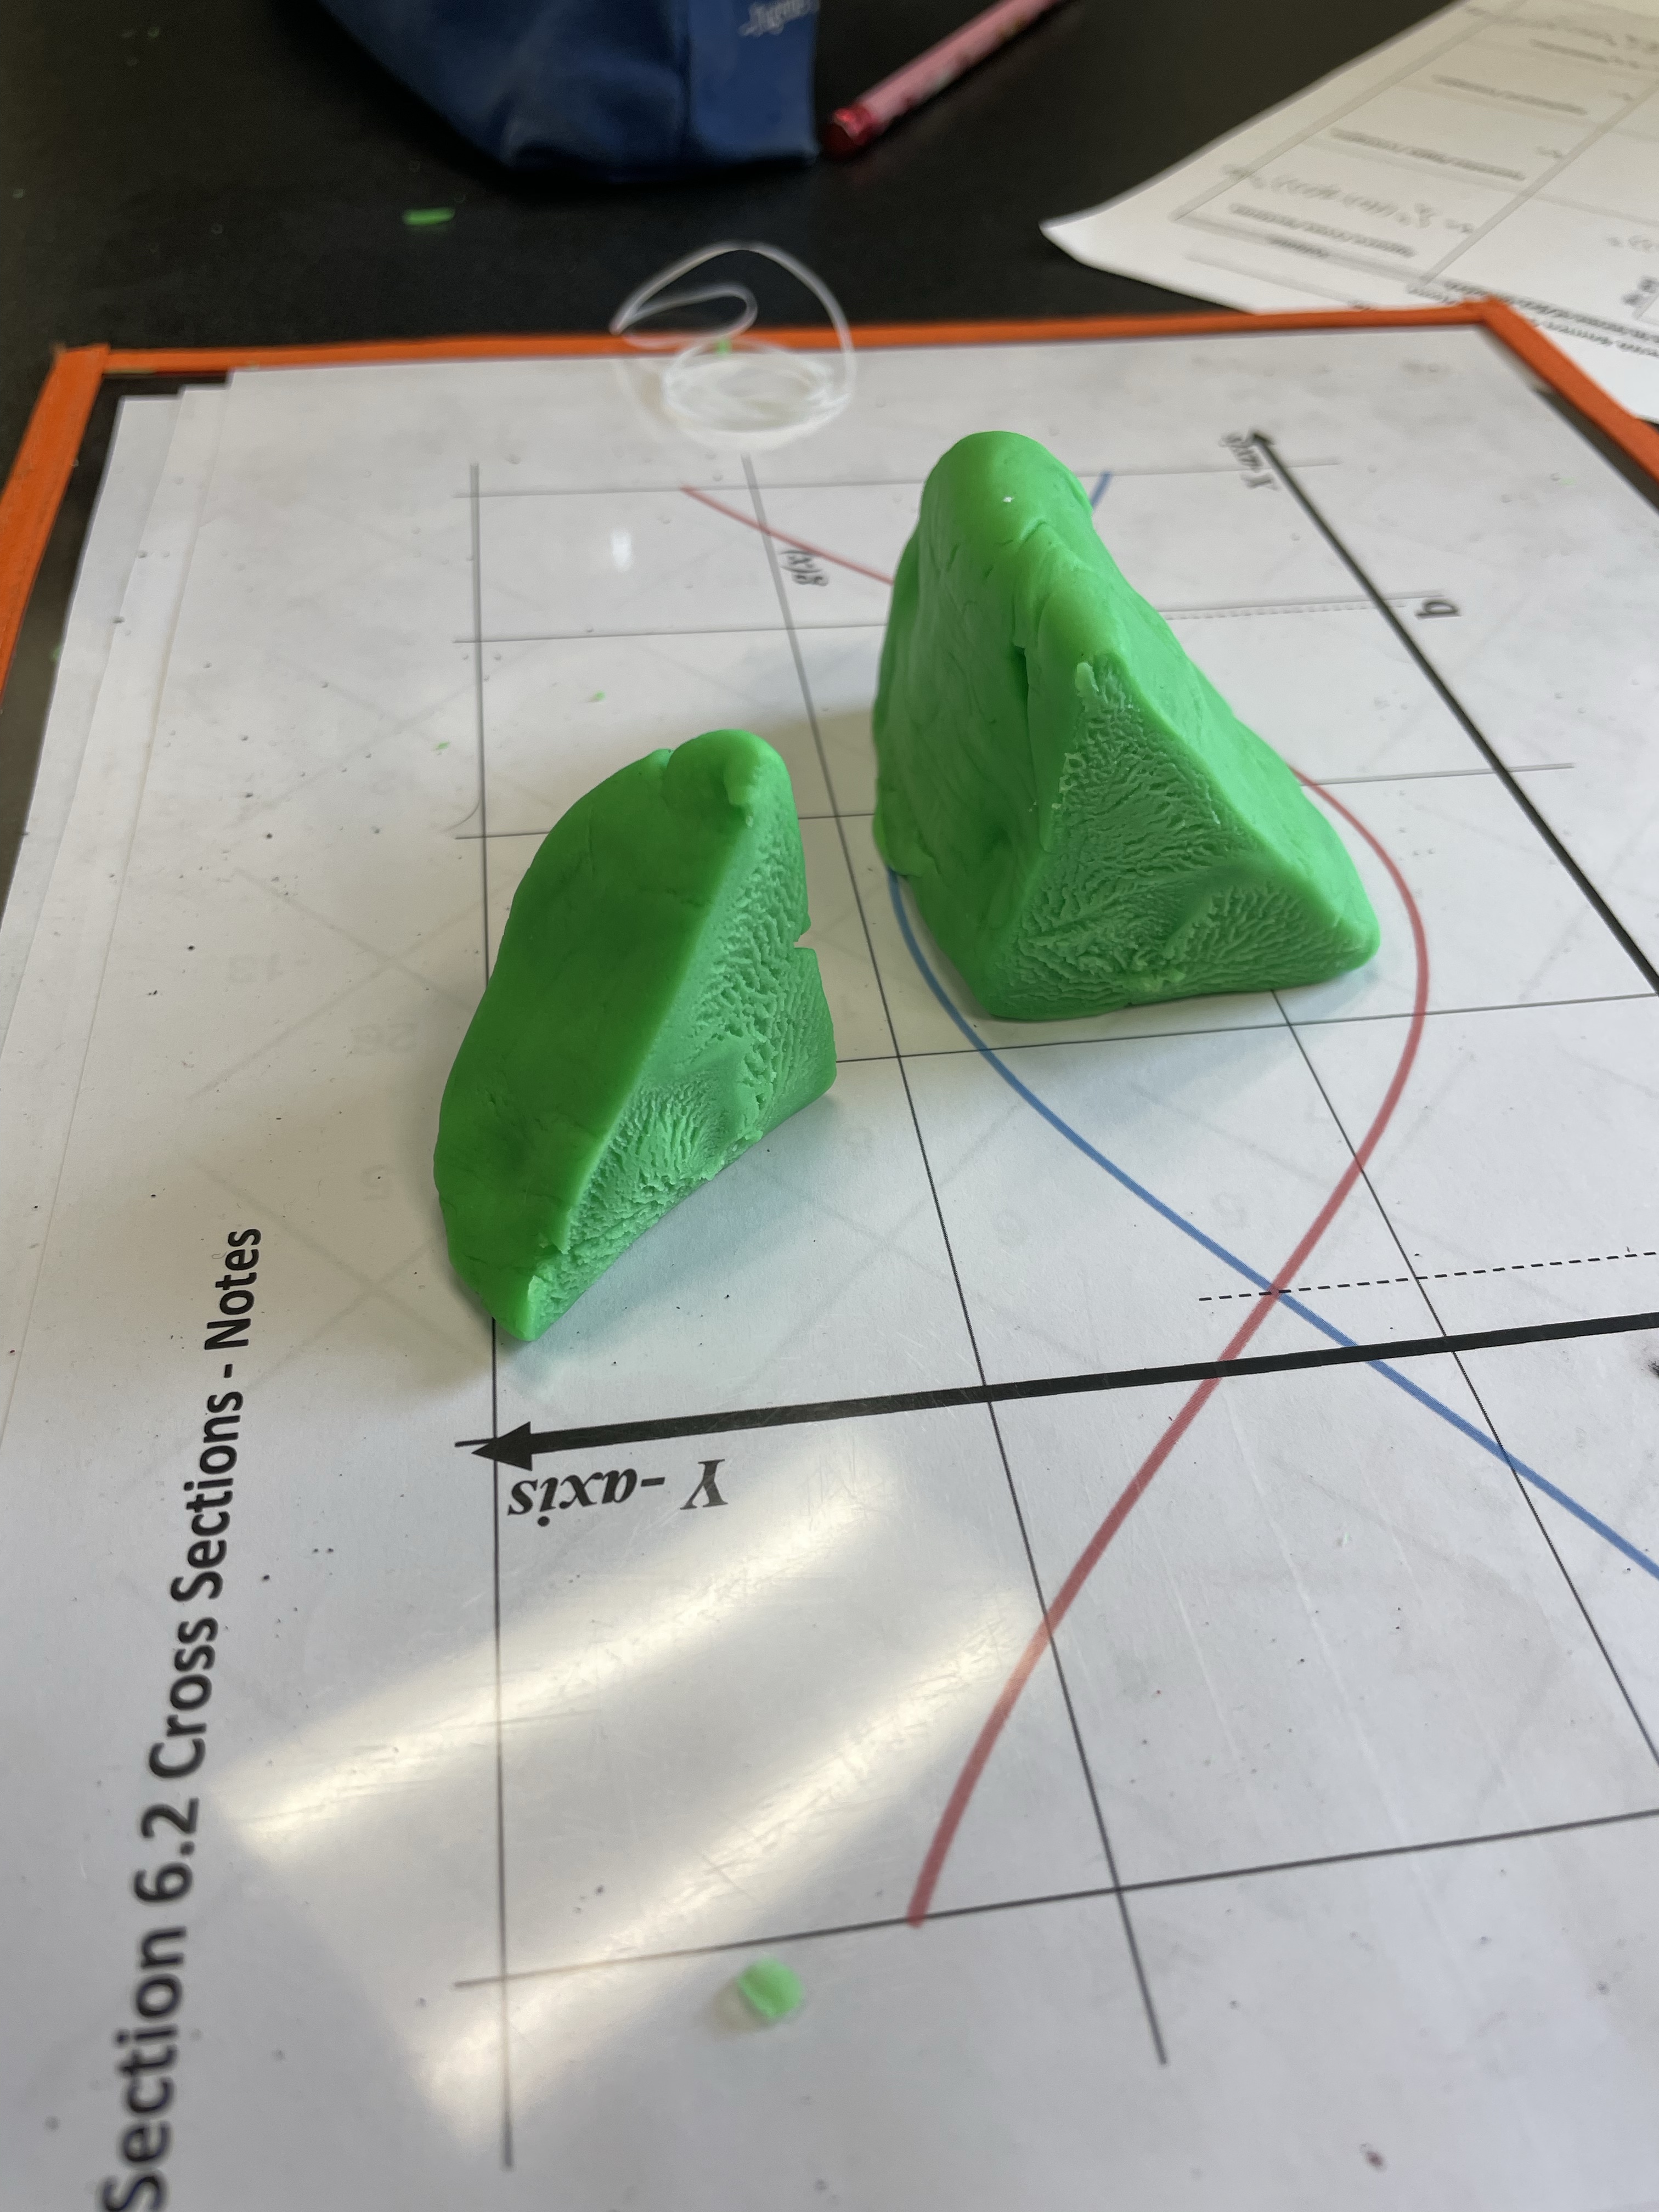
    • After molding, they sliced their solid, and took out two different sized cross sections, one from the middle and one towards the end. This was incredibly helpful as when I said, what is the base of the square? A couple of tables started measuring it with a ruler. (Rulers had been left on the table from the class before). This was accidental, but a great opportunity to talk about why measuring this is not the best method.
    • This led to a discussion about how to get the base measurement we needed. And moved to the worksheet to write down the area and the volume.
    • I did not give them the area of an equilateral triangle. We used our 30-60-90 knowledge to develop this.
    • Once we finished everything we compared the volume formulas on their worksheet. We talked about how they were different and how they were the same.
    • I planned on using the Desmos activity, but we ran out of time. So, I will use this the next day so they can see and manipulate the cross-sections of the examples we use in class.

Assessments Using Desmos Webinar, March 25th at 12:30PM PST

Please join me on Zoom tomorrow, March 25th at 12:30 PM PST for my Assessments Using Desmos webinar!

I will talk about test integrity, grading, giving feedback, and how to create self-checking slides with computation layer. How to give feedback inside Desmos (NEW FEATURE!!) will be covered as well.

The session document is located here and webinar will be recorded if you aren’t able to attend. Note: It usually takes about a week to process and publish the recording.

I looking forward to seeing you there!  🙂

IMG_1014.JPG

Link: https://zoom.us/j/159450515

Desmos Activities for Distance Learning

I’m still on “Spring Break”, and we do not start online learning at my school until March 26th. I am glad that my school community has this time to process, as I am not ready to think about online learning yet. I don’t know what online learning looks like for my school yet. And I think that some students may crave the structure, but that others will need compassion, and space.

I do not want to assess my students. I am sure that they are feeling the stress of uncertainty just as I am, and I do not want to add to their stress. I want kids to feel connected to each other, especially if they need that. I would also like to mix up my students online learning, so they they are not just watching online videos and doing practice problems. I would love for their online learning to be creative, and not too monotonous.

Screen Shot 2020-03-17 at 3.32.41 PM.png
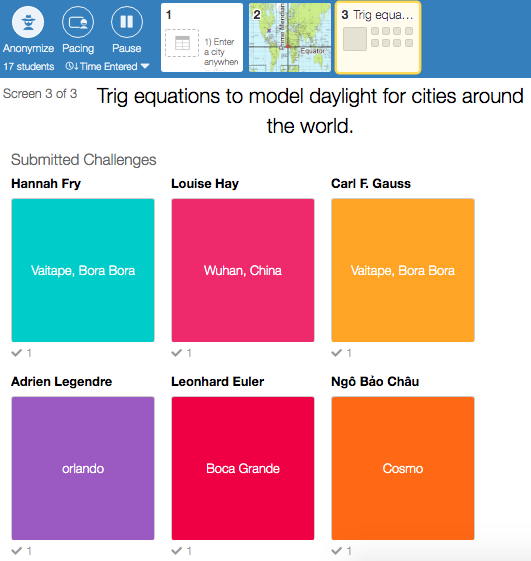
I plan on using Desmos Activity Builders that connect students to each other, like Point Collector, and especially activities that contain Gallery Slides. A Desmos Gallery is a screen at the end of an activity where students get to create their own challenge for their classmates. And then their classmates pick each others challenges to solve.  I feel that doing these galleries will not only allow students to be creative, but also feel connected to other students. I plan on encouraging them to reach out to the “creator” while working on a challenge, or providing feedback after.

I’ve created a Collection of Desmos Activity Builders that contain gallery slides here. I am sure there are more I am not aware of! Please let me know and I will add to this collection. I would love to know how it works out for your students, and the ways that you are incorporating galley slides, and all Desmos in general, in your online learning. Enjoy!

Screen Shot 2020-03-17 at 3.25.22 PM.png


Desmos Activity Builder for All Disciplines

I am presenting “Do More With Desmos Activity Builder” for ALL disciplines at the annual NCAIS Conference (North Carolina Association for Independent Schools) October 27th.

I am excited to bring Desmos to other disciplines because it is not only an amazing engagement software, but it is also FREE for teachers.  I presented it to non-math teachers at my school last week.  They loved it and one teacher even created a card sort before she left my session!

I created a self-paced Desmos Activity Builder for non-math teachers.  This activity showcases the Desmos screens and includes tutorials on how to get started with Desmos.  Please share the Desmos love with non-math teachers in your school!

Screen Shot 2017-10-22 at 11.14.06 AM

Stephanie Blair, another Desmos Fellow, created a Google Doc to share other non-math Desmos Activity Builder.

Screen Shot 2017-10-22 at 10.17.21 AM


Assessment Using Desmos

I use Desmos in class on an almost daily basis.  For our midterm, I decided to let my students use Desmos.  As new Algebra learners, many of my students often make small mathematical errors, especially on exams.  My hope was that using Desmos to verify their answers would help them see graphically when they had made an error, and be able to correct it.

How I created it:

I made a traditional exam on paper and then a Desmos Activity builder to go along with it.  I created a “Welcome to the exam” slide with instructions.  I created two slides for each question, one introduction slide and one working slide (usually a graph slide).  I also added “STOP” slides in-between each question to help the students.  Most of the questions were on paper,  then students verified their answers with Desmos.  However, I did have two slides where the graphs were on Desmos, and they had to write the equations of the graphs.  Here is a sample of the slides.

screen-shot-2016-12-23-at-11-12-12-am

How I implemented it:

If you have iPads, Desmos has a test mode app you can use.  We are 1-1 so my students did the Desmos part on their computers.  I did not want students having the exam on their computers, or accidentally sharing the exam, so I made sure that they were not signed in to Desmos.  Since we use Desmos frequently, I had to instruct my students to sign out of Desmos after they went student.desmos.com.  I sat behind the students, so I could see all of their screens at the same time to ensure they only were on this screen.  I had them close the window when they were finished.  When they put in the code without signing in, they have to hit, “Join without signing in.”

  1.  Go to student.desmos.com
  2. Sign out of Desmos  screen-shot-2016-12-23-at-7-33-59-pm
  3. Instruct your students to enter the code, and to click on “Continue without signing in.” I had them enter their first and last names. screen-shot-2016-12-23-at-7-38-32-pm
  4. I went around to each computer once they started to verify they were not signed in.  **To do this, at the top right hand side of the page, you should see their name, and then an option to sign in or create an account.  Then you know they aren’t signed in.screen-shot-2016-12-23-at-7-34-59-pm
  5. You can “pause” the activity at the end of the exam so students could not go back to individual screens after the exam. I did not do this, but will in the future. (Thanks John Rowe!)

How I graded it:

I had them put all of their final answers on the test paper.  This way I could grade it like a traditional exam.  I went to Desmos if I had a question about their answers.  For a few students, I was able to give some points back if their Desmos was correct, but they messed up on their test paper. I loved being able to verify their test paper answers on Desmos.  It helped me see what they were thinking and award partial credit where appropriate.

I loved it!

During the exam I kept an eye on the teacher dashboard to see how kids were doing.  I loved seeing kids quietly go, “YES!” and celebrate at their desks when entered their answers in Desmos and it worked.  I also liked using the teacher dashboard to watch the kids work during the exam.  I saw one student enter the incorrect graph, and then see that it was wrong.  They went back to their paper to think and work more, and was able to enter the correct graph the second time.  It was amazing.  The tough part was when students didn’t know how to do the problem, and then their wrong answer was verified on Desmos.  For the future, I really want to try to incorporate Desmos into more assessments, not just midterm exams.


What they said:

Most of my students really loved being able to use Desmos.  It was a great reassurance for the majority of the kids.  The last question (if they had time) asked students how they felt about the exam and if they felt Desmos helped.  I loved reading their replies!  My favorite was, “DESMOS WAS A LIFE SAVER”

screen-shot-2016-12-23-at-9-42-45-pmscreen-shot-2016-12-23-at-9-42-37-pmscreen-shot-2016-12-23-at-9-42-57-pmscreen-shot-2016-12-23-at-9-43-34-pmscreen-shot-2016-12-23-at-9-44-04-pmscreen-shot-2016-12-23-at-9-42-15-pm

Here is the Desmos code if you want to check out the sample Desmos midterm in more detail.

Updated – Great tips from commenters!

For future, just “pause” from the teacher dashboard and that prevents them from accessing it outside of class time. – John Rowe

John Rowe had an excellent suggestion that I had not thought of before!  At the end of the exam, you can hit the PAUSE button so kids will not be able to access the exam later.  Brilliant idea and I can’t believe this didn’t occur to me!

I made shortlinks and printed them on the assessment paper which had the actual questions so being logged in wasn’t as much of an issue.  – John Golden

John Golden had a great idea about using just a Desmos calculator link instead of an activity builder and then giving the students short links on their tests.  I love this idea, especially for shorter assessments.  It is what I was looking for to be able to incorporate Desmos into smaller assessments.

Introduction to Transformations Marbleslides!

I just made my first Marbleslides in Desmos!  It was incredibly easy, and the students said it was a really fun way to learn.

This Marbleslides activity introduces students to transformation form and lets them practice moving graphs around with Marbleslides (SUCCESS!!) using the new parent graphs they just learned.  My students know transformation form with linears, y = a(x – h) + k, but have not moved any other graphs around yet.  (For this activity I used the absolute value, quadratic, square root, and cube root functions.)

I have two goals with Desmos this year.

  1. Shorten my Desmos Activity Builders, so that I have time in class to practice with the students outside of Desmos.
  2. Make worksheets to accompany my Desmos Activity Builders, so the students can have notes to look back on.

I felt this activity accomplished both, and my students really seemed to enjoy it.  I have provided the activity and the worksheet for you to try.  I would love feedback!

Desmos Introduction to Transformations Marbleslides

trans-ms-des

screen-shot-2016-10-22-at-9-52-32-am

Exploring Convergent and Divergent Geometric Series with Desmos

I could not find a Desmos teacher activity exploration for series, so I made my own.  Everything is better with Desmos!

This activity works best if students are already familiar with geometric sequences and series.  They are really just exploring convergent and divergent.  I instruct them to look up the words convergent and divergent in the dictionary.  I thought knowing these definitions would help it make sense.  I also included a geometric sequence and series link from Math Is Fun at the end.

Desmos Convergent and Divergent Geometric Series Activity.

Screen Shot 2016-04-28 at 9.53.55 PM

Enjoy!

Inverse Functions and Logarithms

After the Zombie exponential problem, several students wanted to know WHAT was this mysterious LOG thing and especially why it worked?  Enter, inverse functions.

I made an Inverse Functions guided worksheet for my students.  It is self-directed and has them use two different colors for the graphs.  They can get through the entire sheet without much help, and make all sorts of great discoveries on their own.  I blew it in the first class I taught by trying to go over the sheet with them way too soon after handing it out.  I wanted to explain a couple of things before they got too far.  DON’T DO THAT.  Give them ample time to read it, graph things, make small mistakes, and discover.  It makes a huge difference not only in understanding, but in their engagement and attitude.  They really don’t want to hear me talk.  Instead, play music in the background, walk around and see their work, even answer a FEW of their questions.  It is so good for them to work on their own!

Algebra 2 Inverse Functions Worksheet.

Screen Shot 2015-11-07 at 5.09.06 PM

After we went over the worksheet together, we played with the awesome inverse graph created by Desmos that I modified with the equation y=2^x.  The kids can move the slider and it shows the point and its inverse on each graph!

Screen Shot 2015-11-07 at 5.10.15 PM

I created the graphs with an amazing program that Mrs.Davis found called GraphFree.

Algebra 2 Transformations Unit, Starring Desmos Teacher Activities

I teach out of the Discovering Algebra Book.  Last year I tried out the order in the book, and it was disastrous.  The book introduces a new parent graph with each transformation. That did not go well with my students.  It was confusion city.  This year, I went back to what I know.  I taught parent graphs first, then transformations.  Finally, they learned how to write equations given the graph with dilations.  Whew.

Glenn’s convinced me to use the “transformation form” (AKA h,k form) last year in Geometry.  That was a great start with my students in Algebra 2, as we were able to use it right away starting with linears.  I can’t tell you how many problems using the transformation form solves, and how relieved kids eventually are, not to be married to the y-interecept.  Many times, they aren’t given the y-intercept, so y=mx+b is used much more sparingly this year.  It takes my newbies a while, but they get it.  Why kill yourself trying to find where this stinking graph crosses the y-axis when you could put pick ANY point out on the line.

85dda-11850303_153438328335826_1353010797_nThanks to Glenn, I knew to use transformation form from the start.  Thanks to Meg, I had a ton of material to draw from.  And thanks to Desmos, the kids could actually discover transformations ON THEIR OWN.  Disclaimer.  Even with all of this wonderful discovery and conceptual learning, students NEED you to summarize what they have learned with them, and then keep them practicing their new discoveries to cement those discoveries into their brains.  With conceptual learning, many times they are pretty sure they understand what is going on, but they really love when you affirm that.  Also, some kids have a tough time getting there, so a thorough summary at the end helps everyone.

When I taught transformations years ago, I would teach parent graphs, then give them a list of transformation rules to learn and apply.  It was pretty dry and procedural.  Now, I have moved to Desmos, where the students play with graphs to learn what the transformations do without ever seeing any “rules”.  It is awesome, and it sticks.

Screen Shot 2015-10-28 at 8.31.28 PMI still teach parent graphs first and function notation first, along with domain, range and  interval notation.  I actually teach them with the material in the previous chapter so they can know the parent graphs cold before we even start looking at transformations.  After they learn the parent graphs, they study transformations and reflections and then move to dilations.  Oh, those dilations.  My students work with computers and each other for the entire unit.  I also give them handouts so they can take notes and graph as they go along.  I didn’t give them the “transformation rules” until one of the last days.

All of my transformation files are in this box folder.  And the Desmos Teacher Activities are linked below.  You can’t use my activities, but you can’t copy Desmos activities YET for editing.  I am sure that is coming soon.  You will see a vocabulary sheet referred to in the Desmo’s activities.  To start every chapter, I give my students a vocabulary sheet.  They takes notes on it and then most of their important terms are together in the same place.  The vocab sheet is also in the box.

Desmos Teacher Activities – Transformations

  1. Transformations – Shifts and Reflections
  2. Transformations – Dilations
  3. Dilations again (as a short review in-class lesson)
  4. Transformation – Extra practice

Desmos Teacher Activity Builder – Systems of Equations Review

Screen Shot 2015-09-11 at 4.55.41 PM

Desmos teacher activities are amazing!  You can find them all at teacher.desmos.com (not Desmos.com).  And now, you can even create your own!  I just made my first Desmos Activity last week on systems of equations.  It was incredibly easy to make!

Screen Shot 2015-09-11 at 4.32.29 PM

Overlay – See all student work at once.

I teach Algebra 2 students so many of them have already worked on solving systems of equations in Algebra 1.  However, since it was long ago, it is also far away in their brains.  I wanted to let them work through a review without having to directly teach the concept from scratch.  I also didn’t want to reteach parts of the concept they already knew. Desmos activities let you do this beautifully.

Screen Shot 2015-09-11 at 4.32.02 PM
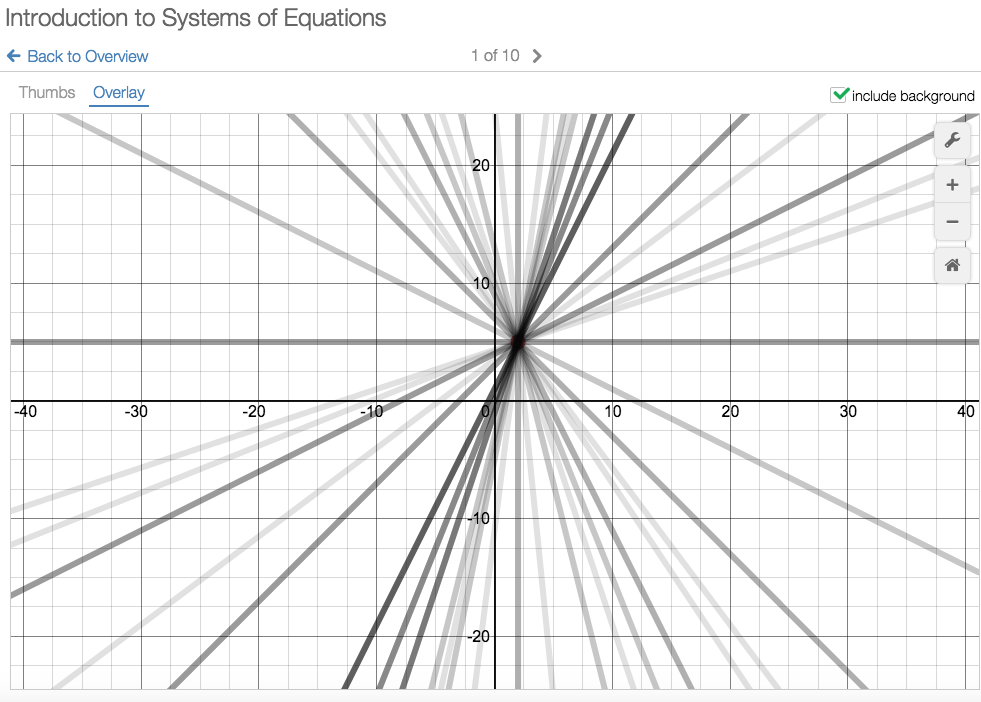
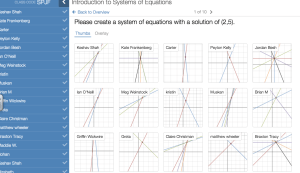
Since you can see their work on your computer in real time, you can see if the whole class needs some review on a topic or if you just need to go and visit a few students.  I project the overlays, and students love to see all of their work together.  Another neat feature when you add a “Question Page” is that students can see previous student answers AFTER they type their answer in.

I also want to thank Sam and his new Better Questions Blog because that is where I got the first question of the Desmos activity I created.  It was a wonderful way to have students think about systems of equations!

Screen Shot 2015-09-11 at 4.57.36 PM