Law of Sines and Cosines and Desmos Geometry!

I do Standards Based Grading and I don’t grade homework. All of my students grades are based on assessments. Recently I have been giving my students graded assignments. I try to design them so that they take the students through different types of problems and have a reflection. I let them work with each other, check their answers with Desmos, and come to see me for help if needed. I’ve only done two this year, but many of my students really liked them. They said that the stress was lower than on assessments because they could ask me questions. They also liked working with each other and being able to check their work. After the graded assignment, I usually give another assessment, and I have noticed a large improvement in grades, especially from students who usually score lower on assessments. Students tell me that the graded assignments really helped them learn and understand the topic better.

This chapter I gave them a graded assignment on vectors and the law of sines and cosines. They have already learned the ambiguous case  with the law of sines, and some students seemed to be relying on memory, but I could tell they really didn’t understand what was going on. So I decided to have them finish constructing a couple of triangles, and to take them through the ambiguous case with law of cosines.

Today I gave them an activity builder where they had to do an ASS triangle with the law of cosines, and helped them learn how to use the Desmos Geometry tool. I want them to be able to check their answers on their graded assignment with Desmos Geometry. I haven’t used Desmos Geometry with students yet, but it was really fun today! Plus,  I love that they learned a new tool.

If you use this, I would LOVE feedback!  🙂

Law of Cosines AB using Desmos Geometry– I loved how some kids actually made the ONE triangle instead of the two separate ones.

Triangles Graded Assignment, docx

Triangles Graded Assignment pdf

Pascal’s Triangle, Patterns, and Binomial Expansion

Today the CPM lesson in my Algebra 2 book started with a lesson from my MS past, Pascals Triangle. I only have two new lessons of the year left before our final assessment and then exam review begins. So I gave them extra time to discover the patterns and then play with Pascals Triangle after their quiz. They’ve had a stressful week (it is May!) and the quiz was tough, so coloring was definitely the right call! Some kids got so into coloring they didn’t even care about the patterns. I didn’t mind at all because they were coloring one of the patterns!

After discovering and then sharing the pattens by groups, we moved on to the main part of the CPM lesson, discovering binomial expansion within the Triangle, then using substitution to extend it to more then (a + b)^n.

I don’t know if it was the all of the cool patterns or the coloring, but my students really got into this lesson today. We usually work in groups in my class, but a couple of students got really involved in the math and extended what they were learning. I usually bring students back to group work when they go off on a tangent, but they were so excited that I just let them go! I’m so glad I did bc they developed these beautiful ideas. Drake was so proud of his that he labeled it and left it for the rest of my classes to see!

My students also created beautiful triangles. Next year I am going to make the Triangle larger so they can see the Sierpinski pattern even more through their own coloring. We decided to do a Pascal’s triangle photo shoot in a couple of my classes. What an amazing way to end the week.

One-Sheets Are Back!

We just finished our first chapter in Algebra 2.  This means that we also just did our first “One-Sheet” Study Guides!

  1.  I provided them with a list of the 6 main topics of this chapter.
  2. They brainstormed in groups about what should go under each topic, using their notes and book.
  3. They folded a brightly colored piece of paper into 6 sections and label each section with the topic.
  4. Gallery Walk – They walked around the room and examined each other’s boards to see it there was something great they wanted to include on their sheet that wasn’t on THEIR board.
  5. I take pictures that I post so students can go back and read the boards if they would like.

Brainstorming with their teams

Gallery Walk of the finished boards

Creating the One-Sheet

IMG_1737

Creating the One-Sheet from their boards

Advice to Next Year’s Students

I give my students an end of course survey every year.  One of my favorite questions is advice my students would give to next years students.  I love their responses!  I make a word cloud that I show my new students at the beginning of the next year.

Screen Shot 2017-05-21 at 10.24.47 AM

I also sort their advice by topic, and then print them out for my new students at the beginning of the year.  I let the groups spend some quiet time reading them, and then discuss as a group. Here is what this year’s class said.

Advice for Success in Alg2T: (from last year’s students)

 Summer Delta Math Assignment

  • DO THE DELTA MATH ASSIGNMENT BEFORE SCHOOL STARTS
  • Do summer work and homework. Go in for help

Delta Math / Homework

  • Always check delta math. There is probably an assignment that you forgot about.
  • Check every day if you have homework or delta math to do.
  • Make sure to do homework so you understand what we are doing in the class!!
  • ALWAYS DO HOMEWORK! It is extremely important and even if you do grasp concepts, go to the help sessions.
  • Do your homework, make one-sheets, do the delta math (this will definitely help!!), and do not be afraid to ASK QUESTIONS!
  • Do your homework, study for tests, don’t stress, one-sheets are your friend, and be nice to Mrs. Reulbach. Good luck!
  • DO THE HOMEWORK AND TALK TO HER AFTER CLASS! it will help a lot! and do not wait until right before the test to seek for help.
  • do your work
  • Make sure you always do your homework, and never fall behind.
  • DO ALL OF YOUR HOMEWORK AND DON’T BE AFRAID TO ASK QUESTIONS
  • DO DELTA MATH and homework so you can come into class with questions.
  • Always do your homework and try to keep up with the speed of the class
  • DO YOUR HOMEWORK AND DO ALL DELTA MATHS
  • Always do homework.
  • Always do your homework
  • Try hard and do your homework!
  • Do your homework
  • Do your homework
  • Do your homework
  • Do your homework
  • do your homework
  • Do your homework.
  • do your homework kiddos
  • Lots of practice problems

One Sheets

  • Seriously, do your one sheets well and in detail. I told myself I would remember everything and come exam time I forgot so much.
  • Do one sheets thoroughly!
  • Do one sheets!!
  • DO THE ONE SHEETS and do them well!!! They REALLY help with reviewing for the midterm/final exam.
  • Do your one sheets!!
  • Do your one-sheet!!!!!!!!!!!!!!!!!!!!!!!!!!!!!!!!!!!!!!!!!!!!!!!!!!!!!!!!!!!!!!!!!!!!!!!!!!!!!!!!!!!!!!!!!!!!!!
  • Don’t forget one sheets! Even if it isn’t assigned as homework, it will help you for the final exam!
  • Make good one sheets because you want to be able to look back when you don’t remember anything related to the topic and learn how to do it.
  • Use review guides

Keep Up!

  • Don’t get behind
  • Don’t get behind. Ask for help. Actually do the homework.
  • Stay on top of your work
  • Don’t bomb the mini quizzes bc they add up quickly

Math Help

  • Make sure you attend Mrs. Reulbach’s help sessions! They are super helpful!
  • Go to math help and always ask questions if you are confused.
  • go to the teacher when you need help. if you do your homework then that will help you a lot in the class. Never be scared to ask something even if you think it is stupid
  • I guess go to absolutely all the help sessions if you even think for a second that you are struggling and always ask people who understand the material what is going on.
  • If you don’t understand something, ask!
  • Always review and do your work, study and you will be successful.
  • Ask for help. Don’t be afraid to ask for help.
  • Come in with a positive attitude, listen, and have fun. GO TO MRS. REULBACH FOR HELP!!!!!
  • Come to all of the extra help sessions, even if you’re a little late they go a long way.

Pay Attention / Participate in class

  • Make sure you pay attention in class
  • Participate
  • pay attention
  • Pay attention
  • Speak up if you don’t understand something. Ms. Reulbach won’t know if you don’t say you’re struggling
  • Take good notes

 Last Thoughts…

  • Keep everything organized
  • To trust Mrs. Reulbach and trust that you will understand the material she is teaching you.
  • Try to understand not only what, but why this math exists.
  • Do not stress. This class can be challenging sometimes but you just have to give it your best effort. Go see Mrs. Reulbach, do your delta math and don’t overthink anything – think smarter not harder.
  • Its fun, good luck.

Quadratic Fireworks! (Projectile Motion)

Today I taught my students about projectile motion.  Well, I say that, but I hate to actually TELL them anything.  I like for them to discover things!  They often make “much ado about nothing” when it comes to the projectile motion equation in Algebra 2, even though it should make sense to them.  They get all caught up in the particulars of the formula and stop thinking about what is actually happening.  So today, before I taught them about the equation, I gave them a picture of a quadratic graph.  screen-shot-2017-01-23-at-6-46-33-pmI had planned on making up my own scenario, until I saw this terrific post by Sara Vanderwerf that involved a creative fireworks graph.  I loved how Sara described clicking on one aspect at a time.  As soon as I saw this graph, I knew I had to use it!

I did not follow her fireworks task exactly.  Instead,  I just gave them this.  I told my students to create a story with their team from this graph, using as much information as they could from the picture (below). I told them they could write it, or draw a picture, or both.

screen-shot-2017-01-23-at-6-26-45-pm

After they created their stories I had them share with the rest of the class.  As I walked around I heard one students say things like, “No, the rocket doesn’t start at the ground because you can’t start at negative time.”  I loved this part because of the conversations but especially because of the laughter.  Kids were coming up with some hilarious scenarios, and enjoying a math problem.  Here is what they came up with.

fullsizerender-26

Hidden Figures!


After they shared their stories, I clicked on each piece of the graph as Sara had.  And then I told them to write the equation that modeled the rockets path from the information I gave them.  This is what I left displayed on the board.  screen-shot-2017-01-23-at-6-54-12-pm

I also wrote two different forms of the quadratic equations on the board and told them they could use either form.   Some groups still forgot to include the a, so I had to walk around and remind them.  I loved seeing students pick different coordinates to plug in for x and y.


After everyone came up with a = -16, I gave them another problem.  This time I only gave them the roots and the the y-intercept, so they HAD to use factored form.  I am doing the Candy Catapult tomorrow, so they needed practice with this.

screen-shot-2017-01-23-at-6-58-15-pm

After writing the equation, they solved for a and came up with a = -16 again.  As the groups came up with this, I asked each of them to think about what was going on.  Was this a coincidence?  What could be happening?  I had someone in every class realize it was gravity!  In Physics last year (our students take physics at 9th graders), they all used -9.8 m/sec².  I put that into a meter to feet converter so they would realize it was the same thing.

I also had the students convert the equations to standard form so they could see the y-intercept appear in the equation.


Assessment Using Desmos

I use Desmos in class on an almost daily basis.  For our midterm, I decided to let my students use Desmos.  As new Algebra learners, many of my students often make small mathematical errors, especially on exams.  My hope was that using Desmos to verify their answers would help them see graphically when they had made an error, and be able to correct it.

How I created it:

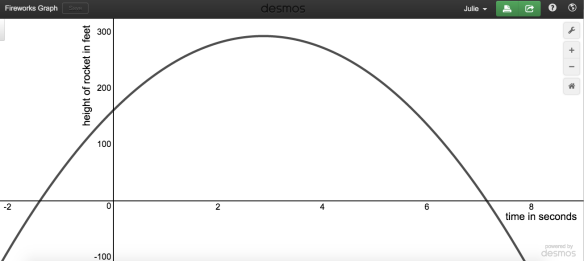
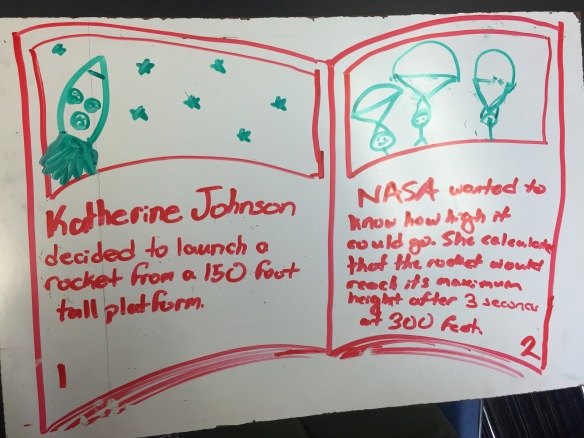
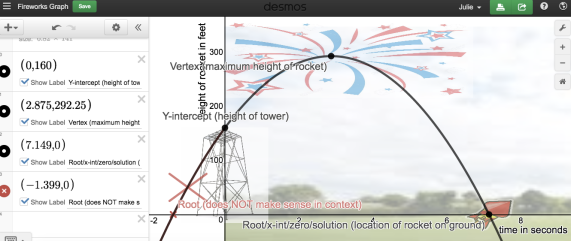
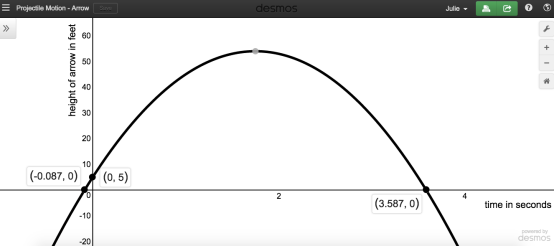
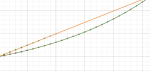
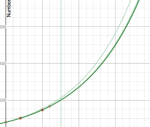
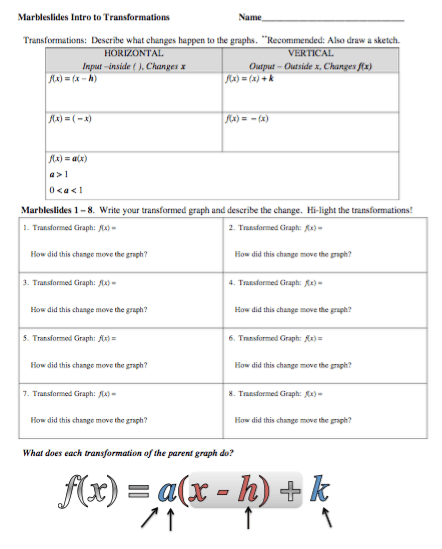
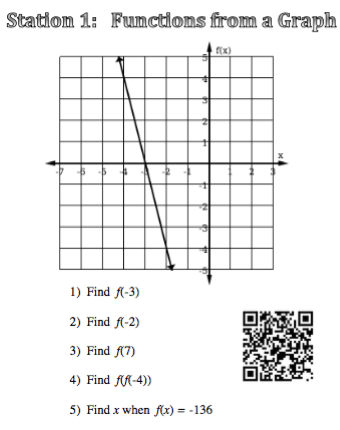
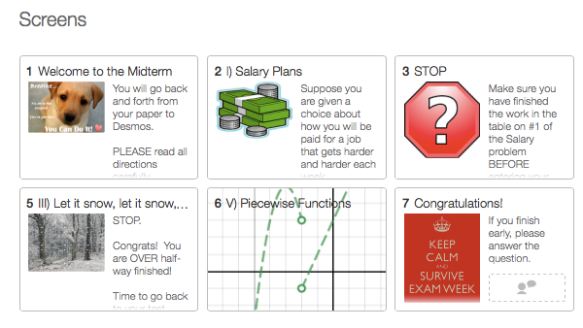
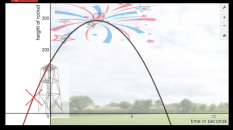
I made a traditional exam on paper and then a Desmos Activity builder to go along with it.  I created a “Welcome to the exam” slide with instructions.  I created two slides for each question, one introduction slide and one working slide (usually a graph slide).  I also added “STOP” slides in-between each question to help the students.  Most of the questions were on paper,  then students verified their answers with Desmos.  However, I did have two slides where the graphs were on Desmos, and they had to write the equations of the graphs.  Here is a sample of the slides.

screen-shot-2016-12-23-at-11-12-12-am

How I implemented it:

If you have iPads, Desmos has a test mode app you can use.  We are 1-1 so my students did the Desmos part on their computers.  I did not want students having the exam on their computers, or accidentally sharing the exam, so I made sure that they were not signed in to Desmos.  Since we use Desmos frequently, I had to instruct my students to sign out of Desmos after they went student.desmos.com.  I sat behind the students, so I could see all of their screens at the same time to ensure they only were on this screen.  I had them close the window when they were finished.  When they put in the code without signing in, they have to hit, “Join without signing in.”

  1.  Go to student.desmos.com
  2. Sign out of Desmos  screen-shot-2016-12-23-at-7-33-59-pm
  3. Instruct your students to enter the code, and to click on “Continue without signing in.” I had them enter their first and last names. screen-shot-2016-12-23-at-7-38-32-pm
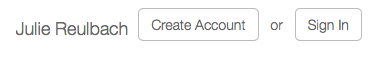
  4. I went around to each computer once they started to verify they were not signed in.  **To do this, at the top right hand side of the page, you should see their name, and then an option to sign in or create an account.  Then you know they aren’t signed in.screen-shot-2016-12-23-at-7-34-59-pm
  5. You can “pause” the activity at the end of the exam so students could not go back to individual screens after the exam. I did not do this, but will in the future. (Thanks John Rowe!)

How I graded it:

I had them put all of their final answers on the test paper.  This way I could grade it like a traditional exam.  I went to Desmos if I had a question about their answers.  For a few students, I was able to give some points back if their Desmos was correct, but they messed up on their test paper. I loved being able to verify their test paper answers on Desmos.  It helped me see what they were thinking and award partial credit where appropriate.

I loved it!

During the exam I kept an eye on the teacher dashboard to see how kids were doing.  I loved seeing kids quietly go, “YES!” and celebrate at their desks when entered their answers in Desmos and it worked.  I also liked using the teacher dashboard to watch the kids work during the exam.  I saw one student enter the incorrect graph, and then see that it was wrong.  They went back to their paper to think and work more, and was able to enter the correct graph the second time.  It was amazing.  The tough part was when students didn’t know how to do the problem, and then their wrong answer was verified on Desmos.  For the future, I really want to try to incorporate Desmos into more assessments, not just midterm exams.


What they said:

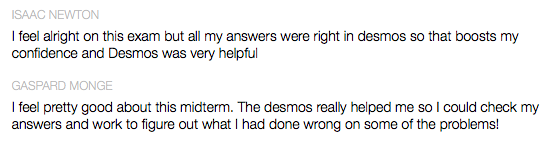
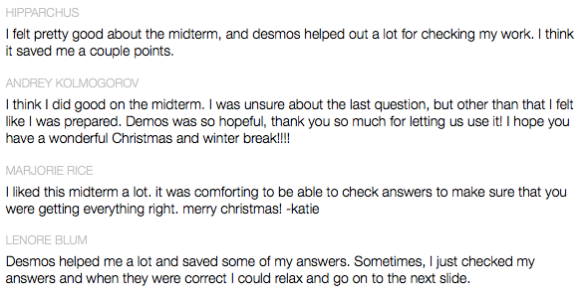
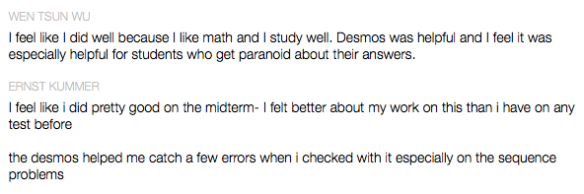
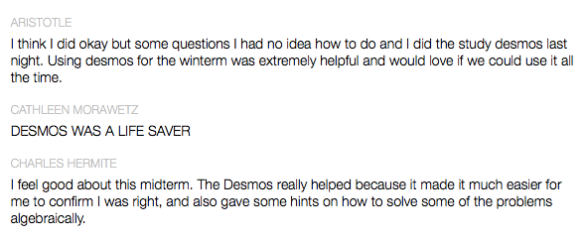
Most of my students really loved being able to use Desmos.  It was a great reassurance for the majority of the kids.  The last question (if they had time) asked students how they felt about the exam and if they felt Desmos helped.  I loved reading their replies!  My favorite was, “DESMOS WAS A LIFE SAVER”

screen-shot-2016-12-23-at-9-42-45-pmscreen-shot-2016-12-23-at-9-42-37-pmscreen-shot-2016-12-23-at-9-42-57-pmscreen-shot-2016-12-23-at-9-43-34-pmscreen-shot-2016-12-23-at-9-44-04-pmscreen-shot-2016-12-23-at-9-42-15-pm

Here is the Desmos code if you want to check out the sample Desmos midterm in more detail.

Updated – Great tips from commenters!

For future, just “pause” from the teacher dashboard and that prevents them from accessing it outside of class time. – John Rowe

John Rowe had an excellent suggestion that I had not thought of before!  At the end of the exam, you can hit the PAUSE button so kids will not be able to access the exam later.  Brilliant idea and I can’t believe this didn’t occur to me!

I made shortlinks and printed them on the assessment paper which had the actual questions so being logged in wasn’t as much of an issue.  – John Golden

John Golden had a great idea about using just a Desmos calculator link instead of an activity builder and then giving the students short links on their tests.  I love this idea, especially for shorter assessments.  It is what I was looking for to be able to incorporate Desmos into smaller assessments.

Introduction to Transformations Marbleslides!

I just made my first Marbleslides in Desmos!  It was incredibly easy, and the students said it was a really fun way to learn.

This Marbleslides activity introduces students to transformation form and lets them practice moving graphs around with Marbleslides (SUCCESS!!) using the new parent graphs they just learned.  My students know transformation form with linears, y = a(x – h) + k, but have not moved any other graphs around yet.  (For this activity I used the absolute value, quadratic, square root, and cube root functions.)

I have two goals with Desmos this year.

  1. Shorten my Desmos Activity Builders, so that I have time in class to practice with the students outside of Desmos.
  2. Make worksheets to accompany my Desmos Activity Builders, so the students can have notes to look back on.

I felt this activity accomplished both, and my students really seemed to enjoy it.  I have provided the activity and the worksheet for you to try.  I would love feedback!

Desmos Introduction to Transformations Marbleslides

trans-ms-des

screen-shot-2016-10-22-at-9-52-32-am

QR Code Stations – Function Notation

We have been working on “building” equations to solve for x , literal equations and an introduction to functions.  After flooding my students with function notation, I decided we needed a day to practice.  One of my favorite ways to let students practice is stations.  I love station work because they allow students to move around the room AND work with different people all period.  I let them pick their partners to start, and I put 2 sets of partners at each station.  They can work with all of the people at their table.  However, I strongly encourage them to work at their own pace.  If they finish and want to move on, or want to stay longer it’s all ok.  Students that work at about the same pace usually end up with each other. No students are bored waiting on others to finish, and I can spend time working with students who have question.  I rove from station to station answer questions so I feel like I get to connect with individuals as I help them.  It is a great day all around!

I still use the clear picture frames to display the problems, but now I put the answers online, so all students can easily see them and have them for later.  This also allows students who may not finish (or who are absent) to access all of the questions and solutions later.  Students can access the answers by scanning a QR code at each station.  Many of my kids have a scan app, but I found out yesterday (from the students of course) that Snapchat has a QR reader.  Here are my function stations.  The QR codes will be active until the end of the 16-17 school year.


screen-shot-2016-10-02-at-2-48-02-pm


Monthly Algebra 2 Blog Posts! #Alg2Chat

Thanks to all of the Algebra 2 Teachers who submitted a blog post this month!  Don’t forget about our Algebra 2 Twitter Chat, this Thursday at 9PM EST (#Alg2Chat).

We would love to have you blog with us!  Here are the topics that we will be discussing at the #Alg2Chat’s on Twitter this month.  It would be great for you to blog so you can share your blog link during the discussions.

9/8/16 – Student Engagement

9/15/16 – Rich Problems for Algebra 2

9/22/16 – Making Groups Work

9/29/16 – How You Use Technology

Fill out this form to submit your blog post.