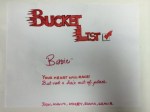
What a difference a year makes! My current students saw all of the Barbie Bungee action from the sidelines as 6th graders last year. They have been asking me ALL YEAR LONG when we were going to do Barbie Bungee. This build up was terrific! Once they knew Barbie Bungee had arrived, they were begging for math class.
After all of the build up, my students took Barbie Bungee very seriously this year. I make it a competition, and they all wanted to WIN. They did multiple test drops, they measured carefully, and they drew beautiful graphs. I did not teach them about the line of best fit, but had them read about it here instead. I told them whoever had the most accurate data and the best line would win the competition! They were inspired to learn all about the line of best fit!
Again, I let them adjust their graph after the 90″ test jumps. This year I was tougher on them, and would not let them test jump again until they fixed their graphs.
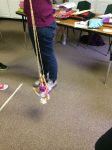
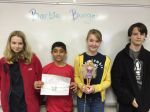
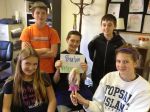
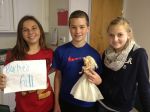
The big jump day was so exciting! Students were yelling and screaming. One group had a rubber band disagreement. They calculated the number of rubber bands and wanted to put a half of a rubber band on so their estimate would be perfect. They wanted to win. However, we don’t do half rubber bands, so the great rubber band debate ensued. They only agreed to put the last rubber band on seconds before the jump. It was a deadly mistake, and their Barbie was the only one to crash. It was a tragic (read great) learning lesson!
Please enjoy the pictures and the video. I have so much fun with this project and making the video each year. It is the best project I have ever done with my students!
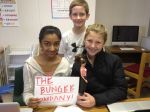
Group students and have them come up with a company name, slogan, goals, and logo for their Barbie Bungee company. Have them read about the line of best fit for homework.
Day 2
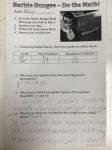
Give students the handout and let them do the test jumps and the graph.
Day 3
TEST DROP day from 90″. Students adjust their graphs if needed, and get to add a data point to their graph and adjust their line of best fit if needed.
Re-drop if needed once graph is completed.
Estimate how many rubber bands they will need to drop from 160″ and then attach those rubber bands to Barbie.
Day 4
JUMP DAY – Finish putting rubber bands on Barbie and then JUMP!
that led me to John’s post about his recent experience with the Barbie Bungee activity. This is a great post, and there is a great discussion going on in the comments right now about how some activities can feel like a recipe and what we can do as teachers to change that. Most of my projects for my first two years were recipes, and I have been trying desperately this year to change that!
Until this year, I had no idea how engaging student wondering, student questions, and student creativity would be for the actual students. I had been reading about it via Dan’s blogany questions (#anyqs) and 3-acts. As a teacher, I know that every lesson needs a great hook to fully engage students. It was not until this summer however, that I actually got to experience this myself, as a student would, through Max’s “Wonderings” session at TMC12. Now, for me “the hook” is not only the hook I would have used before (something interesting to them via an article, multimedia,…), but it also involves student wonderings and questions. Since then I have observed that when students have time to wonder and develop their own questions, they become not only engaged but immersed in the activity. Just by me talking (and instructing) less, and letting them wonder more, my students have naturally become more engaged and interested in the math. They discover that they need to know more math to get to the next step, and this is when I give them instruction. It is instruction during the project as they need it, not before. Activities are projects are not afterthoughts, they are the lesson. When they need the math to figure out their own questions, they work harder and longer, and they actually care about what they are doing. When they create it, they own, and this is where I have seen them grow and learn the most!
I wanted to post this response on my my blog because I have touted the glory of the Barbie Bungee lesson. I posted just the facts, my “recipe”, but I now realize that I left the most important part of my lesson – emphasizing the wondering. With any activity, you have to be careful or it can end up just like a recipe. Looking back, the projects that I have done for the past two years in my classes have been mostly recipes. Since I experienced “wonderings” this summer, I work very hard to NOT let my activities develop as recipes. Sometimes I am successful and sometimes I am not. There is still so much I need to learn, and never enough time!
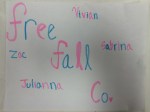
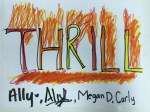
For Barbie Bungee, I spent almost the entire first class period on “the hook”, “wonderings”, and student questions and creativity. For the hook I showed them the Bungee Videos that they loved. I had them create their own Barbie Bungee Companies but gave them very little directions other than, “Brainstorm things a successful company needs.” From this they came up with company names, company slogans, and company goals. Their goals were like the “any questions” I was hoping that they would come up with, similar to what I have seen come from a “First Act”.
Only after they decided to give Barbie the biggest drop without killing her and started talking about how to estimate the number of rubber bands did I give them the instructions worksheet. I probably could have done this without the worksheet. But, I like that it had the Barbie Bungee slipknot instructions on it. I love to give middle school students opportunities to read and follow directions and knew that consistent results (from consistent rubber band knotting) would help us draw better generalizations in the end. Fawn is considering going without the worksheet next time around. I’ll see how that goes before I jump.
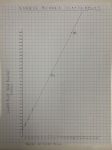
After collecting the data on the jumps, I did not have my students analyze the chart at all. Instead, I had them plot their data. When they did this, they noticed that it correlated and asked me how they could use this to make a better prediction. I instructionally guided them and reminded them of the line of best fit. This led them to their predictions for the test jump.
Another instructional opportunity came after the test jump. When their Barbies hit the ground or fell short, they wanted to know why, and where they had gone wrong. I encouraged them to put this new “test jump” on the data chart and on their graph. This is when many noticed that they needed to adjust their line. Almost every students second test jump was successful. In all of this we did not calculate, we just predicted.
The “BIG JUMP” (13 feet), was more like the beginning of an “Act 3”. Was their math correct? It was exciting because the students loved seeing the Barbies jump – and loved to see their math work! The finale was putting their data into the linear regression calculator, to see how many rubber bands they should have used and how close their predictions had come to the actual math.
I did not end this project with any giant math lesson. In fact, this entire project for me was to create more wondering about linear relationships for our NEXT project where we would need to learn how to do the calculations. Their wonderings were amazing. They wanted to know things like, if they could predict Barbie’s fall with a linear equation, what else out there could they predict? Does this work with anything else? Does this work with everything else? When does this not work? It has led to three subsequent projects and we are starting a fourth in the next week. In this, Barbie Bungee was not an activity in itself for my class, but the hook for all future linear equation work.
In a recent survey I gave my students, they said that they had the most fun with the Barbie Bungee activity, but that they learned the most “math” from our nutrition project (two projects later). That, to me, is progress.
I know that many people end up their units with a cool, hands on activity. However, I decided to start my Linear Equations unit with one. This was easily the best activity that I have ever done with my students. And, I believe they learned more from it than any other activity.
I saw this activity on Fawn‘s blog, and have wanted to try it ever since! She has a wonderful write up of all of the steps, and even a worksheet that I used (and it is hilarious) so I recommend you go there next to get more information on this. NCTM illuminations also has this in their resources, and it is good to read as well, but I liked Fawn’s version better! I took both lessons and then put my own spin on it, and am hoping to extend it for our study of equations of lines.
I put my students into groups of three and four and then showed them these two You Tube videos. They both are excellent and serve different purposes. One video illustrates how thrilling it would be to bungee jump from the highest place possible. The other video (on Land Diving) illustrates how we DON’T want to hit our heads and even talks about how important the length of the cord it.
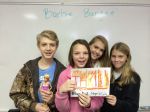
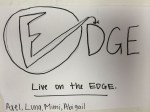
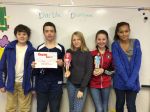
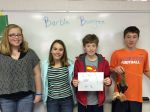
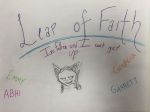
I then told them that they were going to create their own Barbie Bungee Company. I had them brainstorm to come up with a company name and their company goals. Our school is heavily invested in project based learning and I have found that students are much more invested in any project or activity if they come up with the objectives.
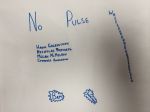
Fun names were picked like “Barbie Daredevil” and “Extreme Sky Bungee”. My students had very realistic goals. They all wanted to make more money than their competitors by giving Barbie the MOST thrilling ride, without killing her.
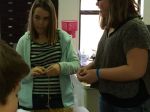
After this was established, I passed out Fawn’s worksheet and they got to work dropping Barbie from 0, 2, 4, and 6 rubber bands. I encouraged them to drop her several times from each and record each drop to get greater accuracy. Some groups listened and some did not. They did not yet realize the importance of accuracy. I would let them drop her from no more than 6 rubber bands to get their line of best fit.
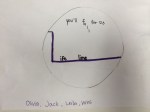
At this point I added from Fawn and NCTM’s lesson in order to more thoroughly analyze their lines of best fit before the big drop. I am go glad I added this part as it ended up being the part of my lesson where the most learning occurred. Our final Barbie Bungee was going to be a drop from 160″. However, I first wanted them to use their line of best fit to do a “test drop” from the ceiling of my classroom, at a height of 94″. We talked about “market research” with businesses, and how important testing from 94″ was before we went to 160″.
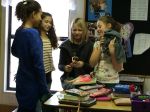
I had each group make their prediction of how many rubber bands they would need to safely drop Barbie from the ceiling. This information needed to be kept TOP SECRET so that the other groups would not steal their companies ideas. They really got into this and my usually loud group work classes were full of excited and hushed whispers.
During the test drops, only one groups Barbie had a very thrilling ride (close to the floor without hitting) the first time. Most groups either hit the floor or were not close enough to the floor. I sent those groups back to the “prediction” drawing board. This is where most of their line of best fit learning took place. They knew they either needed to add or take rubber bands away. However, I had them look at this on their graph so they realized their line of best fit was off. Only after they adjusted their line of best fit, would I let them retest. I emphasized that they should not be guessing how many rubber bands to take on or off, but predicting the number by adjusting their line of best fit.
After they readjusted their line of best fit and made a new prediction, I let them test again. Most of the groups were much more successful on their second test drop. I had them measure how far Barbie came to the floor so that they could add this new data point to their graph. At this point, some groups noticed that she fell further than they had predicted, and slightly adjusted their line of best fit again.
Next it was time to make their predictions for the 160″ drop! I had told them that they would be dropping Barbie 160″ but did not give them much instruction when they were creating their original graphs. Therefore, some groups had to redraw their graphs (or add more paper) to extend their graph to 160″. This was an excellent learning experience as well! After they made their predictions, “locked it in” on a sticky note, and added the rubber bands to Barbie, it was time to do the big drop!!
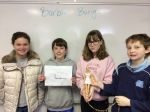
The big drop was very successful and EXCITING. We videoed each drop – and their excitement as well as the things they said were priceless. The You Tube playlist is at the end of this post. Only one group had a major Barbie fatality. Two of the three groups were very, very close and we had to drop her several times to make sure that she hit the ground. One group is still in heated contention. I love it when they argue about the math! Two groups dropped her dangerously close to the ground without hitting. It was a thing of beauty!
After we dropped our Barbies, we went back in to analyze the math. I had them enter their first 5 data points (for the 0, 2, 4, 6 and test drop rubber bands) into an Alcula linear regression website. This site was GREAT as it graphed their data, gave them a regression line, and then let them enter rubber bands (x-axis) to see how many inches Barbie would dropped based on their line. This was when the real magic happened. When the closest group entered their rubber bands, the math returned 159.4″. They were thrilled.
The day after the Barbie Bungee was the last day of school before Christmas break. So, I gave them the option of using the videos we took of Barbie Bungee to make iMovies. All of the students jumped at that! Two of them even finished their iMovie in class. Some of my students are very skilled at iMovie! As I get more of their iMovies, I will post them back here. This was completely optional for my students. Some some added more details, and some focused more on Barbie’s exciting drop! I had two groups ask me if they could do a Powerpoint or Prezi instead since they weren’t great at iMovie. I love that they wanted to do any of it! I plan to make my own iMovie – if I can find the time. I am sure it will not be as clever or inventive as my students movies however!
For the next step I am going to use these graphs to explore what each piece of their regression line really means. Hopefully, they will understand what a y-intercept is because of Barbie’s height and realize what the coefficient with x means because of the inches they were trying to reach with added rubber bands.
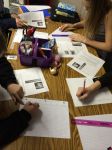
I had each of them answer reflection questions on a Google Doc. The questions included asking what they could have done to have a better drop and what advice they would give to next year’s students. They had great advice! Here are some of my favorites.
“For next year’s students, I would tell them to be very careful when graphing and drawing their line of best fit. They should have fun, but be diligent with their work at the same time.”
“I wish we could have redone our graph more accurately. Make sure to be organized, and keep all supplies and papers together. You also really need to follow directions and stay on task.” (This group had the major Barbie fatality).
“Do not rush to finish first, take a good amount of time to guess 94” and 160” because the guesses is what Barbie’s fate is based upon.”
“We could have used that website and then we would be more accurate. Take your time when drawing the line of best fit and measure right.”
“To be more accurate, we could have done more test drops and used more exact measurements when Barbie was bungeeing. Test your barbie several times and go through all of the math 2 times just to check for any math errors.
Solving equations is one of the MOST important things that I do with middle school students (other than fractions, of course). I want them to learn the “process” of solving equations with simple, one-step equations. Hopefully when we get to multiple step equations they will have a process to fall back on.
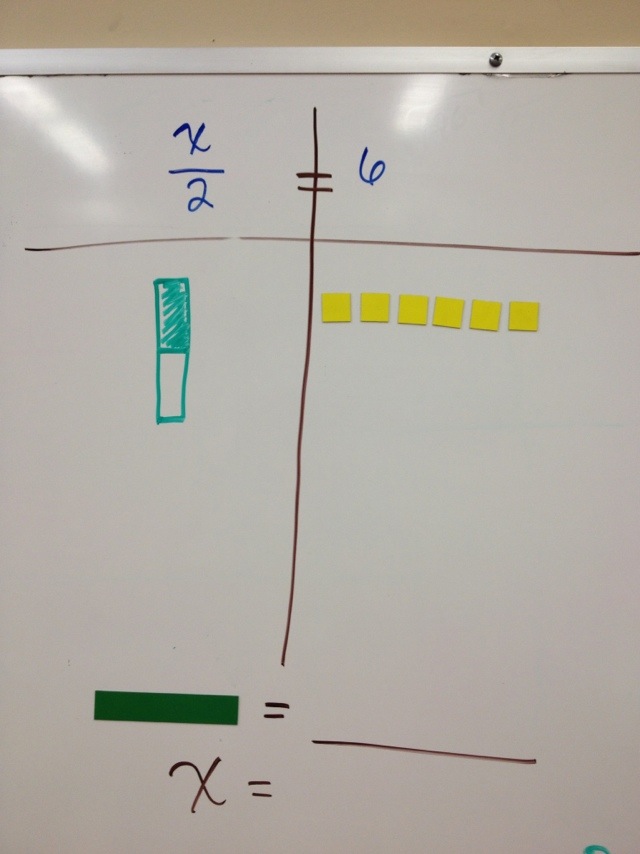
I always start with Hands On Equations. I do not use their “number dice” because I want students to physically move EACH unit from each side. So, I use integer counters instead. I also made my own worksheet to go with it because it matches many online equation solving (virtual manipulative) websites. I link to these sites on my Concept Help Pages and don’t want students to be confused.
This year, I also had students do the Khan Academy’s equation solving intuition problem set before we even started the Hands On Equations. (Here is the explanation video – but none of my students needed it). They understood the concept of the balance AND really got a kick out of the little characters (representing the variable) on the Khan site. That also gave me an idea! Khan called the guys “Pants” or “Old Spice Man” but I decided that WE would call them MONSTERS!
I used the Hands On Equation manipulates (which I called TOYS so they loved them before they even saw them) and my own worksheet (below) which they LOVED because I let them draw MONSTERS on it. Of course we needed to get the MONSTER (x) by itself before it gobbled up the poor little integer circles. Seriously. Gold.
OH MY! How 6th graders LOVE monsters. They have begged and begged to do more equation solving – just so they could draw more monsters!
This slideshow requires JavaScript.
Day 2 we did not get out the “toys” but did do a pass-it equation solving unit where each student got to make up their own one-step equation (and thus their own monster) and then pass it to a friend for the second step. Really, you would have thought that we were playing a game instead of just writing down and solving equations. Day 3 we will work with on one-step equations involving multiplication and division. I made that one a foldable for their notebooks!
I still can’t believe what the right “spin” can do to a lesson with 6th graders! Have I said how much I LOVE 6th graders? My worksheets are shared below. 🙂
Yes, I am loving some foldables right now! The kids love them too. They get to cut, glue, hi-light, and write in little boxes. Plus, when they are studying, they can just flip up and look at one concept at a time so they are not overwhelmed with an entire worksheet. Nirvana.
I am coming up with them for review now, but next year I would like to introduce them when we initially take notes. Then, the students could take the notes right on the foldable and not have to recreate (read – waste time) writing everything again in review. This will leave more time for working on math problems in class – using the foldable as a guide of course!
Again, printing is the only tricky part to make sure it lines up well. I also had the students put a small strip of glue behind the words “I can find Slope from” so it would have a sturdy header and flip better.
I totally stole this from the amazing Sean (thanks Sean!). But, I could not resist! It is right up my teaching alley with all of the singing and dancing! I changed some of the words to suit the steps that I have my students use. We added motions too, like the CLAW (aka distributive property)! I was able to integrate with our dance teacher. She organized the students and cleaned up their steps. We even added a checkmark formation at the end! (Yes, that is what they are doing if you can’t tell. Checkmarks are hard to make!) Of course I made a video of their performance and then an iMovie to share. But, I did not get around to having my students Flash Mob this in the carpool line after school. There is always next year!
Man, I love my job.
Dance Steps to Solving Multi-Step Equations
First you clear your fractions, LCD and CLAW action!
Then you distribute and you do the CLAW scoot!
Then you simplify, put your hands up in the sky!
Then you combine like terms and you do the squirm.
Add and subtract, x-terms alone on one side, so take a step back and do a big slide.
Multiply and divide, the answer you will learn when you jump to the left and do a full turn.
I used the Y in the song YMCA to help my students remember that the y-axis was vertical. So, what could be the next step except for a song and dance about the equation of a line using the YMCA! My students really enjoyed singing about fractions, so I wanted to sing and even dance this time! I know that I am not breaking any new ground here, but my students are fabulous so I wanted to share our version! We just learned it today so it’s a little rough, but I rarely have both 6th grades together for class so I had to video them today.
I downloaded a karaoke version of the YMCA from iTunes for accompaniment. We only sang our song to the chorus of the YMCA so luckily, I found a version that started with the chorus! Of course when we went outside to practice (and video) I couldn’t get the music to play. But, we’ll do this again for sure!
Equation of a Line Song
(Sung to the chorus of YMCA) Edited to add a new verse, 2014
y = mx + b, Equation of a line!
y = mx + b…
Puff, puff positive. Nice negative,
0 slope, And undefined
y = mx + b, Equation of a line!
y = mx + b…
Begin at the B. Rise and then run.
Connect the points, to graph the line!
I always use the ski analogy to teach students slope. This year, I added some Powerpoint visuals and a very fun Teacher Tube video to spice up my lesson. There are two things that I focus on when teaching slope:
Read a graph from left to right, just like you read a book.
When you think slopes, think about skiing!
I picked where I left off in the previous lesson, and had a “reminder” discussion about M. The students got out their graphing worksheets to review. We talked again about how M determined the steepness of the line and which direction the line went. I told them that M was a pretty pathetic name, and that we needed to come up with a better name for M. As a 6th grade teacher, at this point I had kids yell out crazy random names. BUT, I told them that we would have to give M not only an interesting name, but also a descriptive name so that M would not easily be forgotten.
Since I’m a Powerpoint fan now, I made a Powerpoint full of ski slopes and put a big ski slope on the screen just as I finished this talk. Instantly, many kids said, “Slope!” like they had discovered it all by themselves. Some kids were disappointed that we decided not to use their more creative names, but most students were very happy with good old “Slope”.
I then presented them with animated skiers going up, down, and off of the sides of mountains! I love using Powerpoint, as I can make it much more fun than my usual little stick guy falling off an undefined slope drawn on the whiteboard. It was great for a laugh as usual. Next year I need to add more positive and negative slopes with the corresponding equations. While most students did get the connection between the graph of a negative slope and -M in the equation, I need to be more explicit to increase comprehension for all of my students. I believe that adding the equation to each slide will fill in this gap.
After my slope lesson I introduced my students to my best slope discovery of all – a fantastic “Slope Dude” video that I found on Teacher Tube. It is cheesy and fun – just up my math video alley. The kids LOVED it. It is actually so catchy that I now say, “Puff, puff positive” and “Nice negative” every day. It also defined the word “undefined” a “cuss word” in mathematics, which really entertained my 6th graders (hopefully enough so that they will actually remember it long term)!
I really love the online PLN! Thanks Slope Dude! : )
What does y = Mx + B mean? I didn’t want my students to just memorize what M and B meant, I wanted them to understand it. So, instead of just telling (or showing) them what M and B stood for, this year I let them discover it for themselves! And since seeing is believing, I decided to use an online graphing calculator.
First, I taught them how to use a basic graphing calculator that I found online. Then, they graphed a series of graphs on the online calculator. I had them answer questions for each graph on a Discovering M and B worksheet. I had shown them the equation y=Mx+B the day before. I did this very briefly, just to show them how to pick out the M and the B from an equation. I did not tell them what M and B meant.
After graphing a series of graphs, they had to answer questions at the bottom of their worksheet. Side one focused on slope, and side two focused on the y-intercept. I taught this lesson two classes in a row. In the first class, I had never used this lesson before and wasn’t sure how easy it would be since they had not used the online graphing calculator before. Plus, I was being observed so I was a little nervous. However, I realized in the first class that my students were trying to “zip” through the questions in order to get to the other side. They weren’t thinking enough about the questions. And, when I told them that their answers weren’t correct, they wanted me to tell them the answer right away without further thought. So, in the next class, I decided to try to get the students to really focus on the questions at the bottom of each page by making it kind of a “challenge”.
** Note: As the teacher, you MUST make your students focus on the questions at the bottom of each page. Do NOT give them the answers until they try to figure it out themselves. This is the key to this entire lesson. **
I told the students that in order to answer the questions, they would have to look through their worksheet to try to figure out the pattern. To make it more dramatic, I called the pattern a “puzzle” and made a huge deal about “figuring out” what B meant. I was tough on them, looking for great descriptions for slope and insisting on an accurate description for B. I told kids when they were close! But, I wouldn’t say, “You GOT it!” until I saw the word intersection. A few kids got it early, and after my, “Yes!!” I put my finger to my lips in a shhhh, don’t tell the secret! It drove the other kids crazy! I told them, I am looking for one special word! After a few failed attempts, some students were even googling, “linear equations and B” to try to find out what word I was looking for! It was so much fun for me, and you could feel the excitement in the room!
All of my students were able to figure out that M indicated the steepness of the line and which way the line went (positive or negative). Most of them were also able to figure out that B was the point where the line intersected the y-axis. Quite a few of them even came up with the word intersection. It was a great day! Worksheet included.