Trigonometry Stations

I’m so excited to start trig again in Algebra 2!  We have a week long trig blitz where we review the trig ratios, inverses, special right triangles, and law of sines and cosines.  Some students needed more one on one review than others. Stations.jpg.png
So I decided to do a station activity to review the week.  I love station activities, as everyone can work at their own pace, check their answers as they work, and get one on one help from me when they need it.  Plus, they get to work individually and with other students and move around.  I created booklets for them to do the work for each station.  My students make one sheets at the end of each unit, so I put a blank one sheet template on the front of the booklet.  This way, they could take extra notes as they worked the problems.  It was pretty much a perfect teaching day!

Since they have studied all of these topics previously in Geometry, I wanted to push them a bit.  We did the ambiguous case (ASS) last year with the Law of Sines.  However this year, after the pre-calc teacher told me about using the law of cosines with an ASS triangle, I pushed my students to try it!  Some of them preferred the law of sines, but many saw the benefit to using the law of cosines.

This year I introduced the law of cosines as an alternate (and optional) challenge.  But next year, I am going to have them all use the law of sines to find a missing side of a 2 triangle ASS in order to frustrate them enough to BEG for a better way.  I will do this as a group activity on the large white boards so they can fuss with each other about how crazy the problem in, then I will sneak around to the groups and quietly suggest a better way.  Oh, teaching math can be so much fun!

Here are the stations I used.  I created QR codes that sent the students to the answer sheets.  Then I taped the codes to each station so students could check their answers as they went along.  And here is the booklet.  I wish I could do this everyday.


Complex Numbers Foldable

Complex numbers are amazingly fun to teach in Algebra 2 because it is the first time students have ever seen them.  It turns many of their  previous “no solutions” into answers, how exciting is that?  It also enables them to understand the majority of math jokes and memes!

Simpsons-I8SumPi

I start my students off by letting them read about who uses complex numbers (because they always ask and I find this saves time), and then I let them read the Math Forum’s John and Betty’s Journey Into Complex Numbers.

Then, I show them this…Screen Shot 2015-12-16 at 8.45.02 AM

We have been studying patterns since the first day of school.  Patterns are part of the beauty of mathematics.  And the math they currently know does not let this pattern continue.

Enter complex numbers.

Some of them don’t buy it at first, but then I ask them, “Can you SEE zero cookies?”  “Can you SEE -5 dollars?”  Hmmmm…..

After the fun stuff comes the real work.  And that is where the foldable comes in.  I saw this awesome circular diagram idea for powers of i on Bonnie’s blog, Teaching On The East Side.  I also used her great answer scramble idea (see below)!

I use graphing a + bi to motivate why the heck we can’t leave i the denominator and must use the complex conjugate to simplify.  Fun times!

Here is the link to the word doc for the foldable.

Screen Shot 2015-12-16 at 9.18.57 AMAfter the foldable we needed a break before getting more practice so we played this Kahoot.  I liked it because every slide has a fun math joke or meme involving complex numbers!


Finally, for the practice worksheet I made a Holiday Scramble!  Where the answers are all on the board, but mixed up so you have to find them.  This is great for the students that do NOT like to even see the hint of an answer before starting a problem, but do want to check their answers after they are finished.

IMG_6008

Inverse Functions and Logarithms

After the Zombie exponential problem, several students wanted to know WHAT was this mysterious LOG thing and especially why it worked?  Enter, inverse functions.

I made an Inverse Functions guided worksheet for my students.  It is self-directed and has them use two different colors for the graphs.  They can get through the entire sheet without much help, and make all sorts of great discoveries on their own.  I blew it in the first class I taught by trying to go over the sheet with them way too soon after handing it out.  I wanted to explain a couple of things before they got too far.  DON’T DO THAT.  Give them ample time to read it, graph things, make small mistakes, and discover.  It makes a huge difference not only in understanding, but in their engagement and attitude.  They really don’t want to hear me talk.  Instead, play music in the background, walk around and see their work, even answer a FEW of their questions.  It is so good for them to work on their own!

Algebra 2 Inverse Functions Worksheet.

Screen Shot 2015-11-07 at 5.09.06 PM

After we went over the worksheet together, we played with the awesome inverse graph created by Desmos that I modified with the equation y=2^x.  The kids can move the slider and it shows the point and its inverse on each graph!

Screen Shot 2015-11-07 at 5.10.15 PM

I created the graphs with an amazing program that Mrs.Davis found called GraphFree.

Creating a Need for Logarithms with Zombies

Every since I have taught math I have noticed that students are not big fans of logarithms.  I think it may be because when they are in Algebra 2, logs seem so different from everything else they have done so far in math.  To solve a quadratic equation, you apply the square root; the inverse of x squared is the square root of x.  Equations they can easily solve like that make sense to them.  However, to easily solve most exponential equations, you need to apply the LOG.  Log doesn’t look like the exponential function at all, and I think that is where the confusion begins.

Screen Shot 2015-11-19 at 10.03.38 PMSo this year, I started with a simple Zombie Word Problem (from Wendy).  The crisis?  Students were turning into Zombies at an exponential rate!  How many hours until our entire student body (1002 students) were ALL Zombies?  The catch?  I had not taught logarithms yet.  I had never even said the word LOG in class.  We had only done exponential functions and equations.  My students were knew how to solve equations like 2^x=8.  But, when given 3^x=1002, they were stumped.  3^6 was too small, and 3^7 was too large.  I insisted they could find a solution, and to try things.  They did amazing work.

image9

After determining that we would all perish between 6 and 7 hours, they started the slow process of plugging decimals.  Every minute counts!  They also went to Desmos.  Some kids even spent quite a while plugging in numbers until they got the EXACT answer.  But many of my students remarked, “Is this how we are supposed to do this, just by guessing?”  I explained that they were not merely guessing.  It was a method that worked, derived from an original estimate.      But, they said, this takes too long.  “THERE HAS GOT TO BE AN EASIER WAY!”  I finally relented (wink, wink) and showed them the LOG feature.  Some of my students had heard of logarithms, and already had a negative opinion of them.  But today they were all happy to meet logs because it was such an easier method.  And now they were very curious to know what the heck this log thing was and WHY it worked.  Boom.

Today, awesome hook for instant interest in logs; tomorrow, inverse functions to show why logs work.

Zombie Word Problem – Smart Notebook, PDF

Algebra 2 Transformations Unit, Starring Desmos Teacher Activities

I teach out of the Discovering Algebra Book.  Last year I tried out the order in the book, and it was disastrous.  The book introduces a new parent graph with each transformation. That did not go well with my students.  It was confusion city.  This year, I went back to what I know.  I taught parent graphs first, then transformations.  Finally, they learned how to write equations given the graph with dilations.  Whew.

Glenn’s convinced me to use the “transformation form” (AKA h,k form) last year in Geometry.  That was a great start with my students in Algebra 2, as we were able to use it right away starting with linears.  I can’t tell you how many problems using the transformation form solves, and how relieved kids eventually are, not to be married to the y-interecept.  Many times, they aren’t given the y-intercept, so y=mx+b is used much more sparingly this year.  It takes my newbies a while, but they get it.  Why kill yourself trying to find where this stinking graph crosses the y-axis when you could put pick ANY point out on the line.

85dda-11850303_153438328335826_1353010797_nThanks to Glenn, I knew to use transformation form from the start.  Thanks to Meg, I had a ton of material to draw from.  And thanks to Desmos, the kids could actually discover transformations ON THEIR OWN.  Disclaimer.  Even with all of this wonderful discovery and conceptual learning, students NEED you to summarize what they have learned with them, and then keep them practicing their new discoveries to cement those discoveries into their brains.  With conceptual learning, many times they are pretty sure they understand what is going on, but they really love when you affirm that.  Also, some kids have a tough time getting there, so a thorough summary at the end helps everyone.

When I taught transformations years ago, I would teach parent graphs, then give them a list of transformation rules to learn and apply.  It was pretty dry and procedural.  Now, I have moved to Desmos, where the students play with graphs to learn what the transformations do without ever seeing any “rules”.  It is awesome, and it sticks.

Screen Shot 2015-10-28 at 8.31.28 PMI still teach parent graphs first and function notation first, along with domain, range and  interval notation.  I actually teach them with the material in the previous chapter so they can know the parent graphs cold before we even start looking at transformations.  After they learn the parent graphs, they study transformations and reflections and then move to dilations.  Oh, those dilations.  My students work with computers and each other for the entire unit.  I also give them handouts so they can take notes and graph as they go along.  I didn’t give them the “transformation rules” until one of the last days.

All of my transformation files are in this box folder.  And the Desmos Teacher Activities are linked below.  You can’t use my activities, but you can’t copy Desmos activities YET for editing.  I am sure that is coming soon.  You will see a vocabulary sheet referred to in the Desmo’s activities.  To start every chapter, I give my students a vocabulary sheet.  They takes notes on it and then most of their important terms are together in the same place.  The vocab sheet is also in the box.

Desmos Teacher Activities – Transformations

  1. Transformations – Shifts and Reflections
  2. Transformations – Dilations
  3. Dilations again (as a short review in-class lesson)
  4. Transformation – Extra practice

Functions Unit – Whiteboarding Brain Dumps for “One Sheet” Test Study Guides

This year I am having my students create “One Sheets” for each chapter.  Ideally, this one sheet is one piece of paper with everything they need to know (and don’t want to forget) about the chapter.  Basically, they are creating their own concise study guide for this assessment and future assessments.  My plan is for them to create a one sheet at the end of each chapter, while they know the material best.  Then, they can use them to study for all cumulative tests that I give in the future.  I do not let them use the one-sheets on their assessments.

However, this did not start out as smoothly as I had hoped for some students.  When doing some review work from our first chapter, sequences, earlier this week I noticed that several students were struggling, even though I had them get out their Chapter 1 One Sheets.  The problem, inadequate one sheets.  They had something for every topic, but many students did not have nearly enough.

In our math department meeting this week a couple of the teachers mentioned doing brain dumps on concepts.  Writing on whiteboards, students brainstorm all they can about the topic, then check their notes to find more, then share their board.  Their homework this weekend is to make a one sheet after the in-class brain dump.  I allowed them to take pictures of others students boards, and now I am going to post all of the boards that I got pictures of.  Hopefully they will all look at the other boards on this post and make a FANTASTIC one sheet to share on Monday, and study from for this test and all future tests in my class.

Last chapter they worked on the one sheet individually, then shared them the next day with the rest of the class.  I still want to do this on Monday, but I would love for them to get more out of it. I hope that the brain dump helped.  I believe I am going to have them try to find one thing on another student’s sheet that is NOT on their one-sheet, and add it to the back.

Below are their fantastic whiteboards on functions.  I will share their one sheets next week!

Literal Equations, Number Magic, and Group Speed Dating

Literal Equations Speed Dating

I did this lesson in one 90 minute block period, but it was rushed at the end.  Two 55 minute class periods would have been better.

Last year equation solving in Algebra 2 was TRAGIC.  This year I knew I had to change that.  I decided to start with a concept that worked wonders in my middle school math classes, Math Magic.  I found the idea on Dan’s blog long ago.

Screen Shot 2015-09-11 at 5.03.35 PM

I have them tell me their result, and then I tell them the number they chose by simply subtracting one from their result and dividing by 2.  A few kids pick up on it right away, but many don’t.  Screen Shot 2015-09-11 at 5.15.24 PMNext, I have them write down the “Pick a Number” directions using algebra.  We talk about how they have to use a variable because everyone picked a different number.  After they attempt this and share it with their partner, we talk about any errors.  Some students will forget the parenthesis around 2(n + 7).

I then give them an equation and tell them to develop the steps they would need to give this problem to a friend.  After writing the steps, I tell them the result, and see if they can work backwards to find the original number.  I let them figure it out on their own, then encourage them to write out the steps.

Screen Shot 2015-09-11 at 5.17.29 PM

Next year I will give them more time with this.  It would be great for them to come up with their own and share with others.  Then, start the Glenn’s part on day 2.

This year, after I did a few of these, I shared with them my three rules for solving equations, which I modified from Glenn’s blog.  I had them make up a CRAZY equation by letting kids just shout out numbers and operations, and then challenged them to write all of the steps to get back to x.  Their equation looked something like this.

Screen Shot 2015-09-13 at 2.25.36 PM

It took up the entire board to “undo” and was AWESOME.  I then let them try one on their own that I made up.  The challenge – get back to x!

Screen Shot 2015-09-11 at 5.27.41 PM

Once they write the steps to get back to x and confirm with their partner, I tell them the result is 12, and challenge them to find out what x is.  I had kids ask if they could do it in their heads.  In seconds, the entire class had the correct answer!  Yes, they easily solved this, in seconds.

Screen Shot 2015-09-11 at 5.30.56 PM

After this, moving to literal equations was a breeze!  I gave them a few easy examples of literal equations, making sure they were showing each step and explaining that they were using inverse operations to make 0 or 1 each step along the way.  To practice, I put Glenn’s worksheet onto cards and did Meg’s Group Speed Dating Instructions.  Like Meg, I gave each group of 3/4 kids two cards.  They worked together to solve it and had a chance to ask me questions.  Then I had two kids move around the room as partners and 2 stay at the table.  For each rotation, the partners switched cards and solved each other’s questions.  I told them they had to work with their partner before asking the other group any questions.  Some of the questions were tough, but they really worked well together!  Number 1 was very easy, while number 6 was quite challenging for the students.  I really hope that this makes complicated equation solving seem so much easier throughout the year for my students!

My biggest draw back to this lesson was that we don’t move around until the last 20 minutes of the period.  I would love to get them up and moving before the end as a 90 minute block gets very long about half-way through.

Desmos Teacher Activity Builder – Systems of Equations Review

Screen Shot 2015-09-11 at 4.55.41 PM

Desmos teacher activities are amazing!  You can find them all at teacher.desmos.com (not Desmos.com).  And now, you can even create your own!  I just made my first Desmos Activity last week on systems of equations.  It was incredibly easy to make!

Screen Shot 2015-09-11 at 4.32.29 PM

Overlay – See all student work at once.

I teach Algebra 2 students so many of them have already worked on solving systems of equations in Algebra 1.  However, since it was long ago, it is also far away in their brains.  I wanted to let them work through a review without having to directly teach the concept from scratch.  I also didn’t want to reteach parts of the concept they already knew. Desmos activities let you do this beautifully.

Screen Shot 2015-09-11 at 4.32.02 PMSince you can see their work on your computer in real time, you can see if the whole class needs some review on a topic or if you just need to go and visit a few students.  I project the overlays, and students love to see all of their work together.  Another neat feature when you add a “Question Page” is that students can see previous student answers AFTER they type their answer in.

I also want to thank Sam and his new Better Questions Blog because that is where I got the first question of the Desmos activity I created.  It was a wonderful way to have students think about systems of equations!

Screen Shot 2015-09-11 at 4.57.36 PM

First Day with Make It Stick, Jo Boaler, and Plickers

I want students to be less stressed before math tests.  I do not want them cramming the day before, asking me how to do every review problem because they have already forgotten, then asking me for more review problems to work.  I want students to connect the ideas not only of the current unit, but of the previous math ideas that are also incorporated into the current material.  I would love if students saw math as connected ideas, rather than “a long list of procedures” to be memorized.  I want students to learn conceptually, not procedurally.

This is tough to accomplish, as many of their math classes have been taught procedurally.  I used to think that they would be so happy to have me as their teacher!  I throw the rules of math class out of the window, and help them discover concepts on their own!  However, I found last year that this was not the case with many of my students.  Many were uncomfortable with the fact that I was disrupting their flow.  These honors math students have been successful for many, many years learning the formulas and practicing, practicing, practicing until it was perfect.  And their grade was perfect.  They didn’t want to struggle to “discover the formula”.  Struggling and not knowing make them feel insecure.  Instead, they wanted the formula right away – so they could have more time to learn it, practice it, and get a jump start on tonight’s homework!  They did not want me wasting their time.  I kept telling them this was not the best way, but they did not believe me.  So instead of telling them this year, I am going to have them read the research for themselves.

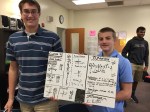
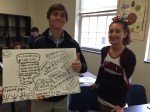
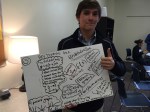
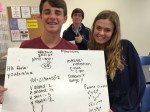
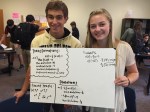
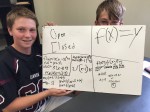
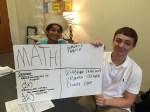
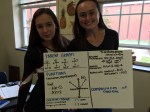
For the first day this year, the students will enter the room and then write their thoughts to these questions. (questions are a work in progress)

  1. What is math?
  2. Finish these sentences:
    1. The people that are the best math students….
    2. The best way to learn a new math concept is to…
  3. How do you study for a math test?

I will then give them a Plickers survey to find out their thoughts on math as a class. I use Plickers the first day because a few students will not have their technology ready. Screen Shot 2015-08-08 at 8.46.54 AM

We will briefly discuss their answers and then I am going to show them this four minute video by Jo Boaler.

Screen Shot 2015-08-08 at 8.47.21 AM

I need to ask them to write after seeing this video.  I’m still working on that and would love any thoughts or suggestions.

For homework, I am going to have them read excerpts from Make It Stick, The Science of Successful Learning by Peter C. Brown.

This fabulous book talks about how people learn, and what you can do to make learning stick.  It is full of real life examples and specific strategies.  The ideas and strategies are summarized in one of the last chapters of the book.  After having them write and discuss how they think they learn best, I am going to have my students read some excerpts of this chapter, then discuss it as a class.  This should benefit them not only in math class, but in most of their other classes as well.

The next day in class, students will pick out what they felt was the most important ideas from the reading and share them.  From this, they will decide on a learning goal for the year.  I then had them fill out  a Google Form to record their “one thing” they wanted to try from “Make It Stick”.

Stick

I will keep doing discovery and conceptual learning in my classes.  I am also replacing “massed practice” with interleaving practice and lagging homework this year.  I am hopeful that having knowledge about how people learn will open their minds to this new style of homework.  Winning over their mindset is half the battle!

This is all still a work in progress!  And if you want to join in on the planning, I’d love to have you!  I will also be talking about my first day plan at the Global Math Department Webinar this Tuesday evening at 9pm EST.  Please join in the conversation!  I hope to have it more polished by then, as I start school August 17th!

Screen Shot 2015-08-08 at 8.47.46 AM

Julie Reulbach

The Files:

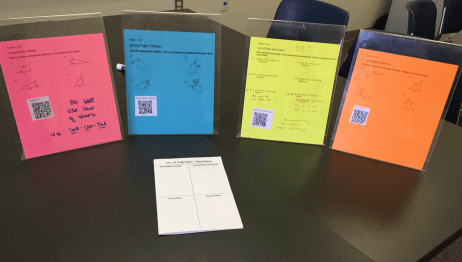
The amazing Meg Craig made a booklet foldable that is the entire activity in one!    I love collaboration!  (I pretty much copied hers for my one sheet).  🙂
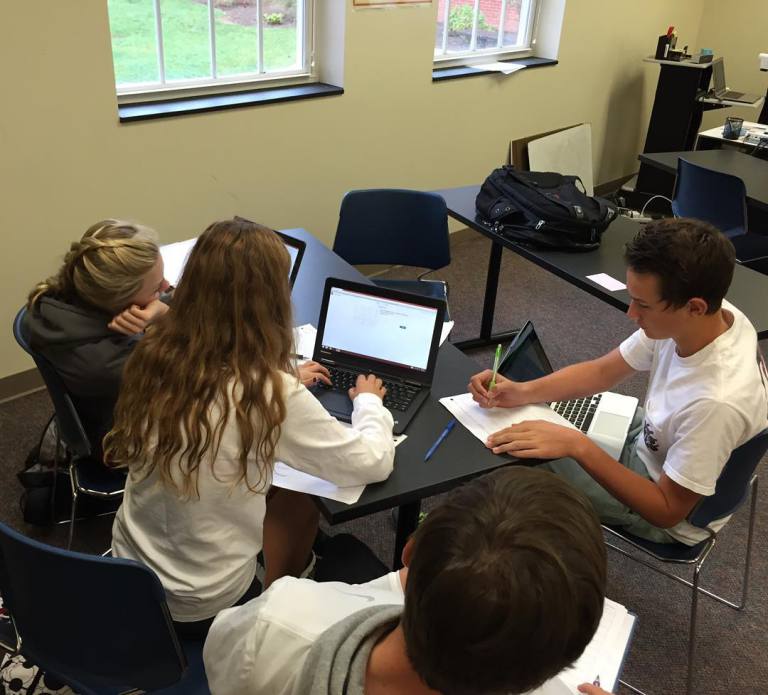
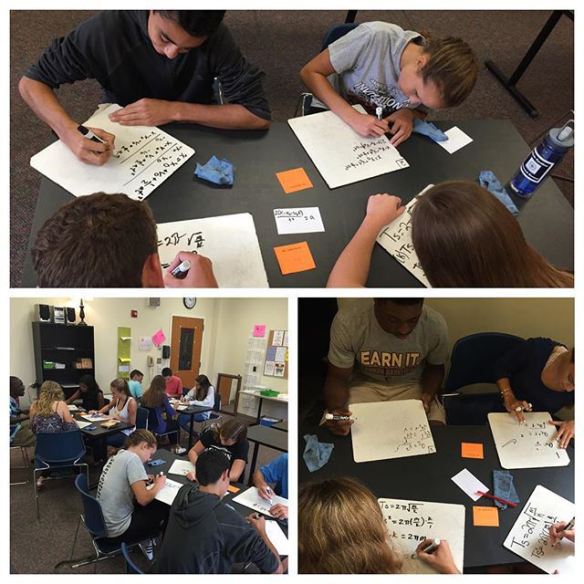
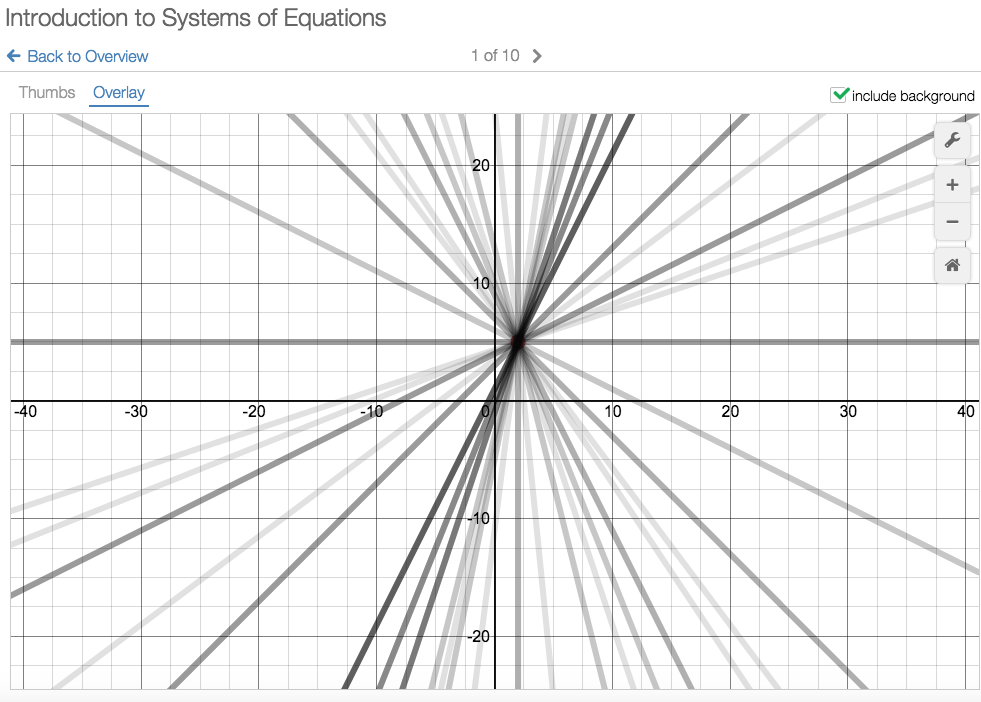
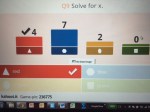
Screen Shot 2015-08-10 at 7.25.06 PM

You Have To Try Kahoot! For Engagement

Moving from middle school to high school this year was an enthusiasm culture shock. For example, in middle school, I had to use Popsicle sticks to limit student participation in class. Many middle school students wanted to answer every question, and I wanted everyone to have a chance to participate.  In high school, I had to use Popsicle sticks in order to encourage student participation. Silence can be deafening, especially at the beginning of the year and always on Mondays.

I do not prefer a silent classroom on a daily basis. I  also prefer that my students talk more than me. So, since my move to high school, I have been endlessly searching for activities that engaged everyone WHILE they were doing math. I tried games, stations, trasketball, speed dating, group work on big white boards, gallery walks, tinker toys, conic cards, Nearpod, Plickers, CANDY and just about anything else you can think of this year to get high school kids ENGAGED and EXCITED (about math work).  While they have liked many of my crazy activities this year, they did not love anything until Kahoot!

Playing Kahoot is the most fun I have had in my classroom in AGES.  Kahoot! is an online multiple choice game where students play against their classmates. I project the questions from my computer, and they select from four choices on their device. Students can use iPhones, iPads, or a computer. Students can also work together and share devices if they do not have enough individual devices. They do not see the question on their device, only the answer choice. As students answer a visual timer counts down and the number of students that have answered pop up on the overhead screen.  To increase the excitement, you can also chose to play KaHoots jeopardy sounding music.

Students get points for getting the correct answer, and even more points if they answer the question more quickly than their classmates. The top 5 students are listed on a “Leaderboard” after each question to keep the competition HOT.

The kids love playing Kahoot! They love playing it so much that I often have my students that aren’t even in the current period join my class during their study hall periods!  Students in class have tweeted and texted out the game code. I even noticed a kid playing through the glass window of my door one day.  Of course I took a picture.


Other than all of the fun for the kids, the best part for ME is that I NEVER HAVE TO MAKE MY OWN KAHOOT.  There are thousands of Kahoots! already made by excellent math teachers everywhere. This is KEY when you have a new planning or are simply overwhelmed. You just type in your topic and then can chose from dozens of premade Kahoots! on just about any topic, including Calculus!

The biggest downside to Kahoot is that the kids want to play it all of the time and beg me daily to play it.

Suggestions for fun and productive Kahooting:

  1. Don’t make your own Kahoot at first. In fact, I may never make my own. There are so many to borrow from!  Once you duplicate a Kahoot, it is easy to edit.
  2. When playing Kahoot, 6 – 10 questions is best. Some kids get discouraged and give up if they fall too behind in the scores. So, instead if playing one KaHoot game with 20 questions, play two 10 question Kahoots! You will have two winners and thus more opportunities to get everyone engaged.
  3. I use Kahoot! as a pretest, for a quick check of their understanding of terms. and as practice problems for more rote  or basic topics. The max time students have to answer a question is 120 seconds so KaHoot is not for problems that take a longer time to solve.
  4. Let them make up silly names. I play Kahoot! so they can have fun while doing math. And making up silly names is really a big part of this fun.


You can also embed YouTube videos into KaHoot. I videoed the kids one day and posted it to YouTube, then added it to their next KaHoot game. The next time we played, their video was what played while they were signing in. They loved it. 

Watch the action here. 

I have just learned about a Ghost Mode in KaHoot but haven’t had a chance to try it yet. Cathy Yeneka blogged about Ghost Mode. I can’t wait to try it in the fall!