Summer is here, and it is amazing. For the first time in my entire teaching career, I am not completely burned out at the end of the year. As expected, I am exhausted, but still enthused. In fact, I am excited to do the many educational related things I had labeled #summerlist on Twitter. I finally have the time to blog about all of the activities that I had taken pictures of all year. I’m anxious to restructure my lessons. I’m actually dreading “refiling the pile” of papers and lessons that I just couldn’t stay ahead of the last few months. But, I am looking forward to have a clean desk and a fresh start!
What’s the problem then? Summer! I am home with my children. I am their full-time activities director. We sleep in, play all day, they go to bed “late” and then I go to bed “early”. I actually have time to enjoy cooking. We do not have sports practice every night of the week so we can even sit down and eat dinner as a family. I get to spend time with the few friends that I was able to stay in touch with this year. Life is so good!
Each night during the school year I would work after I put my children to bed. Now, I’m hardly working! I’m trying to read my educational book studies, blog, organize “the pile”, and start unit organization for the fall. Instead, I usually end up going to bed blissfully early. I’ve realized that I may never catch up on book study. I have missed my family so much this year. I realize that I have missed all of the other things that I love doing. I have missed free time. I am excited to get started again for the fall. But summer has fogged up my focus. I just don’t have the time yet.
Today I spoke to the brand new education graduate students at Wake Forest University. These are individuals who received undergraduate degrees in other disciplines; math, science, english, history, and foreign language. Wake Forest offers a one year graduate program where you can earn your masters degree and teaching license. I went through it after doing a year of graduate mathematics and I loved it! It suited me better than straight mathematics and turned me on to this career that I am so passion about!
I was so excited to meet them but did not know what I wanted to share with them. There really is so much to tell young, excited, upcoming teachers! Dr. McCoy, my former teacher, mentor, and head of the program knows me well and (tried) to help me keep it brief. It was hard – I love to talk and haven’t taught in two weeks! They were a fabulous audience and laughed a lot at the end (mostly at me). I wish I could have stayed longer, shared more, and of course talked more! But mostly I wish I could have had time to answer their questions. I remember being just where they are and all of the questions I had! I just don’t remember now what those questions were.
What I told them:
Creativity is very important – you need to be creative as their teacher AND you need to have the students create. Students take ownership when they create. This helps them become invested in what they are learning!
Use technology – I talked about wiki pages and google docs.
Don’t be afraid to be different – as new students they are the ones with the fresh ideas. Older teachers may think their ideas are crazy but don’t let that stop them!
Use blogs and twitter – Reach out and find other passionate teachers online! There is so much out there! These teachers are supportive and LOVE to share their stuff! You can find me at @jreulbach on Twitter.
Sing songs! Everyone in advertising wants a catchy jingle for a reason! It works! Find ways to get the important things you really them to remember into their heads – FOREVER!
I shared the geometry books that my students made. I have learned more from this project than anything I did all year.
Don’t forget that the person doing the most work in a classroom is usually the one doing all of the learning. That person should not be you.
Good luck class of 2011-2012! I could tell what a dynamic group you were just by being in the room with you! I wish I could help you more! Feel free to ask me questions anytime!
I totally stole this from the amazing Sean (thanks Sean!). But, I could not resist! It is right up my teaching alley with all of the singing and dancing! I changed some of the words to suit the steps that I have my students use. We added motions too, like the CLAW (aka distributive property)! I was able to integrate with our dance teacher. She organized the students and cleaned up their steps. We even added a checkmark formation at the end! (Yes, that is what they are doing if you can’t tell. Checkmarks are hard to make!) Of course I made a video of their performance and then an iMovie to share. But, I did not get around to having my students Flash Mob this in the carpool line after school. There is always next year!
Man, I love my job.
Dance Steps to Solving Multi-Step Equations
First you clear your fractions, LCD and CLAW action!
Then you distribute and you do the CLAW scoot!
Then you simplify, put your hands up in the sky!
Then you combine like terms and you do the squirm.
Add and subtract, x-terms alone on one side, so take a step back and do a big slide.
Multiply and divide, the answer you will learn when you jump to the left and do a full turn.
I was not looking forward to teaching the geometry chapters to my students this year. These chapters are full of definitions and formulas. My own children are in first, third, and fourth grade. The homework that they bring home indicates that the kids have been seeing the same basic definitions and shapes from at least the first grade, and the same formulas from at least the fourth. This all equates to me teaching the same thing to the same kids, again. Can you say Snooze-Fest?
I considered doing a short geometry review and then just diving into fun geometry problems! However, I have students from several different elementary schools. I have learned this year that I have to be careful not to generalize and assume that all of the students have been taught (and will remember) all of this previously taught information. I did not want to skip over the basic definitions that they will need for our more advanced geometry problems if they have not seen them in the past (or they were actually snoozing).
My solution was to have the students create their very own Geometry Booklets. They made them from folding copy paper in half. Each night, I assigned my students sections of their textbook to extract and copy down definitions and illustrations. What they needed to find each night was easy as all of the important definitions and terminology are either hi-lighted yellow or outlined in green boxes. I encouraged (but did not require) them to be creative and colorful at night! It told them that it was THEIR book!
The next day class we played games and did activities using the information that they scribed the night before. They were able to reference their booklets for these games and activities. To motivate them to get all of the required information into their booklets, I let them use the booklets on geometry unit quizzes and tests.
I felt that this was similar to “flipping” the class because they gathered the information from their textbooks at home and then worked on problems in class. Most of my students liked it because they got to be creative with their booklets and they felt like they were “getting out of” math homework. And, they LOVED using these booklets for tests and quizzes.
For the big geometry unit test I let them use their booklets. The test covered two chapters of geometry. Overall, my students scored higher on this assessment than they had scored on any other major assessment all year (and I usually only test on one chapter at a time). But, what amazed me, and them, the most is that many of the students didn’t really need to use their geometry booklets during the test. By writing it down each night, and then going over it each day, they had already processed the information.
To create the covers for their booklets, we integrated with Art and Gardening. Students studied cubism in art and then visited their garden to pick a subject for their covers. Their covers had to be modeled after cubism and include four different geometric shapes. In art they sketched their garden subject using geometric shapes. They then used a wide array of materials of various textures and colors to finish their covers. Our Art teacher did a fabulous job with this and their covers turned out beautifully!
To showcase their work, I made a slideshow of their books to the tune of “The Nonagon” by TMBG. We all really love that song! I included the cover and one page on the inside of each book. I collected their booklets and will return them to the students to use next year during the geometry unit. I may even have them add on to the books.
This week I threw Dan Meyer’s Graphing Stories opportunity at my 6th graders. It is not for a grade, I am not giving (much) class time to work on it. However, I have rarely seen them work so hard. And, I have never seen students care so much about something related to math that isn’t even graded! What’s the secret – CREATIVITY!
I showed them some of Dan’s original Graphing Story videos for illustration. I showed them my 7th graders videos for inspiration. And then I let them go. They worked over the weekend, at night, and during down time at school to come up with ideas and produce their videos. They are asking other students to be in their videos, they are helping each other film, and they are measuring heights like crazy.
They are asking me fabulous math questions:
“How can I get the height of myself when I am on the amphitheater stairs?”
“Can I use the elevation of just one foot?”
” Can I slow down a part of my video to stretch it out so it will be 15 seconds but I will be moving in slow-motion?”
They are doing extra math:
“I am 76 inches but need to use feet. Wait, I remember how to do that!”
“If each step is 14 inches high and there are 6 steps, that is 84 inches. But, that can’t be high enough. Oh yeah, I need to add MY height to the 84 inches.”
But mostly, they are working like crazy – and begging to do it! That is saying a lot for 12 year olds in the last ten days of school!
Now for the hard part – I need to develop “creative math” that teaches my entire math curriculum. After seeing them light-up and work so hard on the creative pieces I have assigned throughout the year, I am no longer happy with “regular” instruction, no matter how fun or “investigative” I have made it. I want them to learn through creating. I want them to have to search for answers to finish their creations. I love to see them thinking so hard. I love to see such active and excited learning.
If you have any great creative curriculum pieces I would love to see them. I want more!
I absolutely loved Dan Meyers Graphing Stories! I rounded them all up into a single Powerpoint presentation, and watched them with my 7th grade class last fall. All I forgot was popcorn (…next year)!
After the viewing, I told them that they were all going to get to make their own Graphing Stories. I put them into groups of four, and then assigned each group a graph characteristic, either vertical, horizontal, increasing, or decreasing. (About fifty percent of their graphing story needed to be their “assigned” characteristic.)
After the groups brainstormed and planned, we hit the outdoors to film! We filmed their 15 second stories around our beautiful campus with my iPhone. I uploaded their videos to YouTube and then they went to work! It was the beginning of the year, and they were all new students to me thus I had just introduced them to Google Spreadsheets.
Graphing Story Requirements:
The presentation must be done on Google Presentations (so that the four group members could easily share and work at the same time).
Fifty percent of the graph needed to be the assigned graph (vertical, horizontal, increasing, or decreasing).
Use Google Spreadsheets to create the “answer” graph.
Create a “blank” graph with label axis so that students could label their graphs.
Create an activity sheet with a blank graph and summary questions.
They worked so hard – and this was a very difficult project for them because they were new at Google Spreadsheets and had never used Google Presentation before. It took them longer than I had anticipated. The end results were beautiful and creative. Some of the graphs were not as “exact” as they could have been, some bumps were left out. But, I was so proud of them that I did not even take off that many points for the errors. I have included links to their movies below.
I can’t wait to watch all of the new graphing stories that Dan pumps out next year with my rising 7th grade. I think it will be fun for kids to watch them as homework, and then present their favorites the next day. I know it will be fun for them to watch their class mates as well!
I taught the Pythagorean Theorem to my 7th graders earlier in the year using a variety of methods. I wanted them to not only see but experience and even touch the theorem. However, the activities did not go as well as planned. As easy as it seemed to show them how this beautiful theorem worked, it was much harder in practice. Middle school students are very visual. And, unless instructions are explicitly clear, they can easily veer off course. This is not their fault, and in fact is one of the most endearing things about middle school students. They are really just so excited about learning that they often dive right in and usually leap before they look!
When I tried to do this activity with my 7th grade instructions went awry, and my students were confused instead of enlightened. So, I learned from my mistakes, and decided to try again with 6th grade. But this time, I created a visually precise Powerpoint presentation for the 6th graders to follow. I let them draw, color, cut, and glue. They were engaged, they were able to follow along, and they understood! This activity gave me multitudes of the infamous “light bulb” gasps that I crave! Since I did this activity, I just remind them of the area of the squares when they incorrectly make the hypotenuse a leg length, and they get it.
Required Materials: Centimeter graph paper and scissors. I cut the graph paper in half (hamburger) to conserve paper.
Suggested: Colored pencils or markers and a glue stick*.
The night before the activity have them read about the Pythagorean Theorem in their book. Have them write down the definition, the diagram, and the formula in their notes. In class the next day, have one student read the definition from their book. Ask them what they think about it. When they say, “What in the world does that mean?” and “That sounds like Chinese!”, tell them, “No, it’s GREEK!” and then start the Powerpoint. Color and cut with them, then sit back and bask in the “light bulb” gasps!
One of my primary goals this year has been to develop easily accessible resources for students to get additional help outside of the classroom. Students, parents, and tutors ask me for extra material for the students to work on. Additionally, sometimes students are at home and stuck on a problem, need help with an entire concept or lesson, or miss a few days of school and need to catch up. I wanted to be able to point students (and parents and tutors) to an interactive “re-teaching” resource that they could benefit from. As a bonus, it would be nice if these “re-teaching” resources varied from my original instruction, were interesting, or even fun!
I started this project solo. But, there are many, many concepts in the two classes that I teach. Also, I did not feel that I was finding enough of a variety of resources. So, I decided to enlist student help.
I created a project for my 7th grade pre-algebra students called “Concept Help Pages”. I assigned each student three
concepts. I picked the three concepts for each student from their lowest personal concept scores. For each concept, students had to create a wiki page on our class wiki and fill it up with four different types of resources.
Online video explaining their concept
Online worked out practice problems that illustrated each step and had the answers.
Online “interactive” problems for students to work and get immediate feedback
Online game
Part of the requirements were that the videos and games had to be interesting and fun. They needed to view the videos and play the games. I wanted the pages to be visually appealing as well so I offered a small amount of bonus points for including a picture or illustration that directly related to their concept. I also had the students do “Peer Reviews” of each other’s pages to check the links, play the games, and give suggestions on how to make each others pages better.
This is a work in progress. I plan on having other classes add to the help pages in the future. As a project for 6th grade, I am going to assign them each one of the wiki help pages for them to explore. I will then see if they feel that they can find additional (and maybe even better) resources to include on each page. In this way, I hope to make the pages very rich in helpful resources.
Going forward, I would like to use these pages during after school help sessions, especially when I have multiple students that need help on several different concepts. When this happens after school I am usually scrambling to help everyone. I make up several problems for several students and then try to work with them all individually (at the same time). The students are rarely at the same level. Usually, everyone ends up waiting on me while I work with one student. If all students could pull up the online interactive problems on the concept that they need to work on, they wouldn’t have to wait for me to make up a problem for them OR check to see if their answer is correct. I would have more time to walk them through the problems and help them when they got “stuck”. This would enable me spend after school help time circulating between students, helping each student with exactly what they needed help on, instead of spending time making up problems and giving out answers.
You’ve got to love ANY game that gets kids JUMPING for math! This game does just that! I got the idea from Kate’s blog. I am a floating teacher, so taping the answers on the board wasn’t practical for me. Instead, I created a Powerpoint presentation that can move from class to class with me.
How it works:
First, split the students into two teams and arm them with flyswatters. I taped a line on the floor that they had to stan
d behind. Then, I put up a powerpoint slide that contains definitions in boxes. A question pops up at the top of the slide and the first person to “swat” it wins! In the case of a tie, the swatter on the bottom wins! This game can move FAST, so I added a pop-up yellow box to indicate the answer after they swat. This way it is quick. They love seeing the yellow box pop-up! You could also put answers to questions in the boxes and put the question at the top. At the end, I did a “Speed Round” where the answers in the boxes were short so kids could read them quick. The Speed Round was a blast!
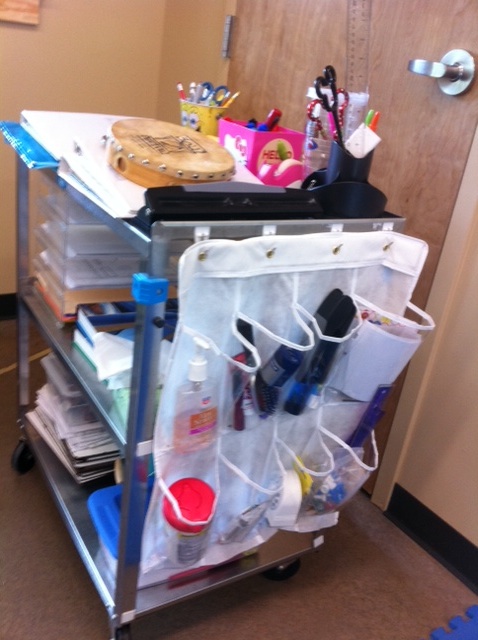
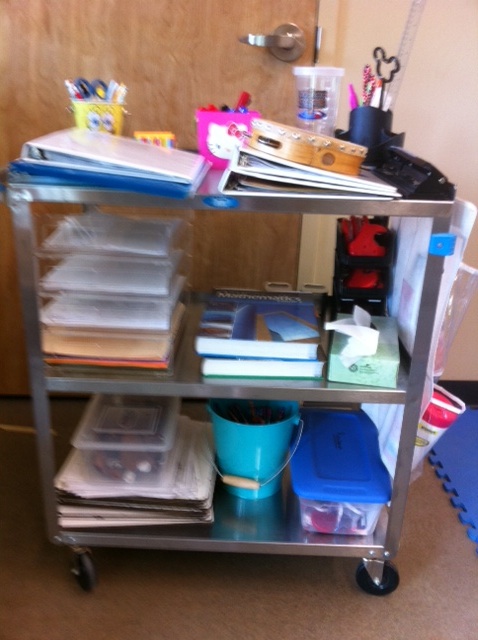
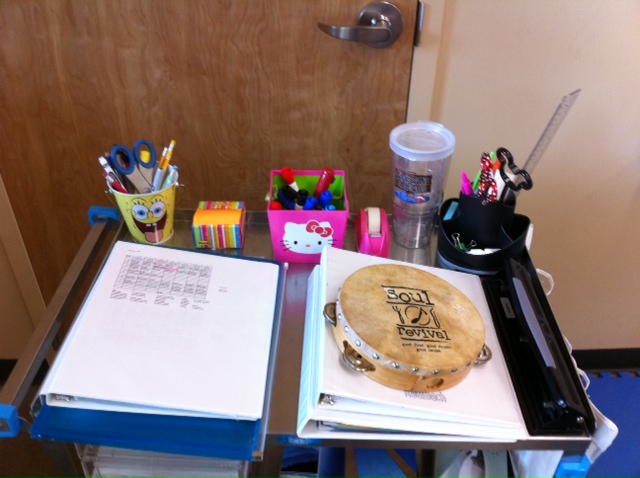
Yes, I am a “mobile” teacher, roving the campus on a cart. Even though I am usually in one of two classroom, I can go between four classrooms and the Lodge! Here are pictures of my mobile (rolling) office. THIS is how I “roll”!
I used half of a shoe organizer on the end for extra supplies.