MATHO Review Game – Powerpoint Template

MATHO is a version of Bingo.  It is great for review.  Students work problems and then if they get the problem correct they get to mark off a number on their MATHO board.  First person to get five in a row wins!

I used to play this game all of the time, but had forgotten about it.  When I brought it back, I used technology to make it better!  I put the MATHO board (word document) into a page protector with dry erase makers, and a Powerpoint to make it very easy for me to implement in the classroom.

Procedure:

  1. Pass out MATHO sheets inside page protectors and dry erase markers.
  2. Students pick any one space to be a FREE space.
  3. Students randomly number the remaining blocks 1 – 24.

I put up a problem and students work out the answer on their whiteboards, then show it to me.  If they get the answer correct, they get to mark off the number I call out on their MATHO boards.

For instance:  After the first problem, I call out the number 14.  If they get the problem right then they can mark off 14 on their boards.  I mark off each number on the mini-Matho board in the bottom corner to keep track of the numbers I have called.  This also helps check to see if their numbers are accurate when they call out MATHO.

As usual, about 1/2 way through the class a student calls out MATHO! and gets a prize from the prize pail.  At this time, I have all students erase their entire boards, renumber, and then we start all over.  Before I used the “erasable” MATHO board I would just keep going and say, “next one to get 5 in a row” or “first one to get the whole board” to keep them going.  But, erasing and re-writing the board so you can start all over prevents 6 students from getting MATHO again in 5 minutes at the same time.

Files for MATHO Game:

http://www.box.net/shared/y4n217vfq1

I am new to Box, so if the link doesn’t work please let me know.

http://www.box.net//static/flash/box_explorer.swf?widget_hash=y4n217vfq1&v=0&cl=0&s=0

Factoring with X-Puzzles and Boxes

Factoring is an important concept in Algebra I, and often a difficult one. My pre-algebra class flew through polynomial multiplication, so I decided to give them some exposure to factoring.  I was going for exposure more than mastery just so they could have some factoring experience going into Algebra.  As my students are young and just beginning to develop abstract thinking, I decided to try more concrete/ visual methods for factoring.

Naturally I though of my fabulous Algebra teacher friend who gave me the Math Hunt idea. She swears by factoring with “the box”, especially with students who tend to struggle more.  Even though I had never factored using the box, multiplying polynomials with the box was a big hit so I decided to look into it and give it a go!

The GCF
We started with the GFC, how to find it and un-distributing (or de-clawing) it from Polynomials.  I made a graphic organizer relating what they knew with what they were learning. I gave them a slew of homework and they SLAYED it.  Looking back, I should have also put GCF problems using the box too. It would have helped a few of my strugglers in the coming days.

X Puzzles
Riding on the good GCF vibes I found a great x puzzle worksheet (more commonly known as diamond puzzles) that I gave to my students.  I really, really love the Internet!   Some of these puzzles were HARD.  But since they were puzzles they LOVED them. Go figure.

Putting It All Together
I then showed them what came to be know in our classroom as “x-box” factoring.  Since they were very familiar with polynomial multiplication with the boxes, showing them factoring was almost effortless. Puzzle + boxes = factoring.  I had them do a few in their notes so that they would have examples to go by for homework, and then I pulled out a dry-erase template that I made.  I printed out the templates and they put them in page protectors.  They love anything that they get to do with dry-erase markers (and I will do anything to make factoring less painful) so it was win-win!
http://www.box.net/embed/ped744bvi3nvv5h.swf

Just because it went very smoothly for them during practice does not mean that they would remember it.  So, after several practice problems I had them write down their own steps to x-box factoring.

After somewhat of a rocky start, writing their own steps went REALLY well.  This showed me that I definitely need to have them do more of their own step writing in the future.  They came up with some great (and very detailed) steps!  We combined their steps as a class to come up with a condensed list.  Here is a pic I took of their first few steps.

The best thing about the x-box factoring is that we stared with the “hard” problems first.  Only a few days later did I show them the simple method for factoring trinomials with a leading coefficient of one.  Some kids took to it, but most stuck with the x-box.  I did not do as many games as I should have this unit.  I was too focused on making sure that each student could get the factoring down.  I will definitely because (too late) I noticed waning attention on the last day we practiced.  A game would have definitely livened things up!  I haven’t begun to look for games for this unit next year but @merryfwilliams shared one that she tried called Algebra Connect.

More diamond puzzles, worksheets, and activities for factoring can be found here.  Happy Factoring!

Resource Sites I Love

I’m new to both subjects that I teach this year so it’s “new lesson time” every night at my house – times two.  I love searching the internet for interesting activities so that the lessons will be fun to teach (oh, and interesting for the kids too).  I rely heavily on my Diigo and the Math Teacher Wiki, but tonight, @fouss and @druinok reminded me of a great resource site that I keep forgetting about!  I Love Math.org

I Love Math

I Love Math is a great site because teachers can upload their own files and links to share.  These are usually Word, Excel, or Powerpoint documents.  Anyone can join, and it is free to upload and download files.  There are only 25 middle school documents on there, but there are 144 documents for Algebra!

I haven’t made an official file cabinet yet like so many other great bloggers out there.  But, even though I have bookmarked the I Love Math site three separate times in Diigo, I keep forgetting about it.  I wanted to blog about this site so my overworked, overtaxed brain will remember to come back to it again!
If you have any wonderful resource sites that you love, please share the link in the comments.

Amazing Algebra Tiles

Not like I’m opinionated or anything, but if you are teaching students younger students (or struggling students) algebra and you are not using Algebra Tiles, then you are missing the boat!  Not that I can be too judgmental, I had them on my shelf and missed fabulous opportunities to use them all year.

I bought them solely for multiplying polynomials with my 7th graders.  I only bought a few sets because I didn’t want to waste too much money if we all hated them.  I have taught older students Algebra (Pre-Algebra, Algebra IA, Algebra IB, Alg II for seniors) many times in the past and never used them.  With those classes the kids had seen Algebra before, sometimes many times, and I didn’t think it would benefit them very much.  The tiles seem very elementary, not to mention a lot of trouble, and I was afraid it would be, “too little, too late”.  So yeah, I was WRONG again.

I pretty much bought them for one purpose.  I wanted to show 7th graders who had never multiplied x by x to SEE the difference between

x + x = 2x     and    x times x = x^2.

Plus, they are young (12-13) and thus more concrete thinkers so I felt it was a good tool to use for this age group.  I wanted to explore taking them from the concrete to the abstract with Algebra Tiles.  I was skeptical but hopeful.  I’ll try anything once!

However, once I pulled these things out though there was no stopping us!  For the first time ever, my students did not mix up 2x and x^2.  W-O-W.  If you’ve taught Algebra before, you know that is big.  My students knew not only what it meant, but what it looked like.  They knew why the 2x and x^2 were different.  They did not ask me a gazillion times if it was 2x or x^2.  And if they did, all I had to do was pull out three tiles and viola – instant understanding.  I mean, HELLO – Look at them!  They look nothing alike!  You cannot ask for a better explanation than that!

One thing that I discovered that really helped my students is how you can represent negatives with the tiles.   This was wonderfully helpful with multiplying a negative through a polynomial.  My kids always stumble over that or even “forget” it.  However, since we have been doing the tiles they can see what they are doing and are no longer forgetting it.  Bonus!

I bought them to teach polynomials to 7th grade, but once I got them out, I have not put them away!  The tiles put ACTION with the MATH.  More great uses for the tiles:

  1. Illustrating the distributive property.  As fun as “The Claw” is, seeing is really believing for my students.
    3(x + 2) is just THREE sets of x and three 2’s.   (Ahhh,… so THAT’s what we’ve been doing all year.)
  2. Negative Operations – The opposite of a positive number is it’s negative.  For the tiles, to get the negative (or opposite), we flipped the tile over to the other side.  (one side is yellow – positive, the other is red – negative).  This can even illustrate basic concepts, like – (-4).  What is the opposite of  -4?  Flip it over and see!
  3. Multiplying a negative + distributive property.  – (x – 3)  or  -2(x – 4).  When you see   – (x – 3) you are taking the opposite of (flipping) everything inside of the parenthesis.
  4. Equation solving – I draw a line down the center of the paper and use the algebra tiles to solve equations.  When kids tried to subtract 4 from 6x, I would take out 6 x-tiles and 4 constant tiles and say, “Now, how can I combine these?”  The answer, “Oh you can’t, they aren’t like terms.”
  5. Equation solving – divide by a number.    3x = 6.  Three x’s = 6, so one x must be 2.  Then, I would split the x’s and line up the constants on the other side, dividing the x’s.
  6. Equation solving – FRACTIONS.    x/2 = 3 .  If HALF of an x = 3, then what does an entire x equal?
  7. Multi-step equation solving – This was especially helpful when I was teaching multi-step equations.  With tons of tiles spread out all over the paper, the students could easily SEE that of course I needed to combine like terms before trying to get x alone on one side!

(I used Hands On Equations at the beginning of the year, but I think that the Algebra Tiles beat them “hands” down.  They are just more intuitive, especially when it comes to the negatives.)

Of course I still do my crazy songs, dances and rhymes so that math will be stuck in their brains – FOREVER.  (And yeah, I just LOVE to sing and dance!)  But, I think that it is important for every student to know what they are doing, and not to just be  following random steps!   So, one day in the future, when they can’t get our annoying equation song out of their head, maybe they will also recall the Algebra Tiles, and remember WHY x times x = x^2 and NOT 2x.

Links:

Algebra Tiles Video

Interactive Online Algebra Tiles

Math Hunt – Time for Targeted Help

Do not delay, try this activity NOW.

Whenever I discover an activity that lets all students in my class work at their own level while I get to assist students that need extra attention I have to share it.  I know that many other teachers are already using this activity, but for those who have not yet discovered it, I must insist that you try it now.

A great friend of mine who is an amazing teacher uses this game regularly in public school with classes of 35 students, and it works for her.  She has been telling me about the virtues of this activity for two years (thanks Les!), but it always seemed like too much work so I didn’t try it.  I was wrong.  It is not much work at all.  It is very easy to plan, and the kids love it.  But, best of all, it is an activity where every student in your class will be challenged at their level.

 Procedure:

  1. Make up at least 16 math problems.  (I would do more if I had a larger class.)  Make them progressively harder.  Make the first few very easy and make the last few really tough!
  2. Print these 16 problems on one sheet of paper.
  3. Fold the paper in half.  The question is on the outside.  Write the answer on the inside so it is not visible.
  4. Assign each paper a number from 1 – 16, marked very visibly on the front.
  5. Place (tape/tack) these problems all around the room, but not in order.  This is where the “Hunt” comes in.  They have to find where the next problem is.
  6. Assign students a “start number” based on their ability level.  Struggling students would be assigned #1, advanced students #8.  I usually assign two or three students to each number to start.
  7. Students will go in order.  If they start with #5, the next problem they work with be #6.
  8. Students travel at their own pace – they do not have to wait on the other students that were assigned their number to finish the same problem.
  9. Have the students write down the question and all work on their own papers.  Once they are finished with a problem, they can check the answer.  If they miss it, they have to RE-work the problem.  If they can’t figure it out, they can call you over to help them out.
  10. Be sure to tell them that they will probably NOT finish all of the problems in a class.
  11. Some students WILL finish all of the problems.  When they come to you to tell you they are done, you can them make them “additional helpers”.  They walk around the class assisting students who need help using the work on their papers.  I do not tell students this in advance, as I don’t want them “racing” to get finished so that they can be a helper.

 Additional thoughts:

  • I taped beginning problems to the tables so that I could have room to sit with struggling students and help them.
  • I didn’t want to waste 16 sheets of paper so I printed out 16 problems on one sheet, cut the problems out, and then glued the problems to the outside of recycled paper.
  • Next time I am not going to make the easy problems #1.  I am going to make the easier problems start at #8 and then go from there.  (So the hardest problem would be #7).
  • I let students help each other as long as they are not just telling each other the answer.

You don’t have to make the last problems really hard, especially if you have a large class and aren’t going to have the time to help out your advanced students too.  Don’t feel bad about this.  When they “fly” through your problems, they get to help teach their peers.  And, we all know how much more we learn when we are teaching something.  Everyone still wins!  J

I did this activity so that I could work individually with struggling students and so that advanced students would get a chance to work on really challenging problems.   A fabulous side benefit of this activity was that my advanced students needed my help too!  These are students who usually “get everything” the first time and rarely need my help.  I was thrilled to get to work one on one with them as well.

I talked Elissa into doing this game today.  I really hope that it went well for her.  I am sure that she will make it better AND color coordinated.  I am hoping that she will blog about it as well because I am looking forward to stealing some ideas from her (hint, hint Elissa).

Suggestions Welcome!

Some of my students wanted a “prize” at the end for finishing.  I didn’t want to do this because not all students would finish and I did not want them to feel bad about that.  Plus, I didn’t want them to rush to finish (and feel like they just needed to get the right answer).  I wanted them to focus on the “process”.  But, there is usually something at the end of a scavenger hunt…

Equation of a Line Song

Today we recorded the two songs that we have been singing lately.  I made up a slope-intercept song that is sung to the tune of YMCA.  We also did  Sweeney’s “Dance Steps to Solving an Equation”.

For the occasion, I was lucky enough to find a really fun Slope-Intercept form t-shirt.  I even had a pair of primary colored “chalkboard” Converse hi-tops that actually matched my shirt.  Yessss, I was in total “math teacher” mode and loving every minute of it.

I decided to try my hand at iMovie tonight.  It was great fun!  I started the movie with a picture of my students.  The YMCA intro music is rather long so I decided to included the pictures of their finished “Slope Man” projects.  Then, comes all of the action!  Their “Equation of a Line” song and dance!

I will post our version of “Dance Steps to Solving An Equation of a Line” soon!

The Equation of a Line song is sung to the tune of YMCA.  The words are below, watch the movie for the motions.

Y = Mx + B,

Equation of a line!

Y = Mx + B

Puff, puff positive,

Nice negative,

Zero slope

And undefined!

Calling All Math Teachers – Help with “Math’s Greatest Hits” List

What are the 20 most important topics in each math class you teach that you would like for your students to remember for next year?

Please put your top 20 (or even top one or two) in the comments section below so we can build a working list!

Every since I read “What is the point?” in one of Elissa’s posts I cannot stop thinking about how to help our students retain the most important mathematical knowledge that we are teaching them.

As math teachers we spend hours coming up with (hopefully) fun and engaging lessons.  We want our students to discover and then understand the many math topics that we present to them.  We feel successful when our students have the “ah-ha” moments in class and when we can tell that they really understand the concepts.  High scores on end of unit assessments lull us into security that our students have really learned the material.  Fast forward two months (or even two weeks in some cases), bring up the topic again, and your students have no idea what you are talking about.  As seasoned math teachers, we know this will happen.  It is why we “review” topics constantly.  It is why we often do an official review of past material before teaching a new unit that is dependent on past knowledge.  But it is still so frustrating!   It is when we feel the least successful as math teachers.  It is when we have the “What is the point?” moments that Elissa described.  How could they have learned this material so well, and then forgotten it so completely?  What happened?

First of all, you cannot blame the students.  They are working hard and they do learn the information. However, think of how much they are learning each and everyday.  Also, remember back to your school days and recall the learn and dump method, where you would cram all of the information that you could into your head and then purge your memory right after the test to start preparing for the next test in yet another subject.  Honestly, think of all of the stuff that you have forgotten – even in your own subject area.

It is not the teacher’s fault either.  We work hard so that our students will learn the material.  We make up engaging activities and discovery lessons so they will actually understand what they are doing.  And, we make up mnemonics and even songs to help them retain this knowledge past the test day.  They are learning.  However, we have to realize that they will not remember everything that we teach.

I want to improve this.   Since I know that it is difficult for students to remember everything, I want for them to come away from my class understanding and actually remembering the most basic and important facts from my math class to carry with them to the next year.  These are the facts that are crucial to remember for the next mathematics level.  These are facts that are the most important to remember.   And, even if they can’t remember all of these facts, I would love to give them a tool to help them remember these facts.  I also want them to have easy access to this information so they can go, “Oh yeah, I remember that!” before the next teacher has to teach it – again.

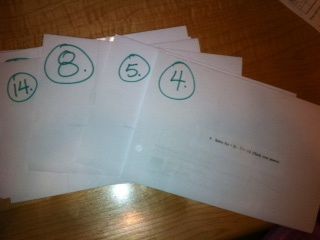
The tool that I would like to design could be a  “Math’s Greatest Hits” list for the year.  I would like to compile the “Math’s Greatest Hits” list slowly over the year, adding to the list each time we come to a crucial concept.  Ideally, I would like to keep this under 20 “math facts” so the students can keep it all on one page.  I want the students to realize the importance of this list of facts and to have easy and constant access to this list all year long.  Ideally, I would like for the students to even carry their list with them to their next math class.

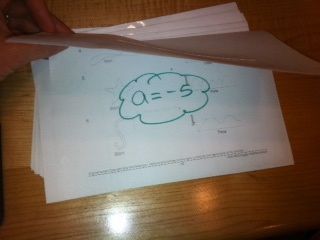
My first thought was to expand upon the index card flip charts that we currently make, but add a twist. For instance, we could use colored index cards instead of white cards just for the “Maths Greatest Hits”.  However, some of their earlier flip charts are already lookin pretty ratty.  The list needs to be in a page protector to keep it durable and to make it seem more “important”.  But then students would have to take the list out of the page protector to flip the index cards.  I am afraid that to many students this will not qualify as “easy access”, but will fall in the “too much trouble” category and thus will not be used.  So sadly I have realized that the index card method probably isn’t the most effective.

What may be best is one sheet of colored card stock for each student.  I can print lines on the paper to divide each side into 8 or 10 sections.  This will create room for 18 – 20 “Math Facts”.  It would be in a page protector and students could pull it out to add to it, and have it handy for math lessons and homework.

I am not married to this idea, it is just the best one that I could come up with!  I would love any and all suggestions.  I want to create this list in the next couple of weeks.

Please comment to

  1. Give ideas on how you would design the “Math’s Greatest Hits” list
  2. Give the top “Math Facts” for your subject.

When I have time (hopefully before summer), I will compile all of these facts by subject and re-post.

Equation of a Line Song!

I used the Y in the song YMCA to help my students remember that the y-axis was vertical.  So, what could be the next step except for a song and dance about the equation of a line using the YMCA!  My students really enjoyed singing about fractions, so I wanted to sing and even dance this time!  I know that I am not breaking any new ground here, but my students are fabulous so I wanted to share our version!  We just learned it today so it’s a little rough, but I rarely have both 6th grades together for class so I had to video them today.

I downloaded a karaoke version of the YMCA from iTunes for accompaniment.  We only sang our song to the chorus of the YMCA so luckily, I found a version that started with the chorus!  Of course when we went outside to practice (and video) I couldn’t get the music to play.  But, we’ll do this again for sure!

Equation of a Line Song
(Sung to the chorus of YMCA)
Edited to add a new verse, 2014

y = mx + b, Equation of a line!
y = mx + b…
Puff, puff positive. Nice negative,
0 slope, And undefined

y = mx + b,  Equation of a line!
y = mx + b…
Begin at the B.  Rise and then run.
Connect the points, to graph the line!

That’s all!  Enjoy!  🙂

Ski Slopes – Day 5

Day 5 – Slope

I always use the ski analogy to teach students slope.  This year, I added some Powerpoint visuals and a very fun Teacher Tube video to spice up my lesson.  There are two things that I focus on when teaching slope:

  1. Read a graph from left to right, just like you read a book.
  2. When you think slopes, think about skiing!

I picked where I left off in the previous lesson, and had a “reminder” discussion about M. The students got out their graphing worksheets to review.  We talked again about how M determined the steepness of the line and which direction the line went.  I told them that M was a pretty pathetic name, and that we needed to come up with a better name for M.  As a 6th grade teacher, at this point I had kids yell out crazy random names.  BUT, I told them that we would have to give M not only an interesting name, but also a descriptive name so that M would not easily be forgotten.

Since I’m a Powerpoint fan now, I made a Powerpoint full of ski slopes and put a big ski slope on the screen just as I finished this talk.  Instantly, many kids said, “Slope!” like they had discovered it all by themselves.  Some kids were disappointed that we decided not to use their more creative names, but most students were very happy with good old “Slope”.

I then presented them with animated skiers going up, down, and off of the sides of mountains!  I love using Powerpoint, as I can make it much more fun than my usual little stick guy falling off an undefined slope drawn on the whiteboard.  It was great for a laugh as usual.  Next year I need to add more positive and negative slopes with the corresponding equations.  While most students did get the connection between the graph of a negative slope and -M in the equation, I need to be more explicit to increase comprehension for all of my students.  I believe that adding the equation to each slide will fill in this gap.

After my slope lesson I introduced my students to my best slope discovery of all  – a fantastic “Slope Dude” video that I found on Teacher Tube.  It is cheesy and fun – just up my math video alley.  The kids LOVED it.  It is actually so catchy that I now say, “Puff, puff positive” and “Nice negative” every day.  It also defined the word “undefined” a “cuss word” in mathematics, which really entertained my 6th graders (hopefully enough so that they will actually remember it long term)!

I really love the online PLN!  Thanks Slope Dude!  : )

y=Mx+B Discovery Lesson using an Online Graphing Calculator – Day 4

Day 4 – An Introduction to Slope and y-intercept

What does y = Mx + B mean?  I didn’t want my students to just memorize what M and B meant, I wanted them to understand it.  So, instead of just telling (or showing) them what M and B stood for, this year I let them discover it for themselves!  And since seeing is believing, I decided to use an online graphing calculator.

First, I taught them how to use a basic graphing calculator that I found online.  Then, they graphed a series of graphs on the online calculator.   I had them answer questions for each graph on a Discovering M and B worksheet.  I had shown them the equation y=Mx+B the day before.  I did this very briefly, just to show them how to pick out the M and the B from an equation.  I did not tell them what M and B meant.

After graphing a series of graphs, they had to answer questions at the bottom of their worksheet.  Side one focused on slope, and side two focused on the y-intercept.  I taught this lesson two classes in a row.  In the first class, I had never used this lesson before and wasn’t sure how easy it would be since they had not used the online graphing calculator before.  Plus,  I was being observed so I was a little nervous.  However, I realized in the first class that my students were trying to “zip” through the questions in order to get to the other side.  They weren’t thinking enough about the questions.  And, when I told them that their answers weren’t correct, they wanted me to tell them the answer right away without further thought.  So, in the next class, I decided to try to get the students to really focus on the questions at the bottom of each page by making it kind of a “challenge”.

** Note:  As the teacher, you MUST make your students focus on the questions at the bottom of each page.  Do NOT give them the answers until they try to figure it out themselves.  This is the key to this entire lesson. **

I told the students that in order to answer the questions,  they would have to look through their worksheet to try to figure out the pattern.  To make it more dramatic, I called the pattern a “puzzle” and made a huge deal about “figuring out” what B meant.  I was tough on them, looking for great descriptions for slope and insisting on an accurate description for B.  I told kids when they were close!  But, I wouldn’t say, “You GOT it!” until I saw the word intersection.  A few kids got it early, and after my, “Yes!!” I put my finger to my lips in a shhhh, don’t tell the secret!  It drove the other kids crazy!  I told them, I am looking for one special word!  After a few failed attempts, some students were even googling, “linear equations and B” to try to find out what word I was looking for!  It was so much fun for me, and you could feel the excitement in the room!

All of my students were able to figure out that M indicated the steepness of the line and which way the line went (positive or negative).  Most of them were also able to figure out that B was the point where the line intersected the y-axis.  Quite a few of them even came up with the word intersection.  It was a great day!  Worksheet included.

Discovering M and B